

It is a dark and windy Sunday afternoon. Sitting in the glow of two 27″ monitors, I click and type away on a new board layout for one of the many projects I have underway.
Suddenly, darkness. Monitors go black, room is pitch dark. There goes the power again.

If you’re like me, you use workstation laptops instead of desktops, so you never lose your work during an outage. If you’re also like me, you lose power every time the wind blows.
Lousy power infrastructure aside, there are several ways to deal with unreliable utility locally. By far, the least expensive and most expedient solution is to hook your critical appliances up to an uninterruptable power supply (UPS).

A quality UPS provides several benefits in addition to offline AC power. A UPS can also:
- Suppress surges from incoming line power
- Filter high frequency noise to/from attached devices
- Correct for high or low line voltage
- Automatically back up data and shut down attached loads
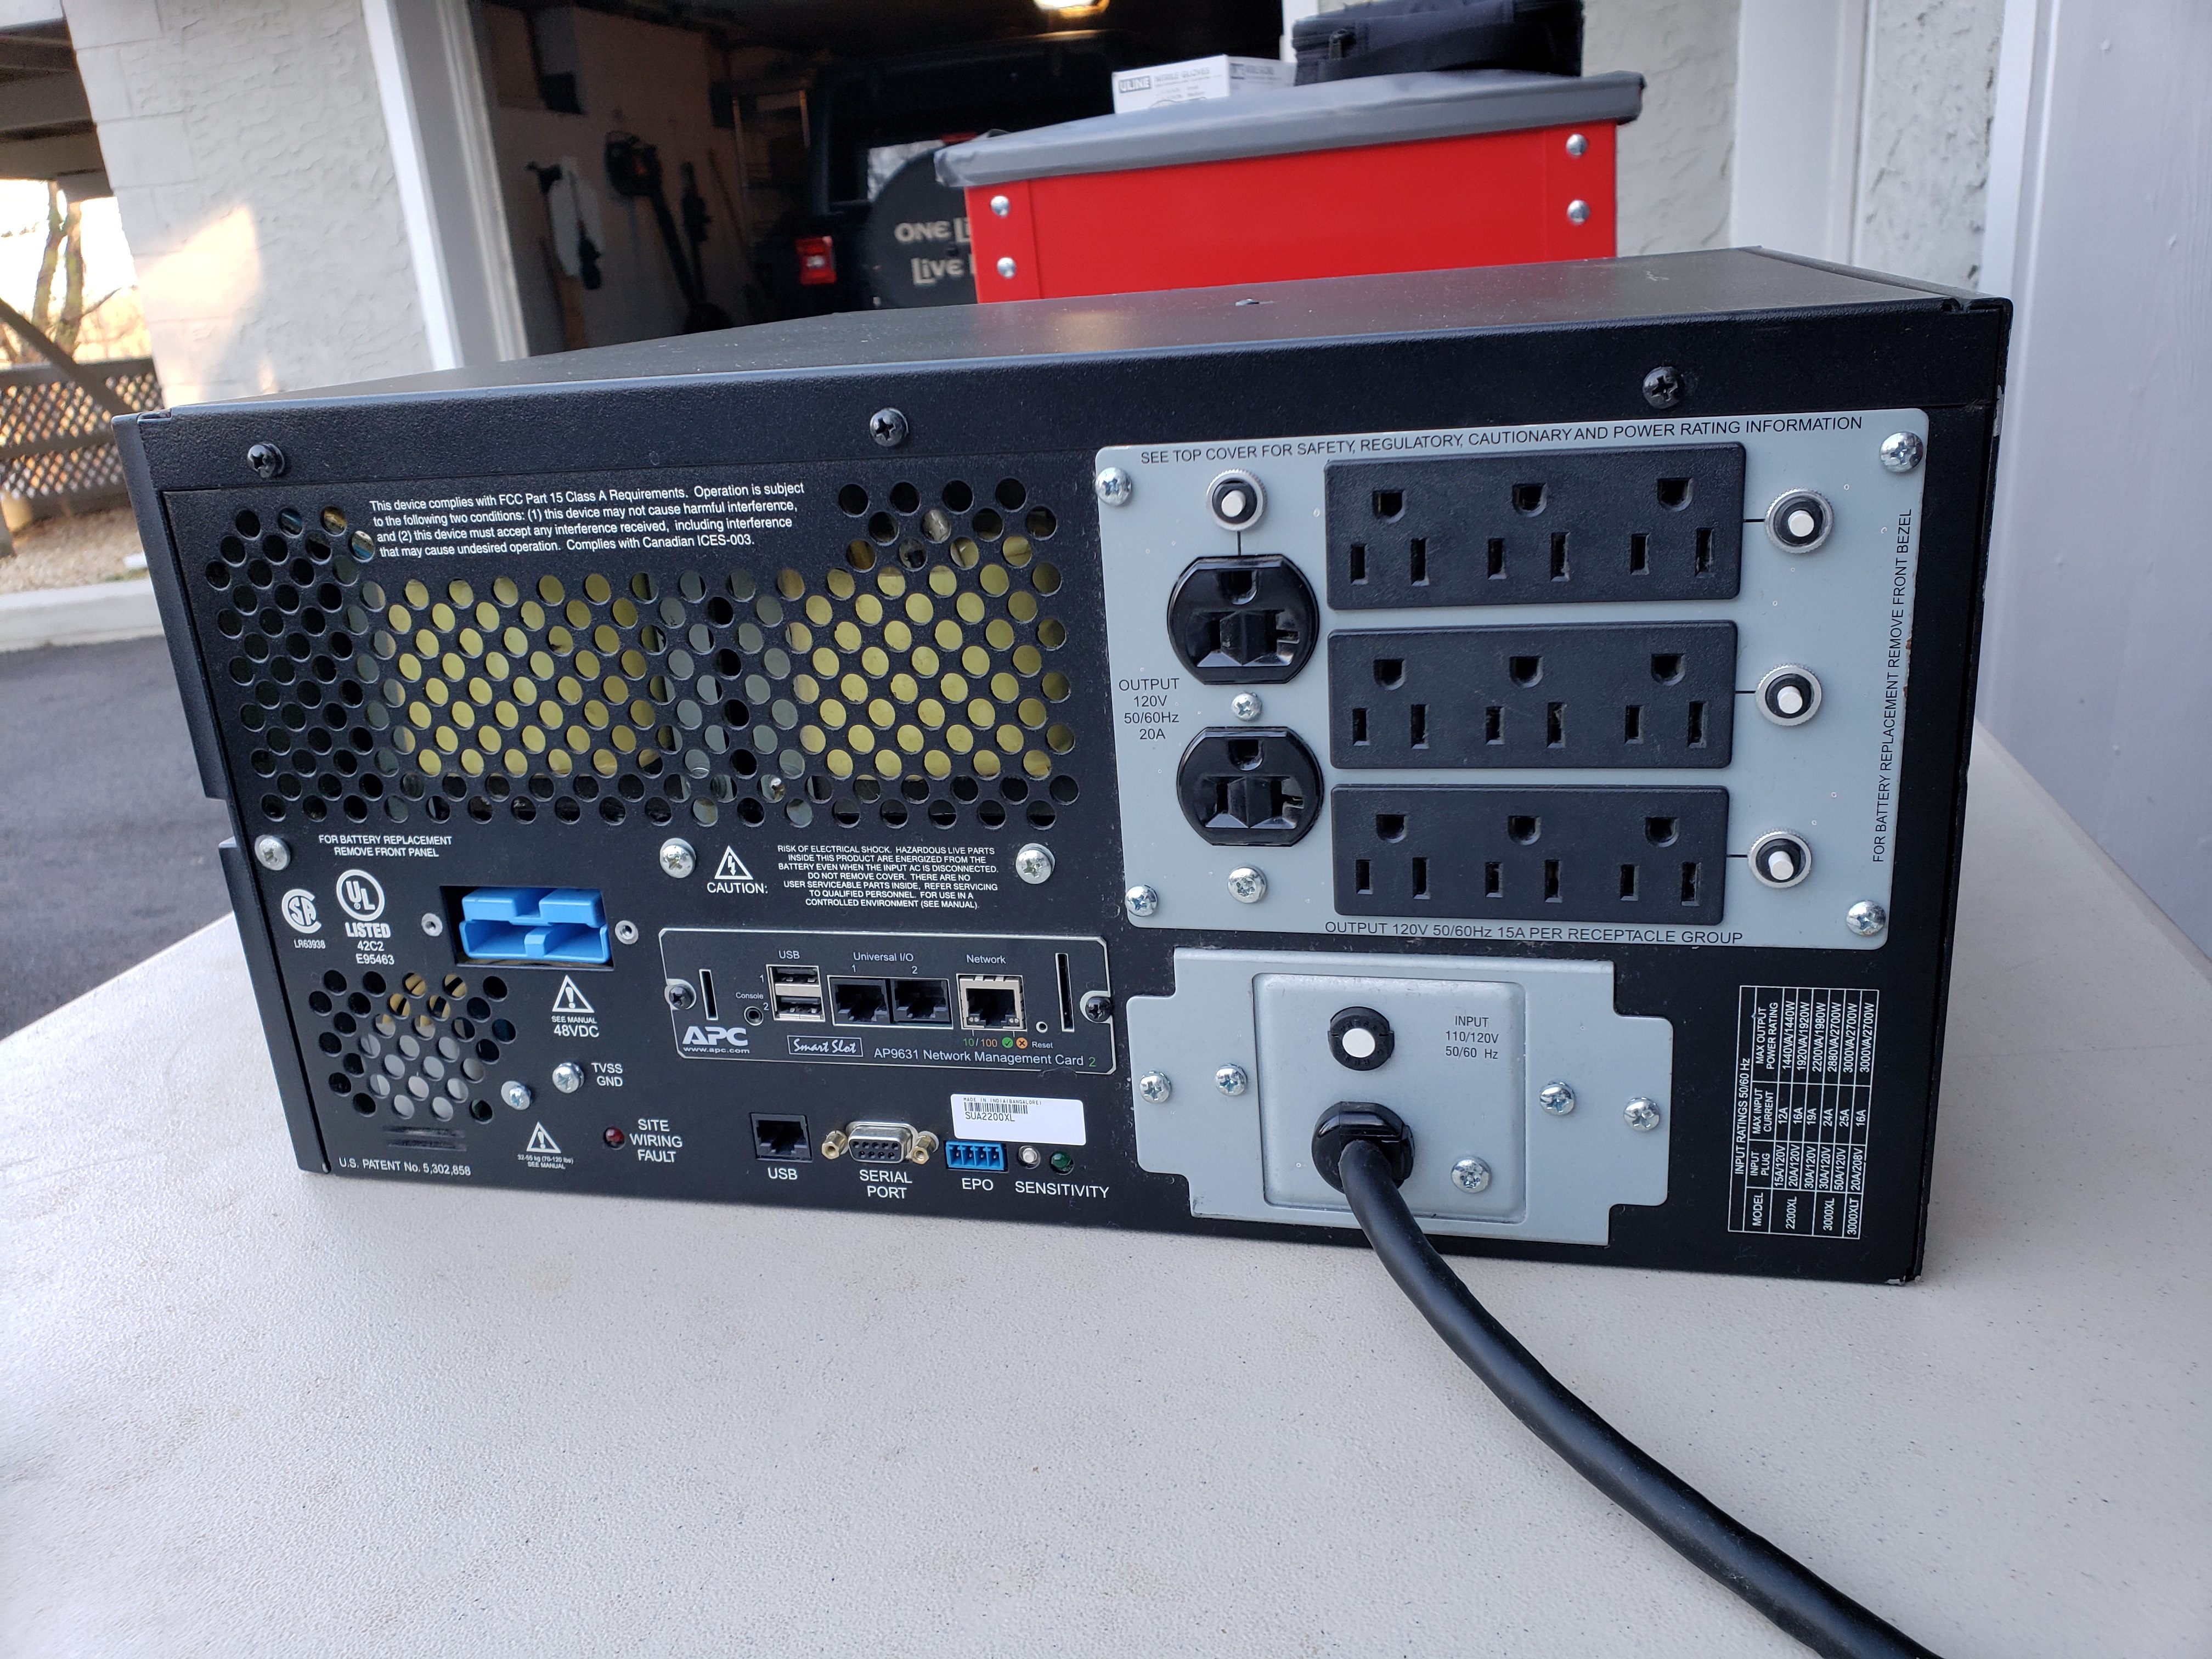
UPS sizes are typically denoted by the volt-amp (VA) capacity of the UPS in a backup power role. I would consider a UPS with a rated of capacity of <3000 VA to be for home or light commercial use. Once you get into the 5-10 kVA+ range, you are looking at very large units that can weigh multiple hundreds if not thousands of pounds.
If you want the most capacity for a standard 120 volt 15 amp circuit, I would suggest a 2200VA sized unit. Technically, 120 volts at 15 amps is 1800VA, but most UPS’s fall into the following size classes:
- 350-850VA
- 1000VA
- 1500VA
- 2200VA
- 3000VA
It is important to remember that the apparent power presented to the UPS may be relatively high even if the real power consumption of the load is low, depending on the type of device you are powering.
Lets say that you have a regular desktop computer with a 500 watt power supply. Just because the rated capacity of the pc supply is “500 watts” does not mean that the load presented to your wall socket cannot exceed 500VA. This is because the power supply, like all real electrical loads, has a power factor (PF). Without going into an essay about power factor, the bottom line is that you should always size the UPS with a healthy (again, in my opinion at least 15-20%) margin over the max anticipated load to account for transient power factor conditions.
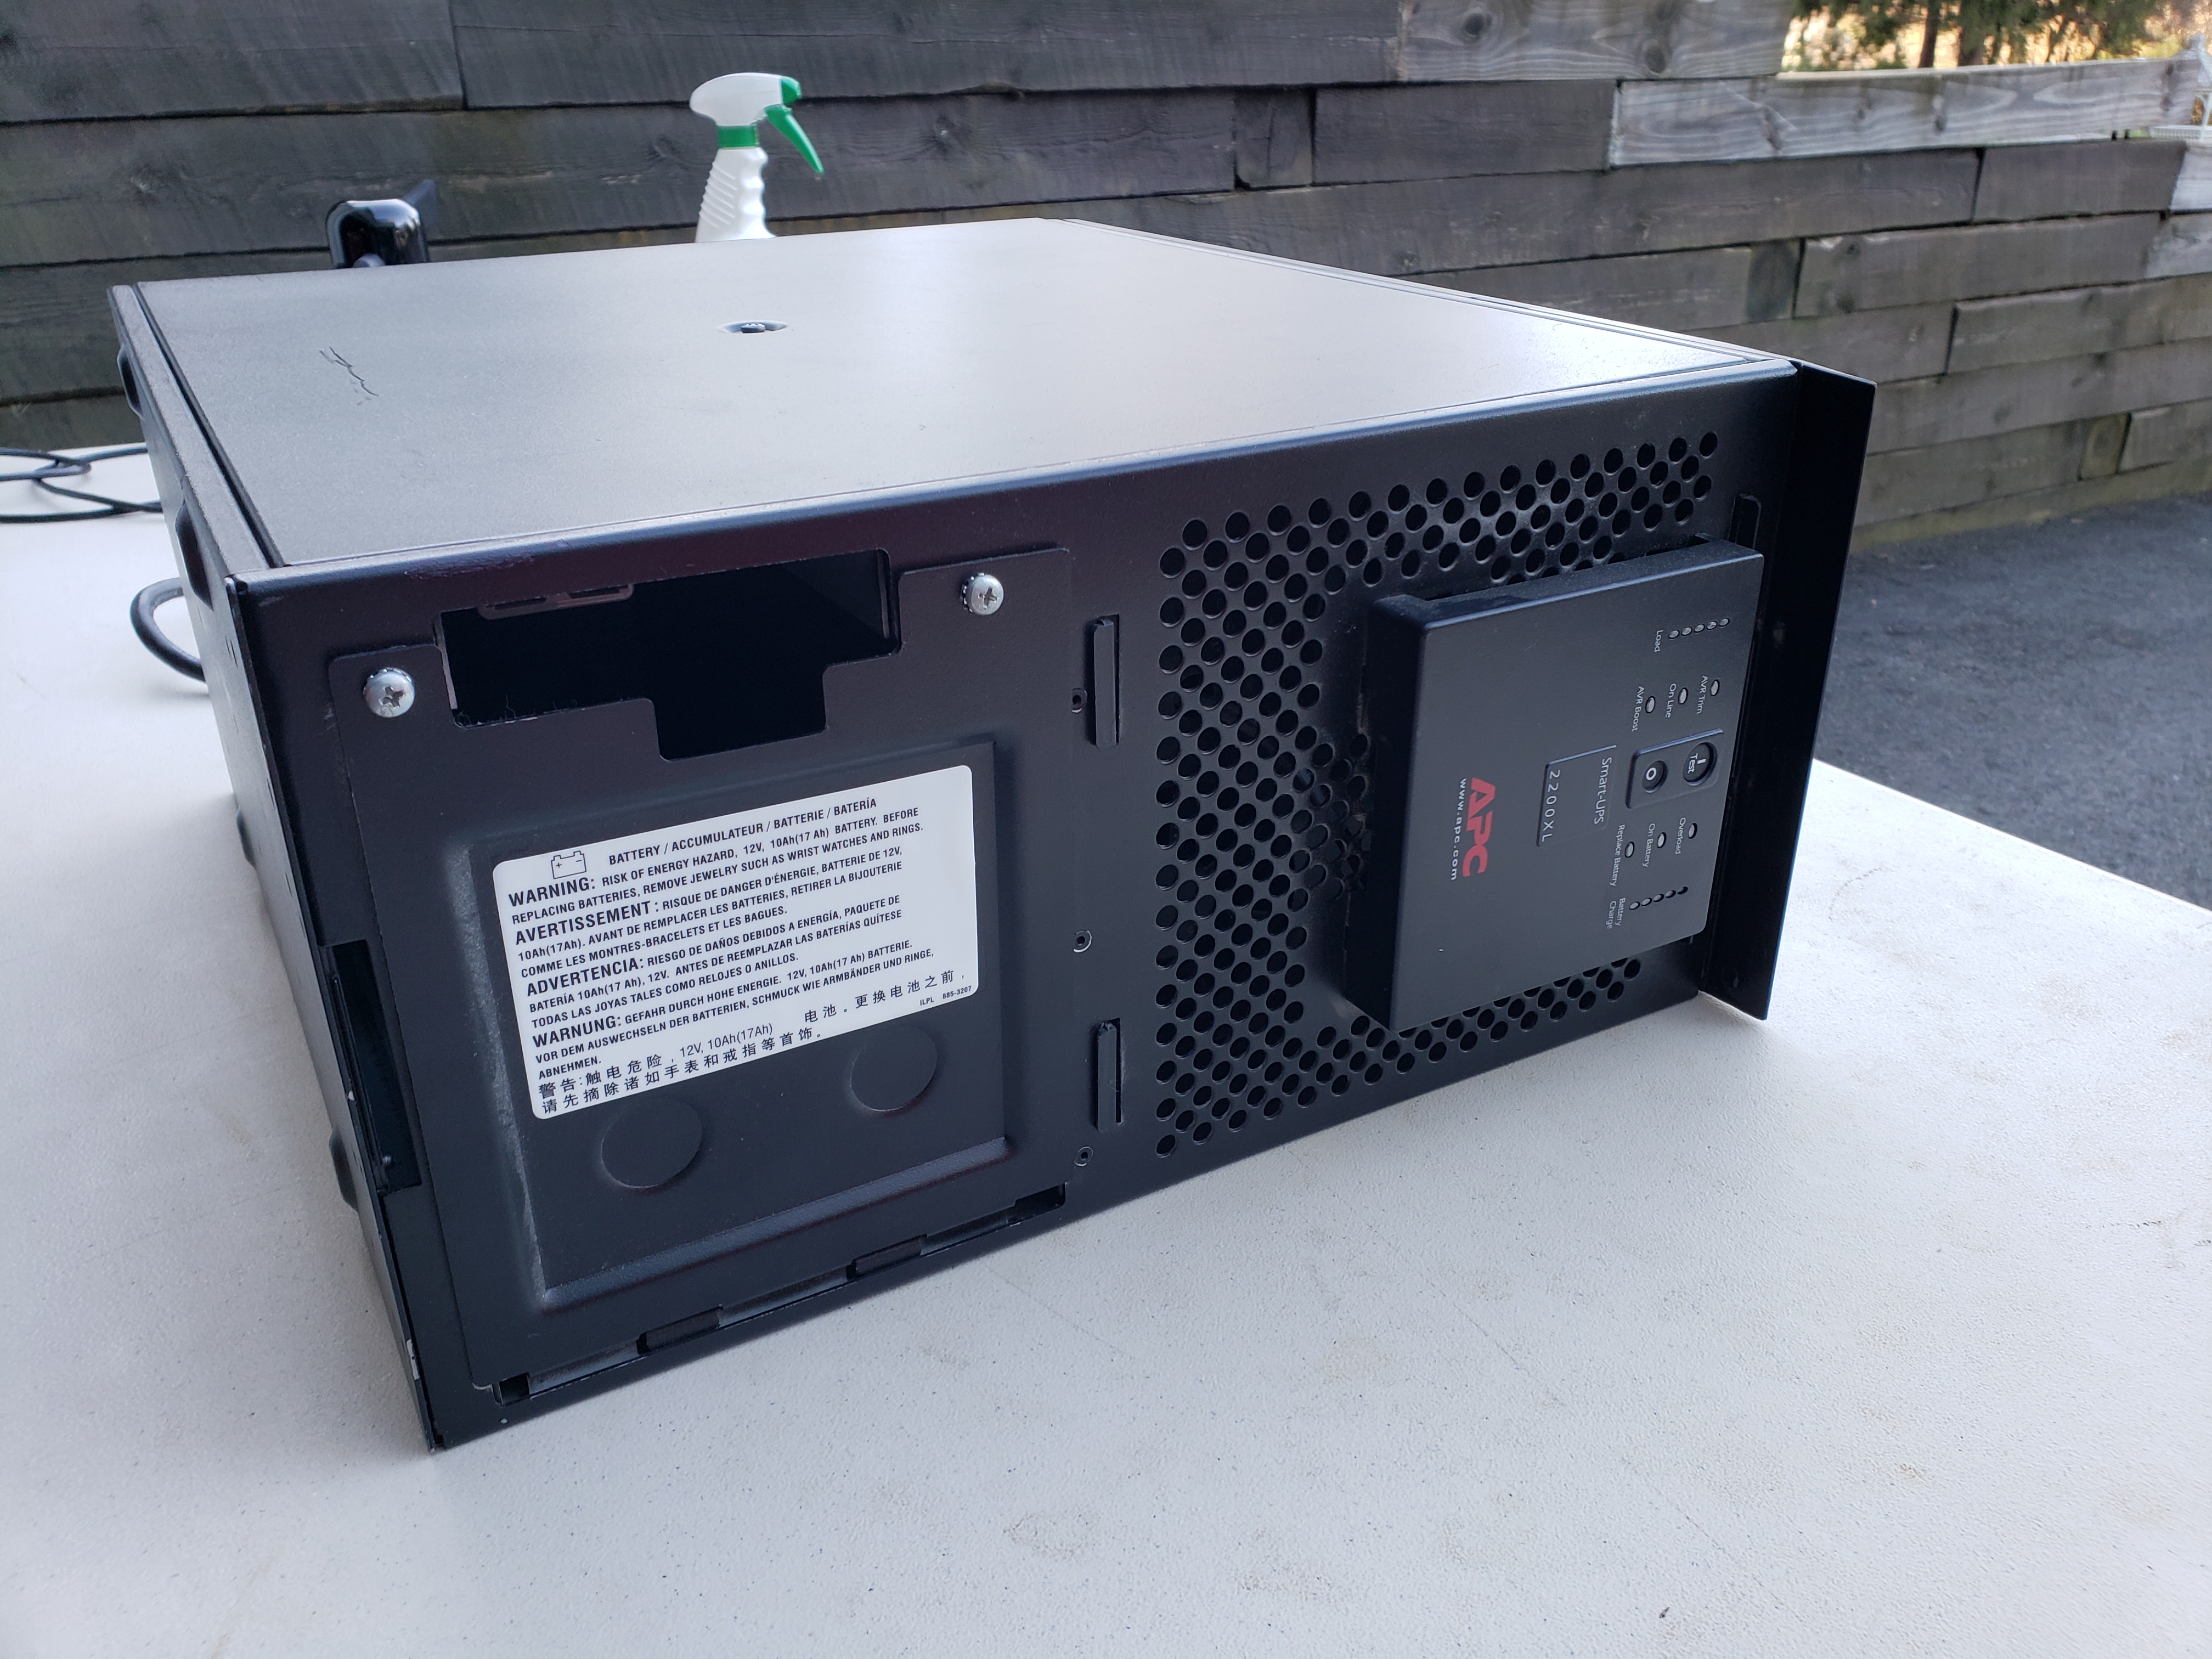
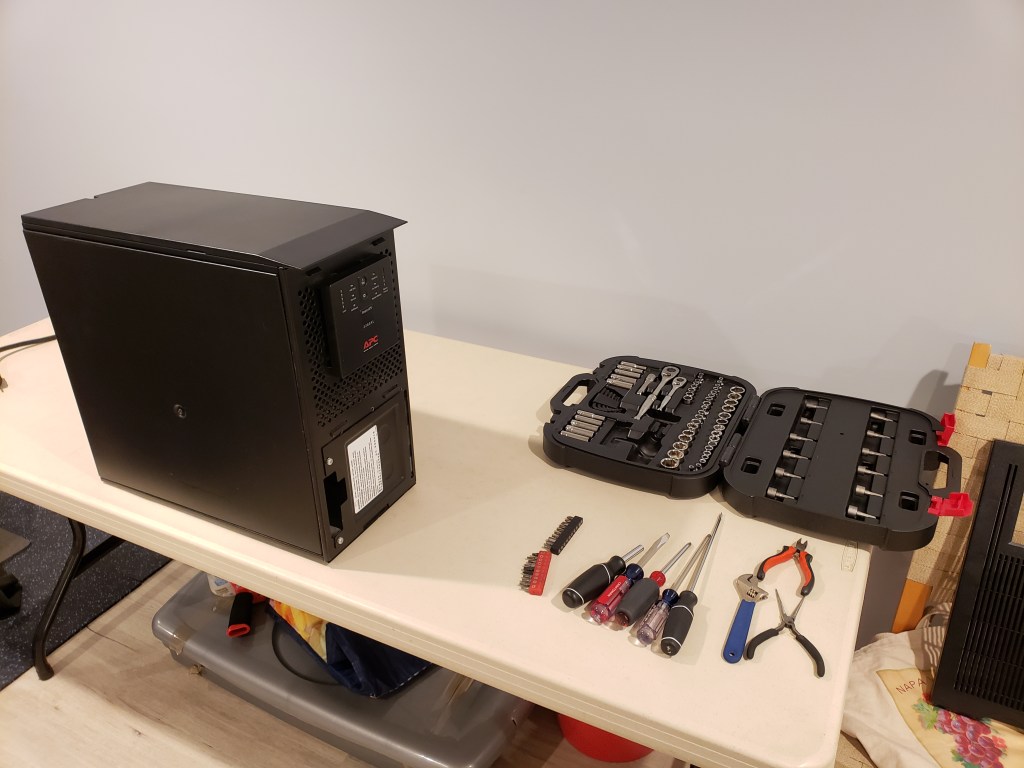
After doing some market research on new units, I remembered that my father had an old 2200XL model (SUA2200) sitting in the back of his shop. He had the unit in service for a few years, but soon after replaced it with a smaller and quieter UPS since he did not need the 2200VA capacity. I decided to make a project out of this UPS by breaking it down to see what’s inside, and replace the inevitably aged input protection devices and electrolytic capacitors.
First impression after many years is that this UPS is built like a tank. Even without batteries, the heavy gauge metal chassis and big honking transformers will give you a hernia if lifted carelessly.
The first order of business is to remove the old batteries and blow the dust out.


Next phase is to disassemble the chassis to the point where the main board can be removed.
On this model, I noticed that the transformer tray was held by several screws hidden under the top cover. So that comes off first…


Next we open up the main cover again and get into removing lots of wire to board connections.
***IMPORTANT SAFTEY NOTE***
DO NOT attempt to open your UPS and perform any modifications unless you have sufficient experience/knowledge/training in working with devices that contain operating voltages greater than 40 VDC/AC. Devices such as a UPS contain high voltages and high capacity energy storage devices (large capacitors and batteries). These devices can and will produce LETHAL electric shock if not handled with care, even if the unit is UNPLUGGED from mains power.
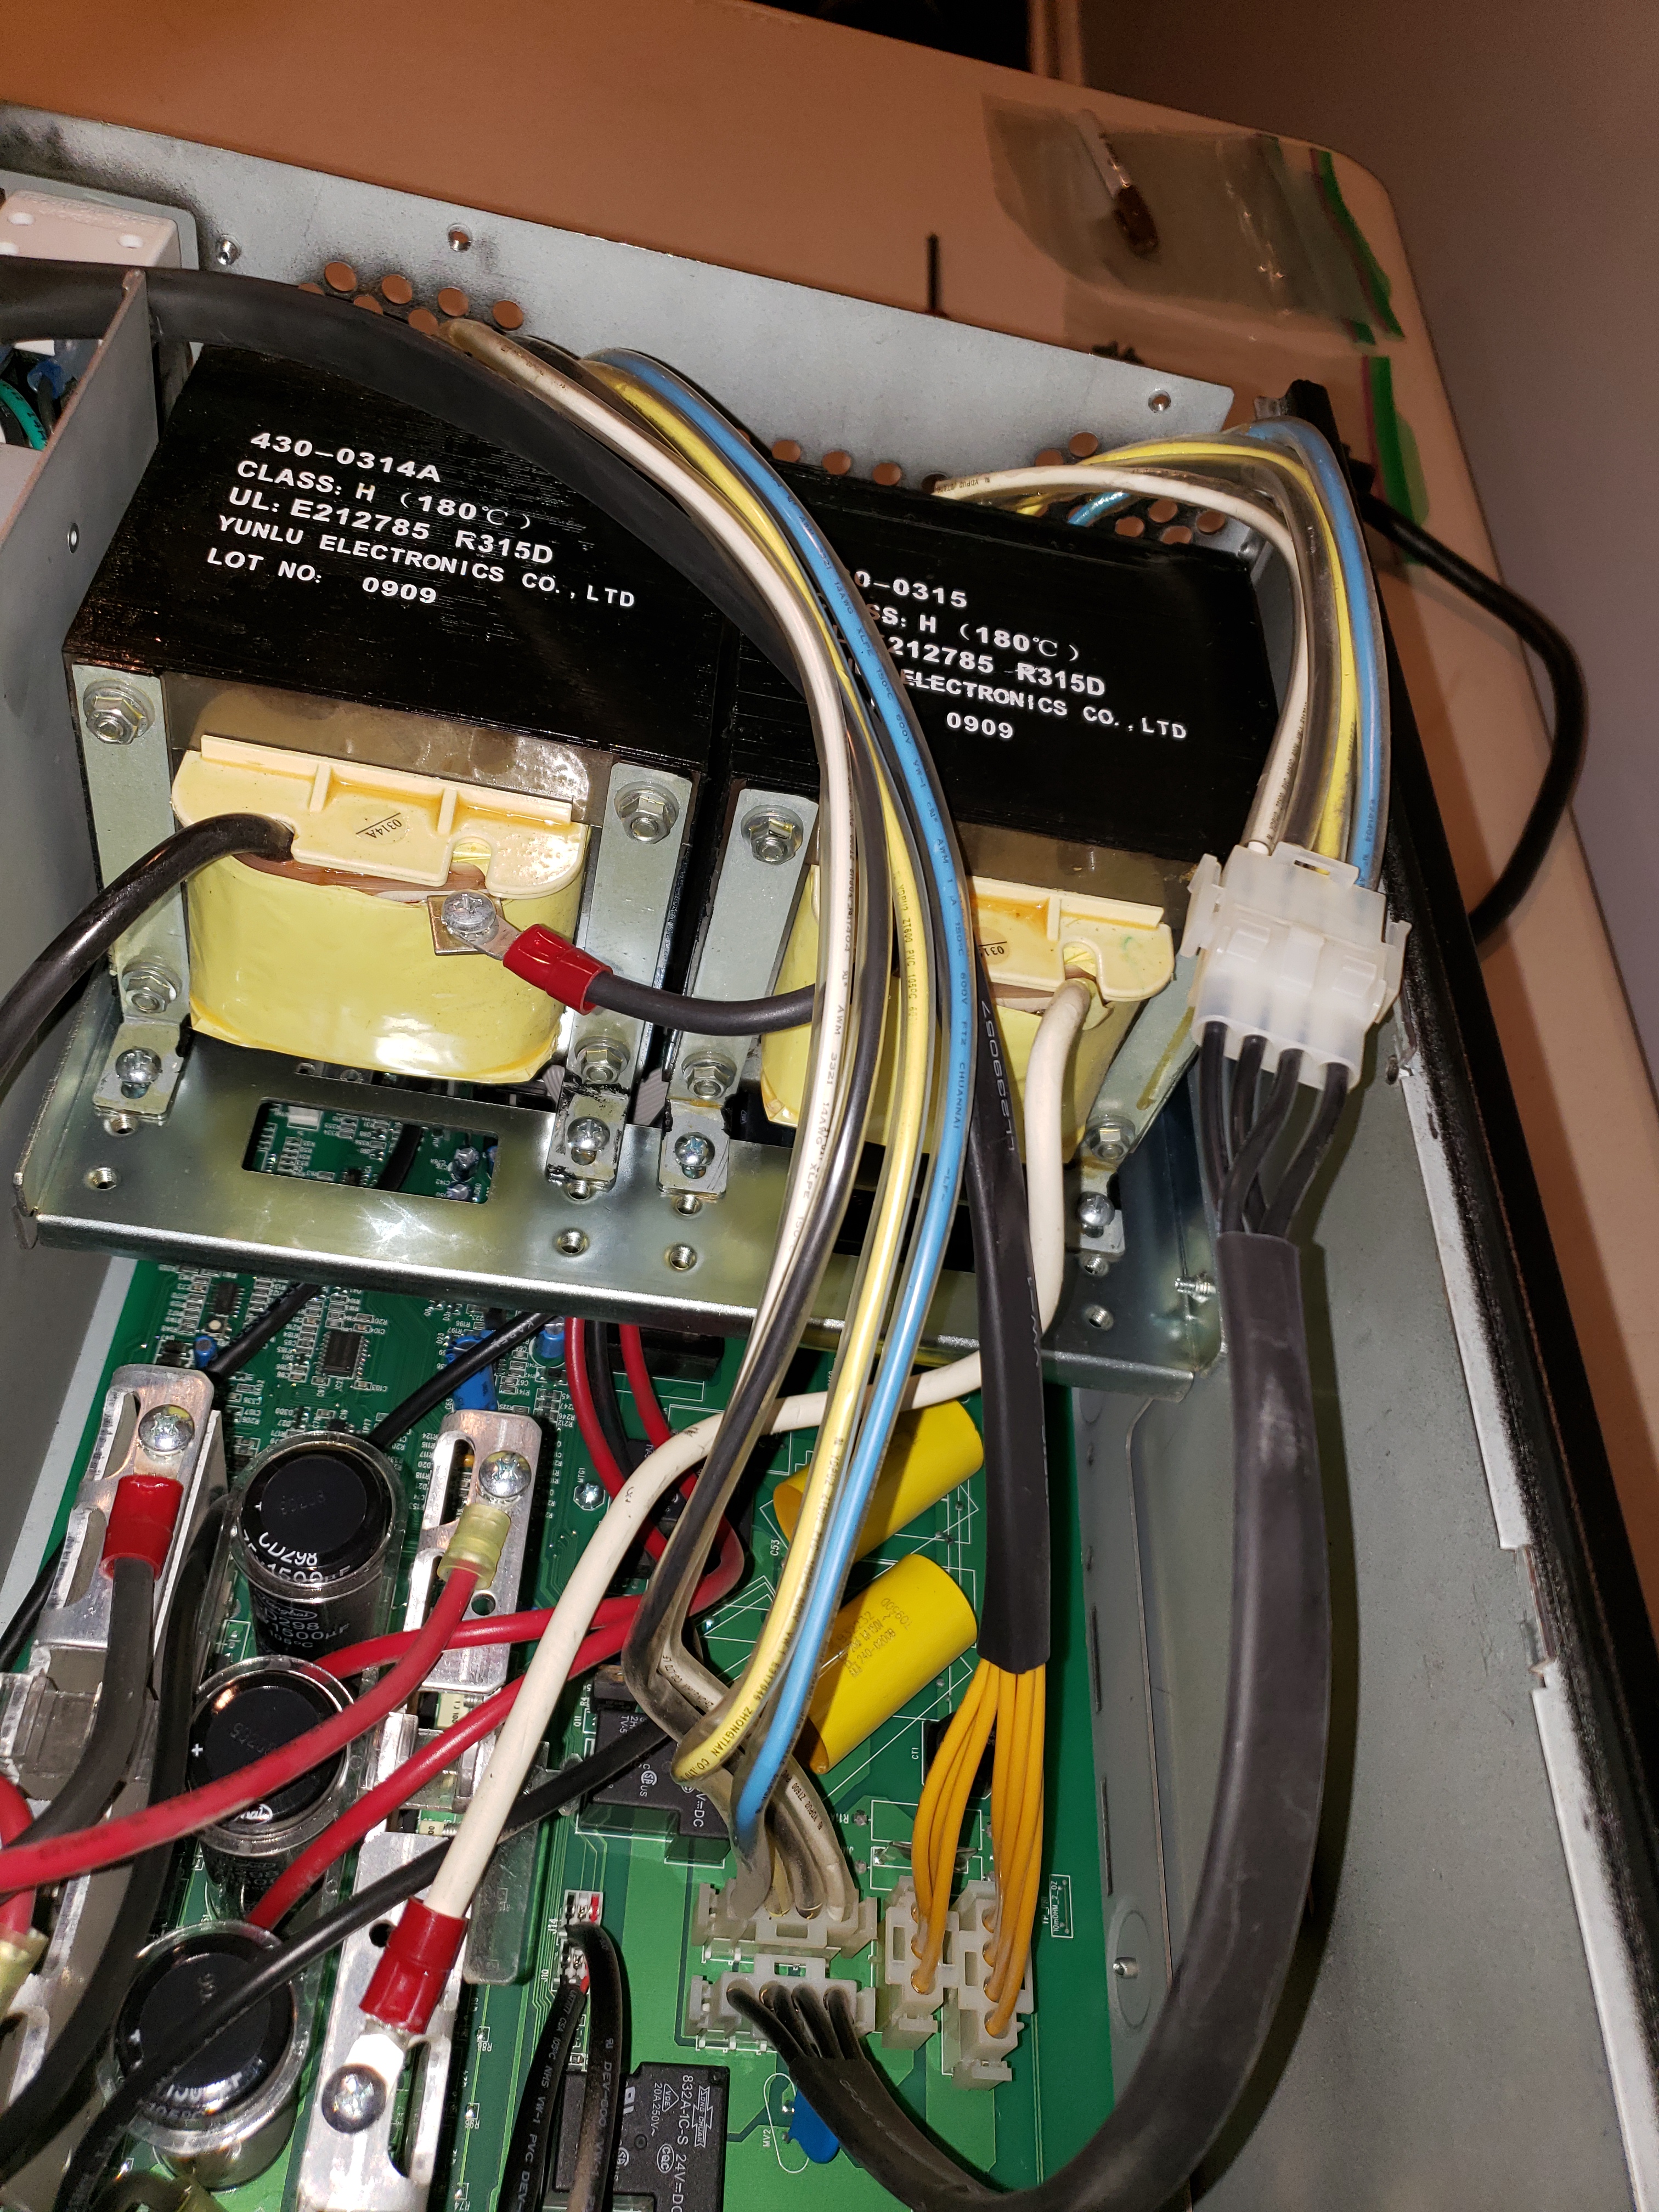
Opening the UPS up again, we begin with unplugging lots of connectors going to the main board and removing the large transformers.


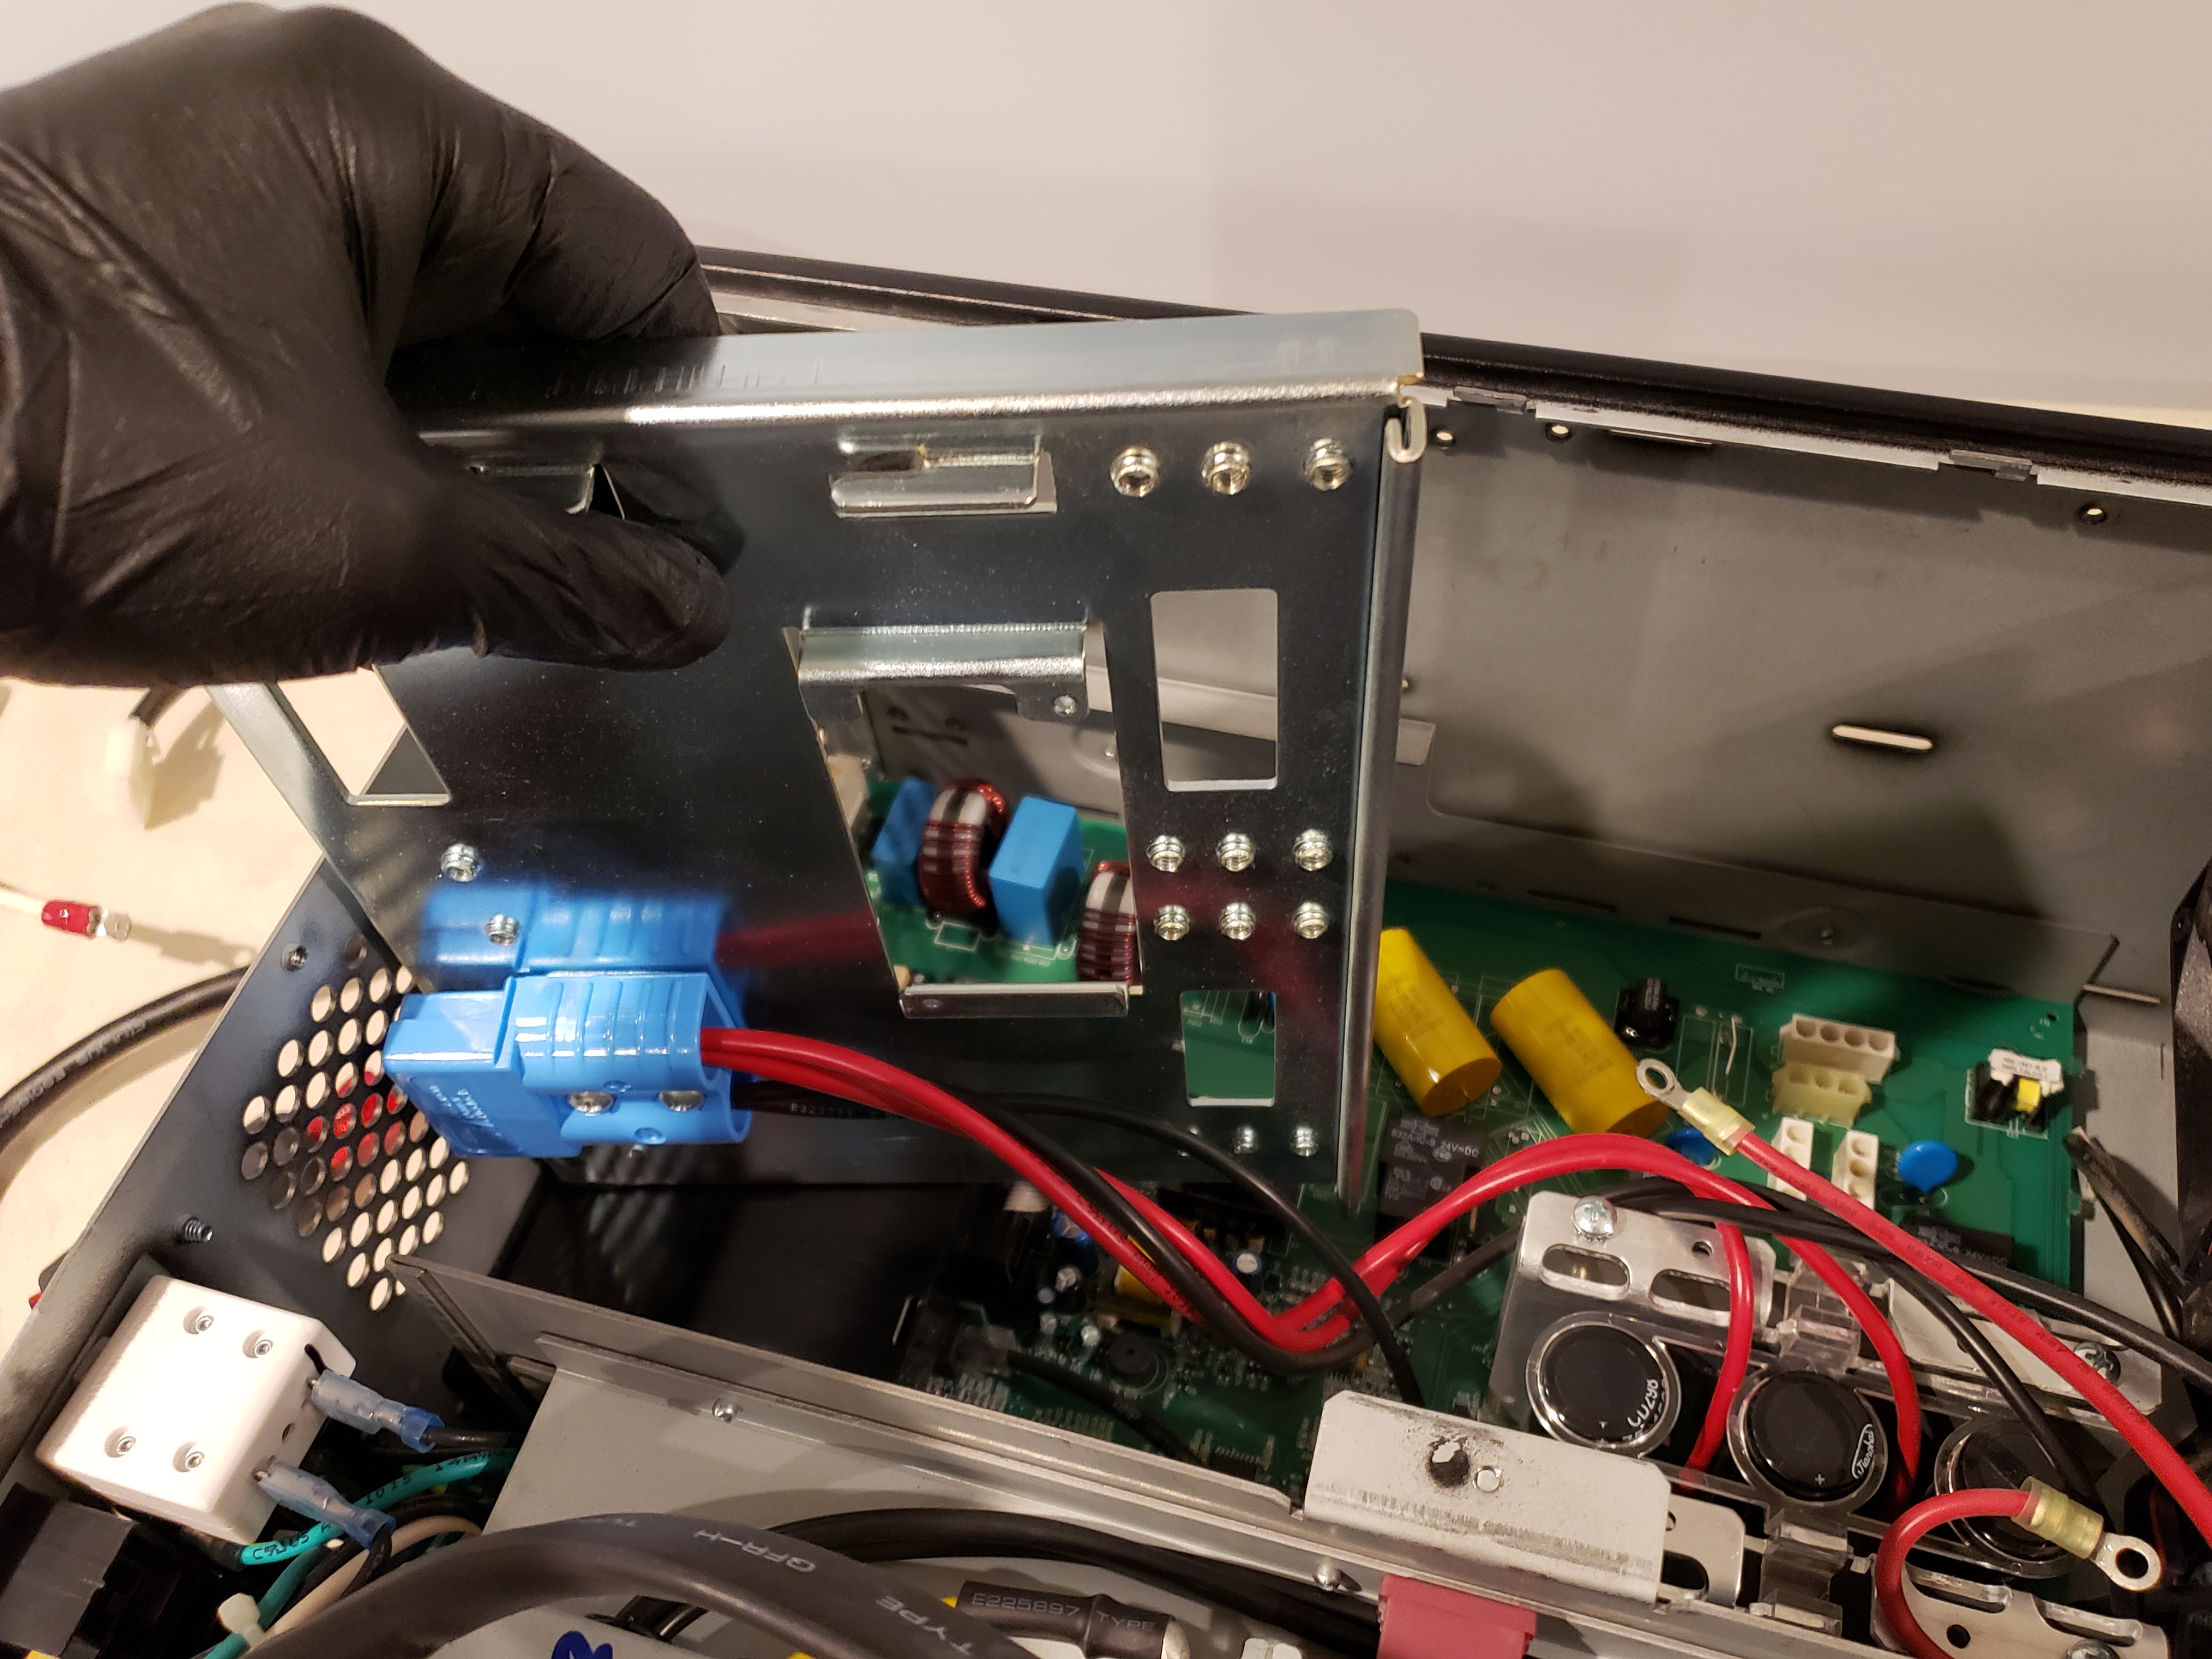
The transformer tray and expansion card slot comes out next.


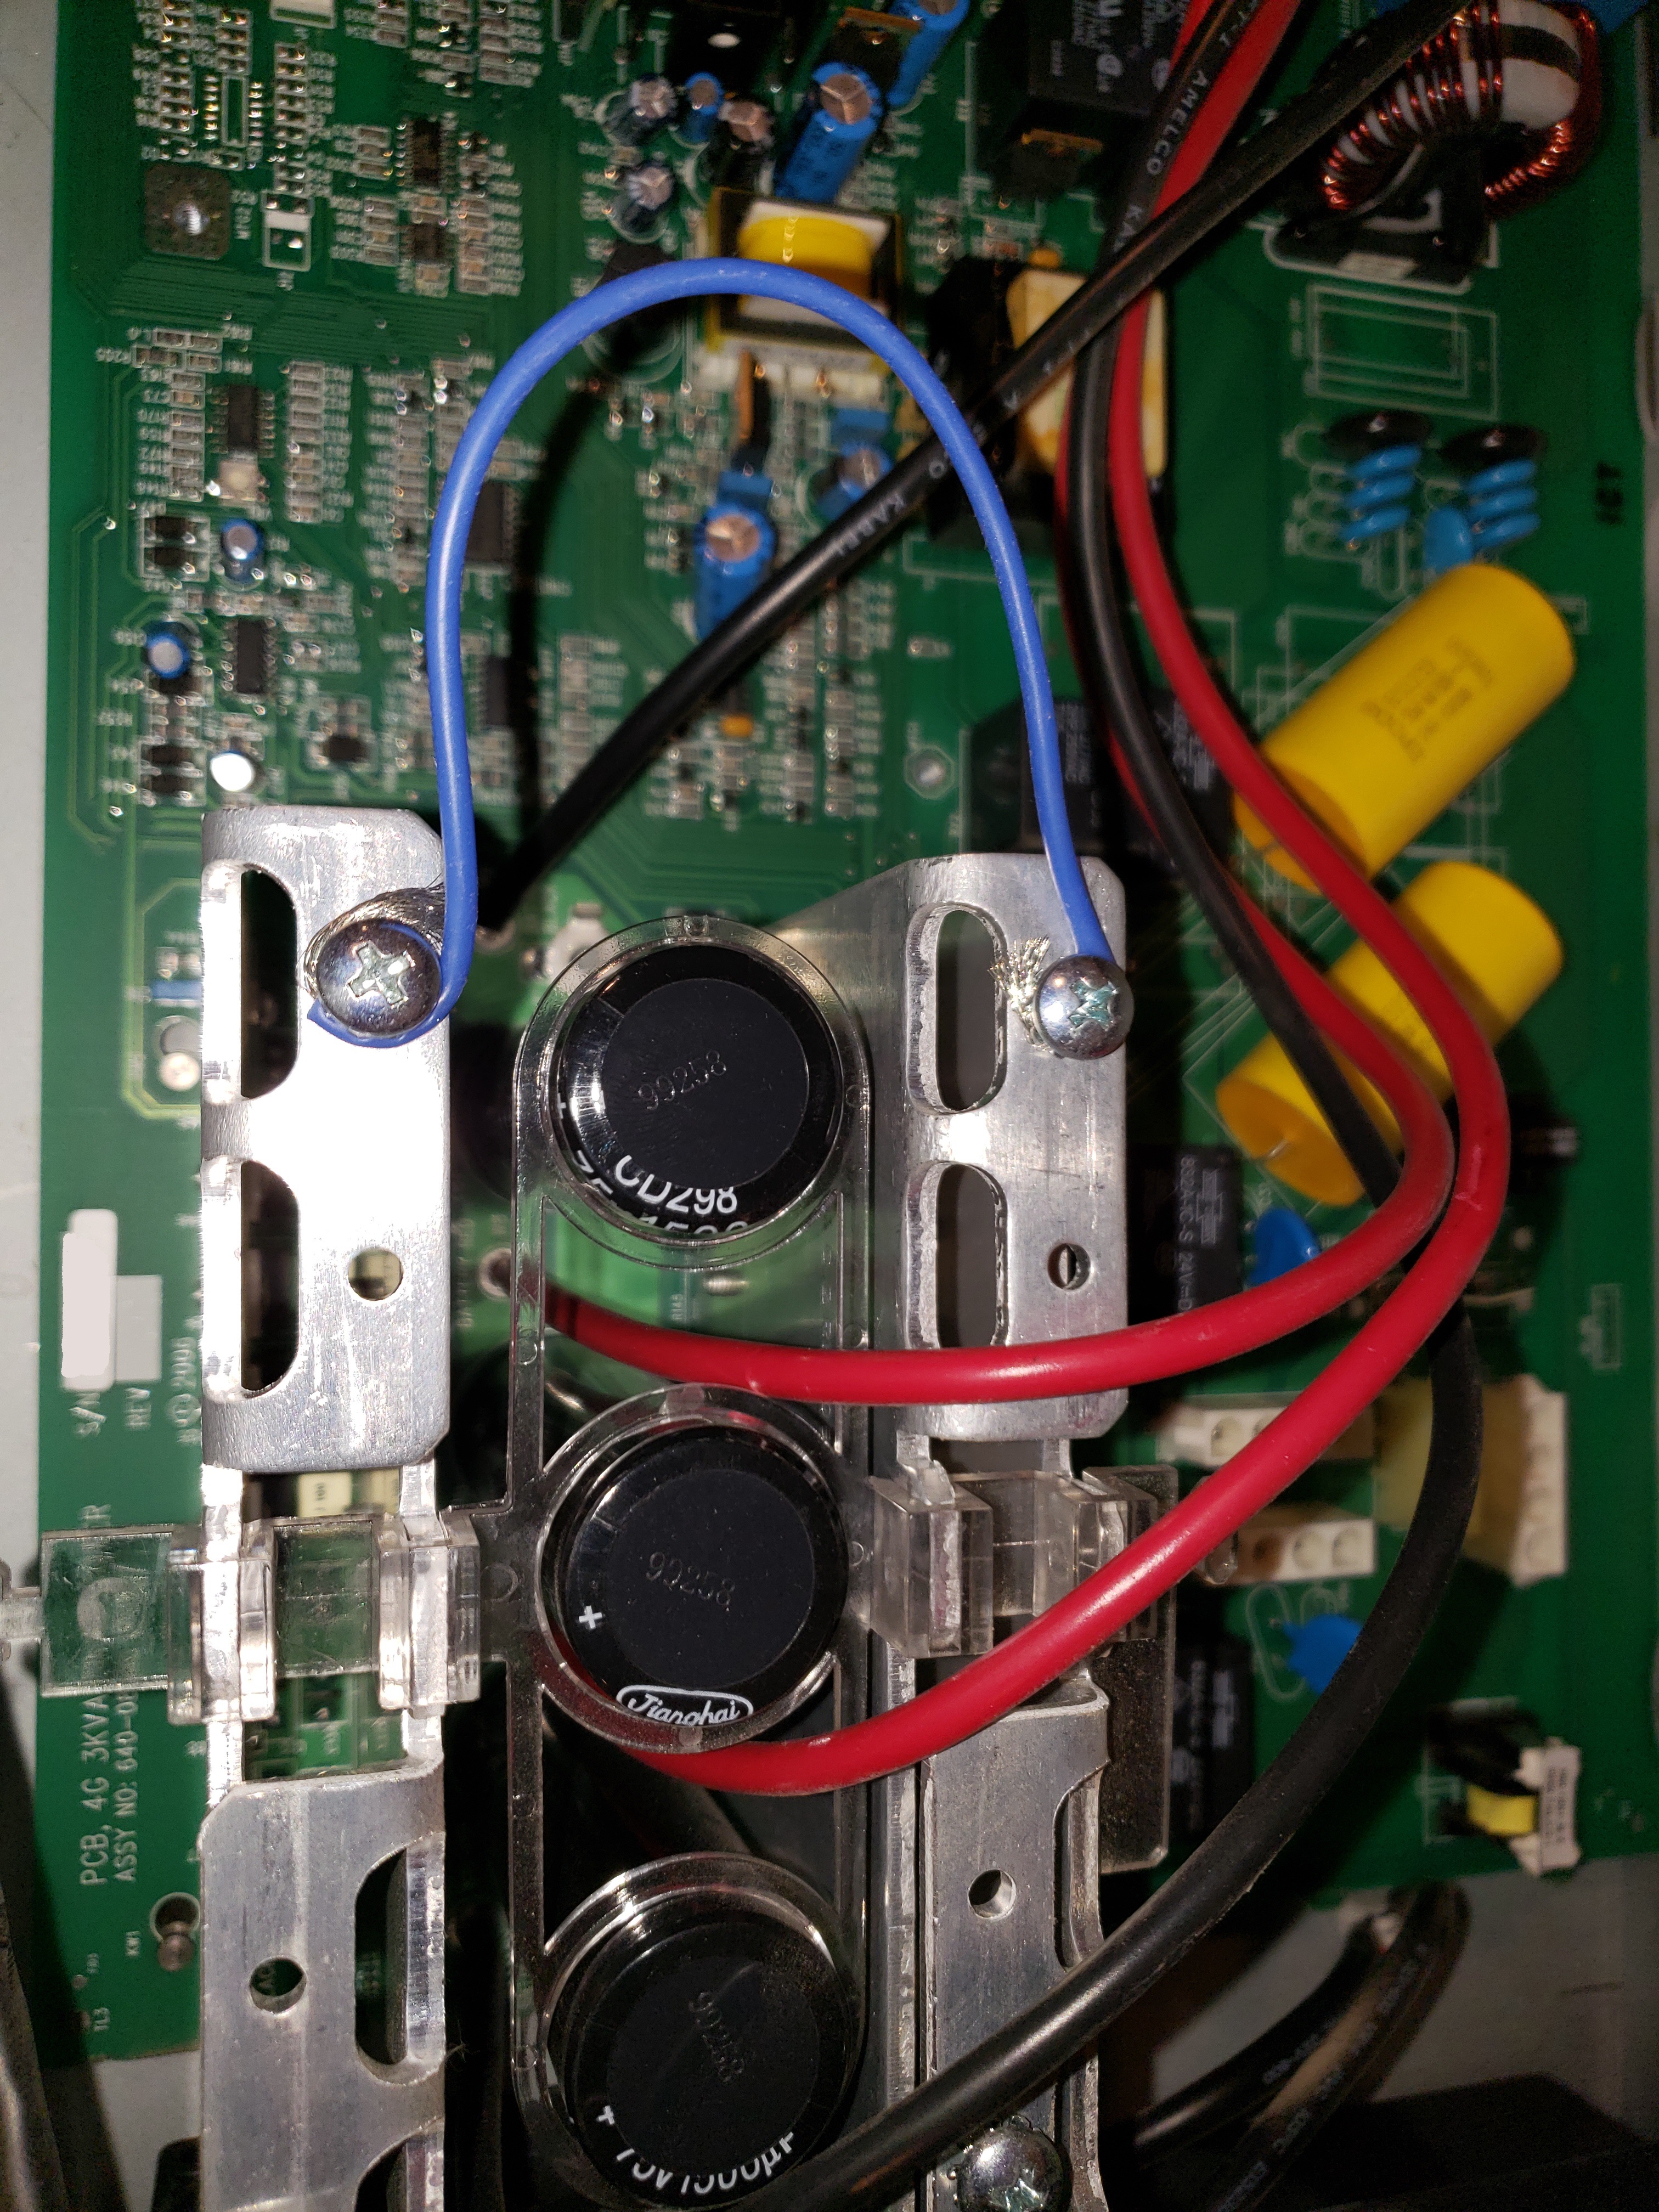
Before undoing the wire-to-board connectors from the battery to the big inverter caps, I wanted to make sure those capacitors were discharged. Let’s check the voltage after 5 years of being powered off…

Not significant, but with 4500uF of capacitance behind that voltage it could still be dangerous under the right conditions. So I safely discharged the cap bank with a 100 watt 1K resistor and tied a short across the circuit.

After undoing all the screws, the main board slides forward and out. It needed a little leverage to move things along after 11 years in the same spot.

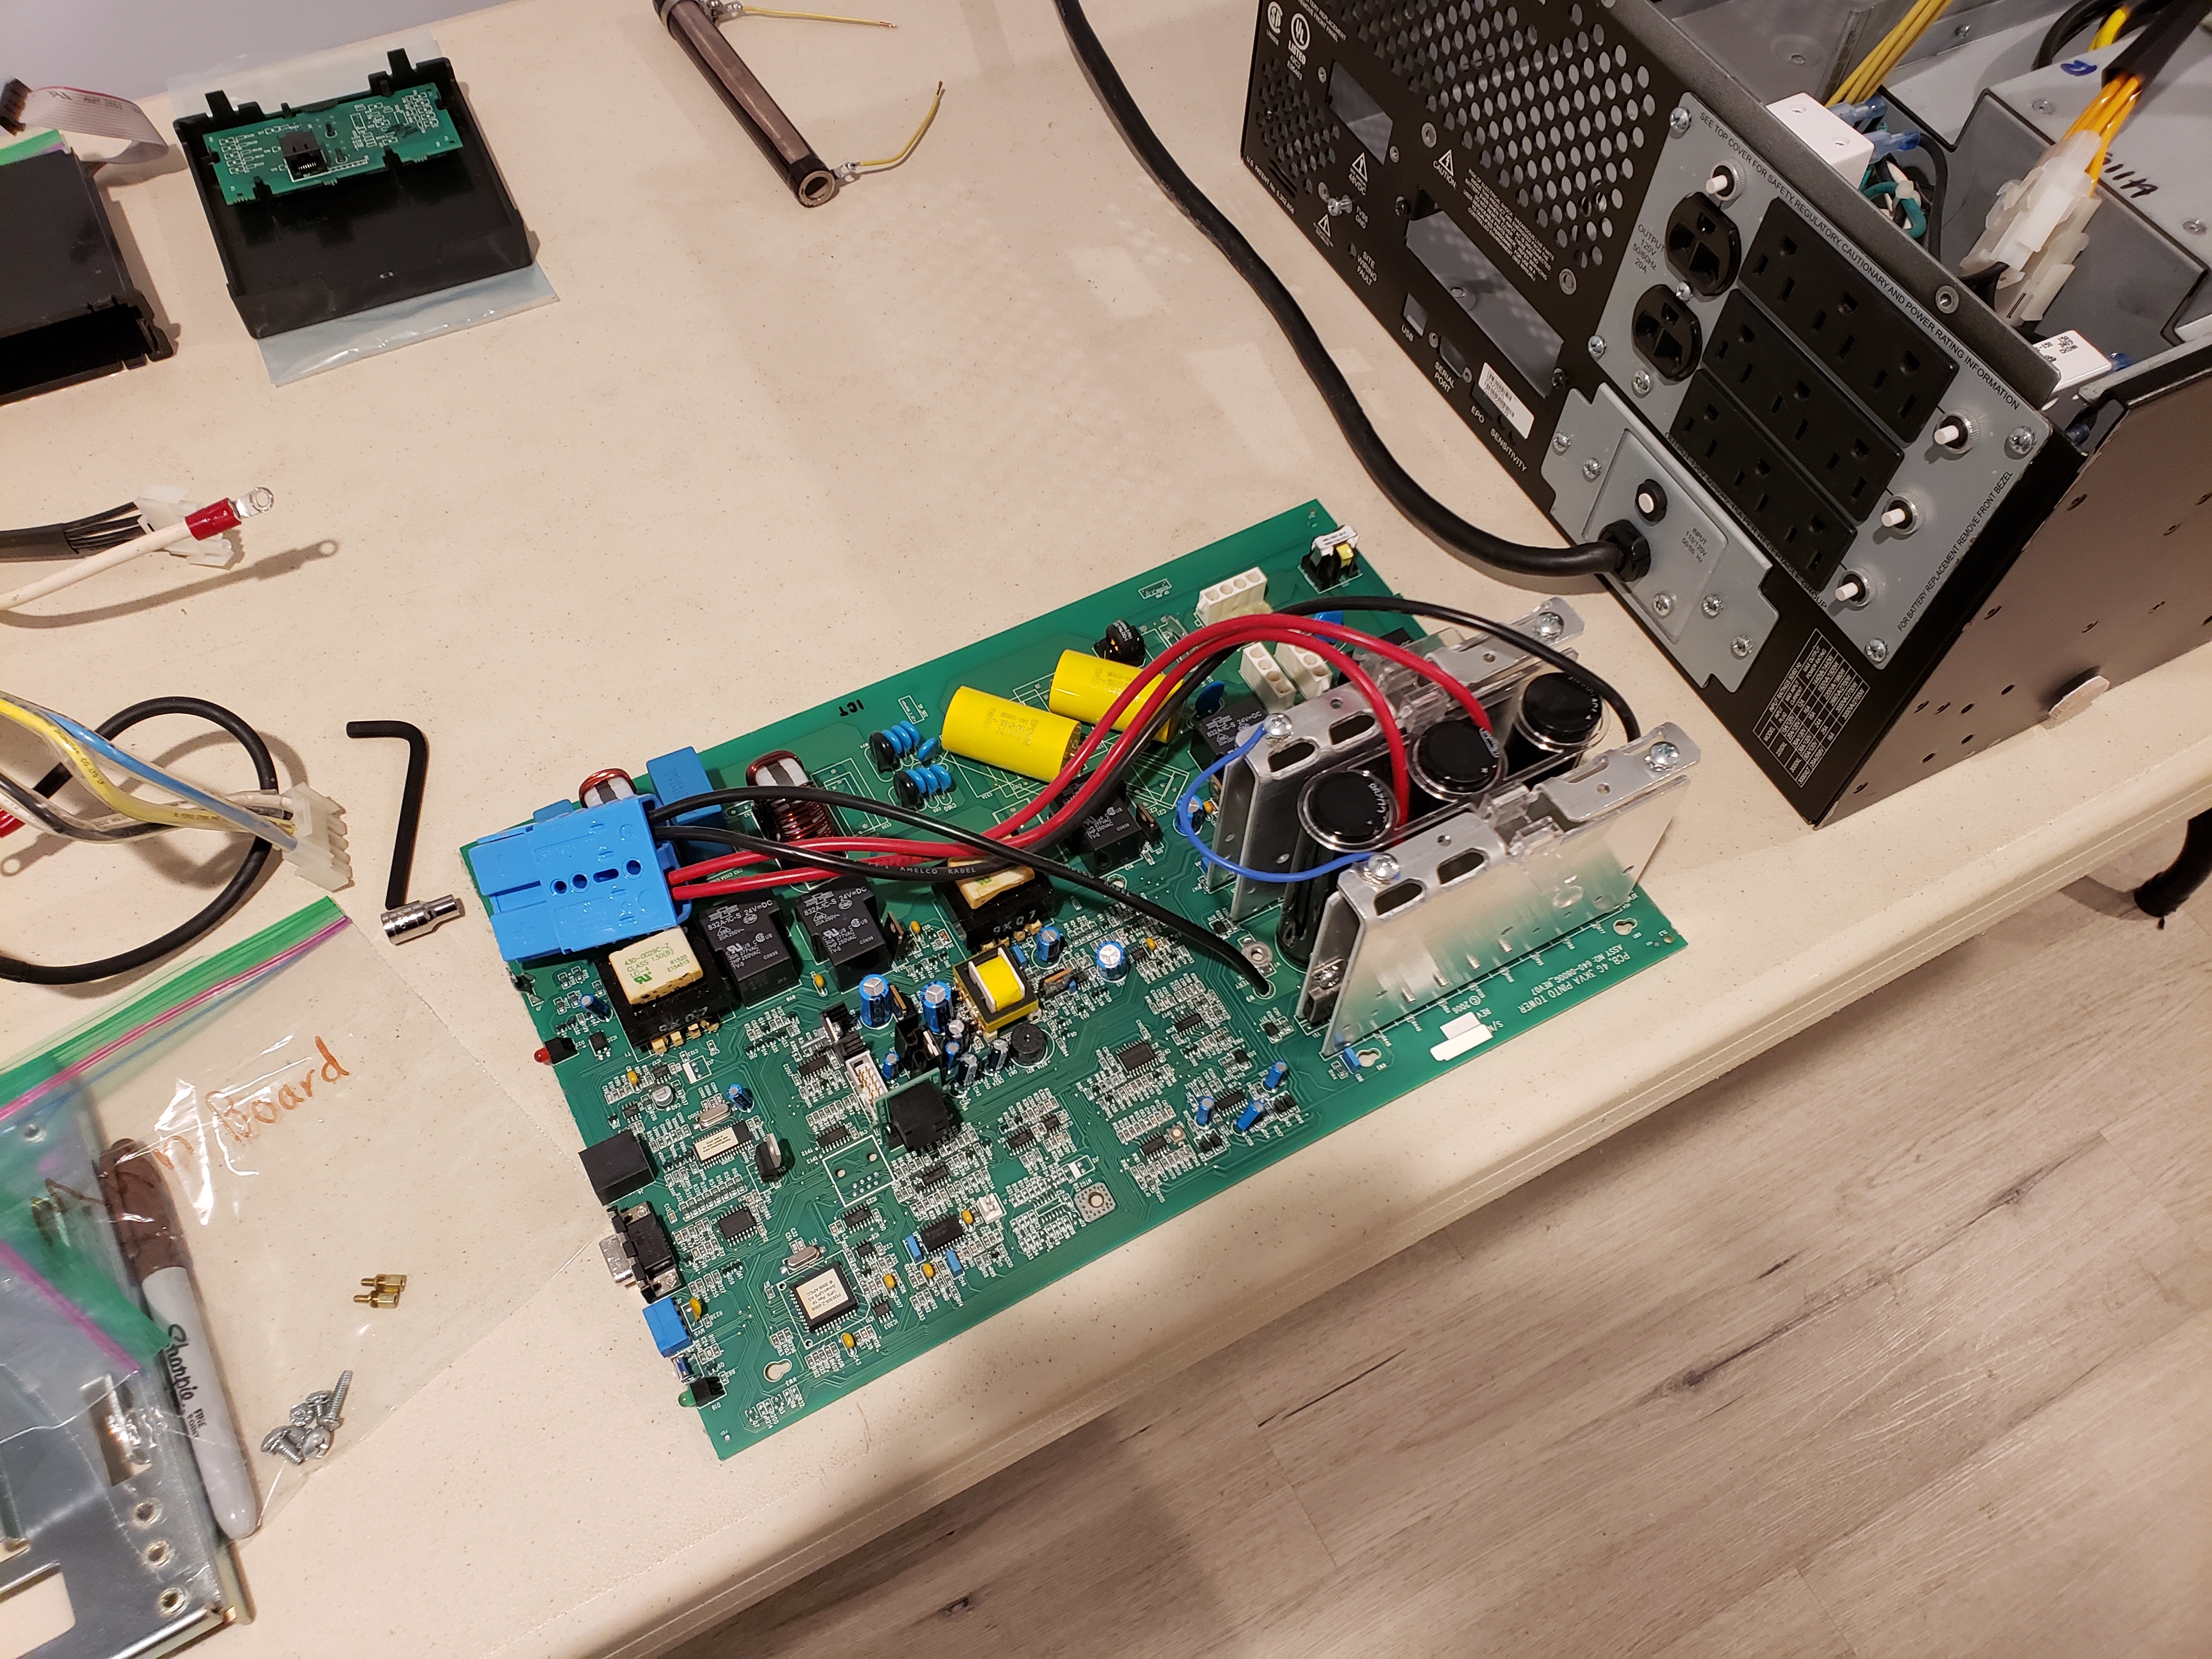
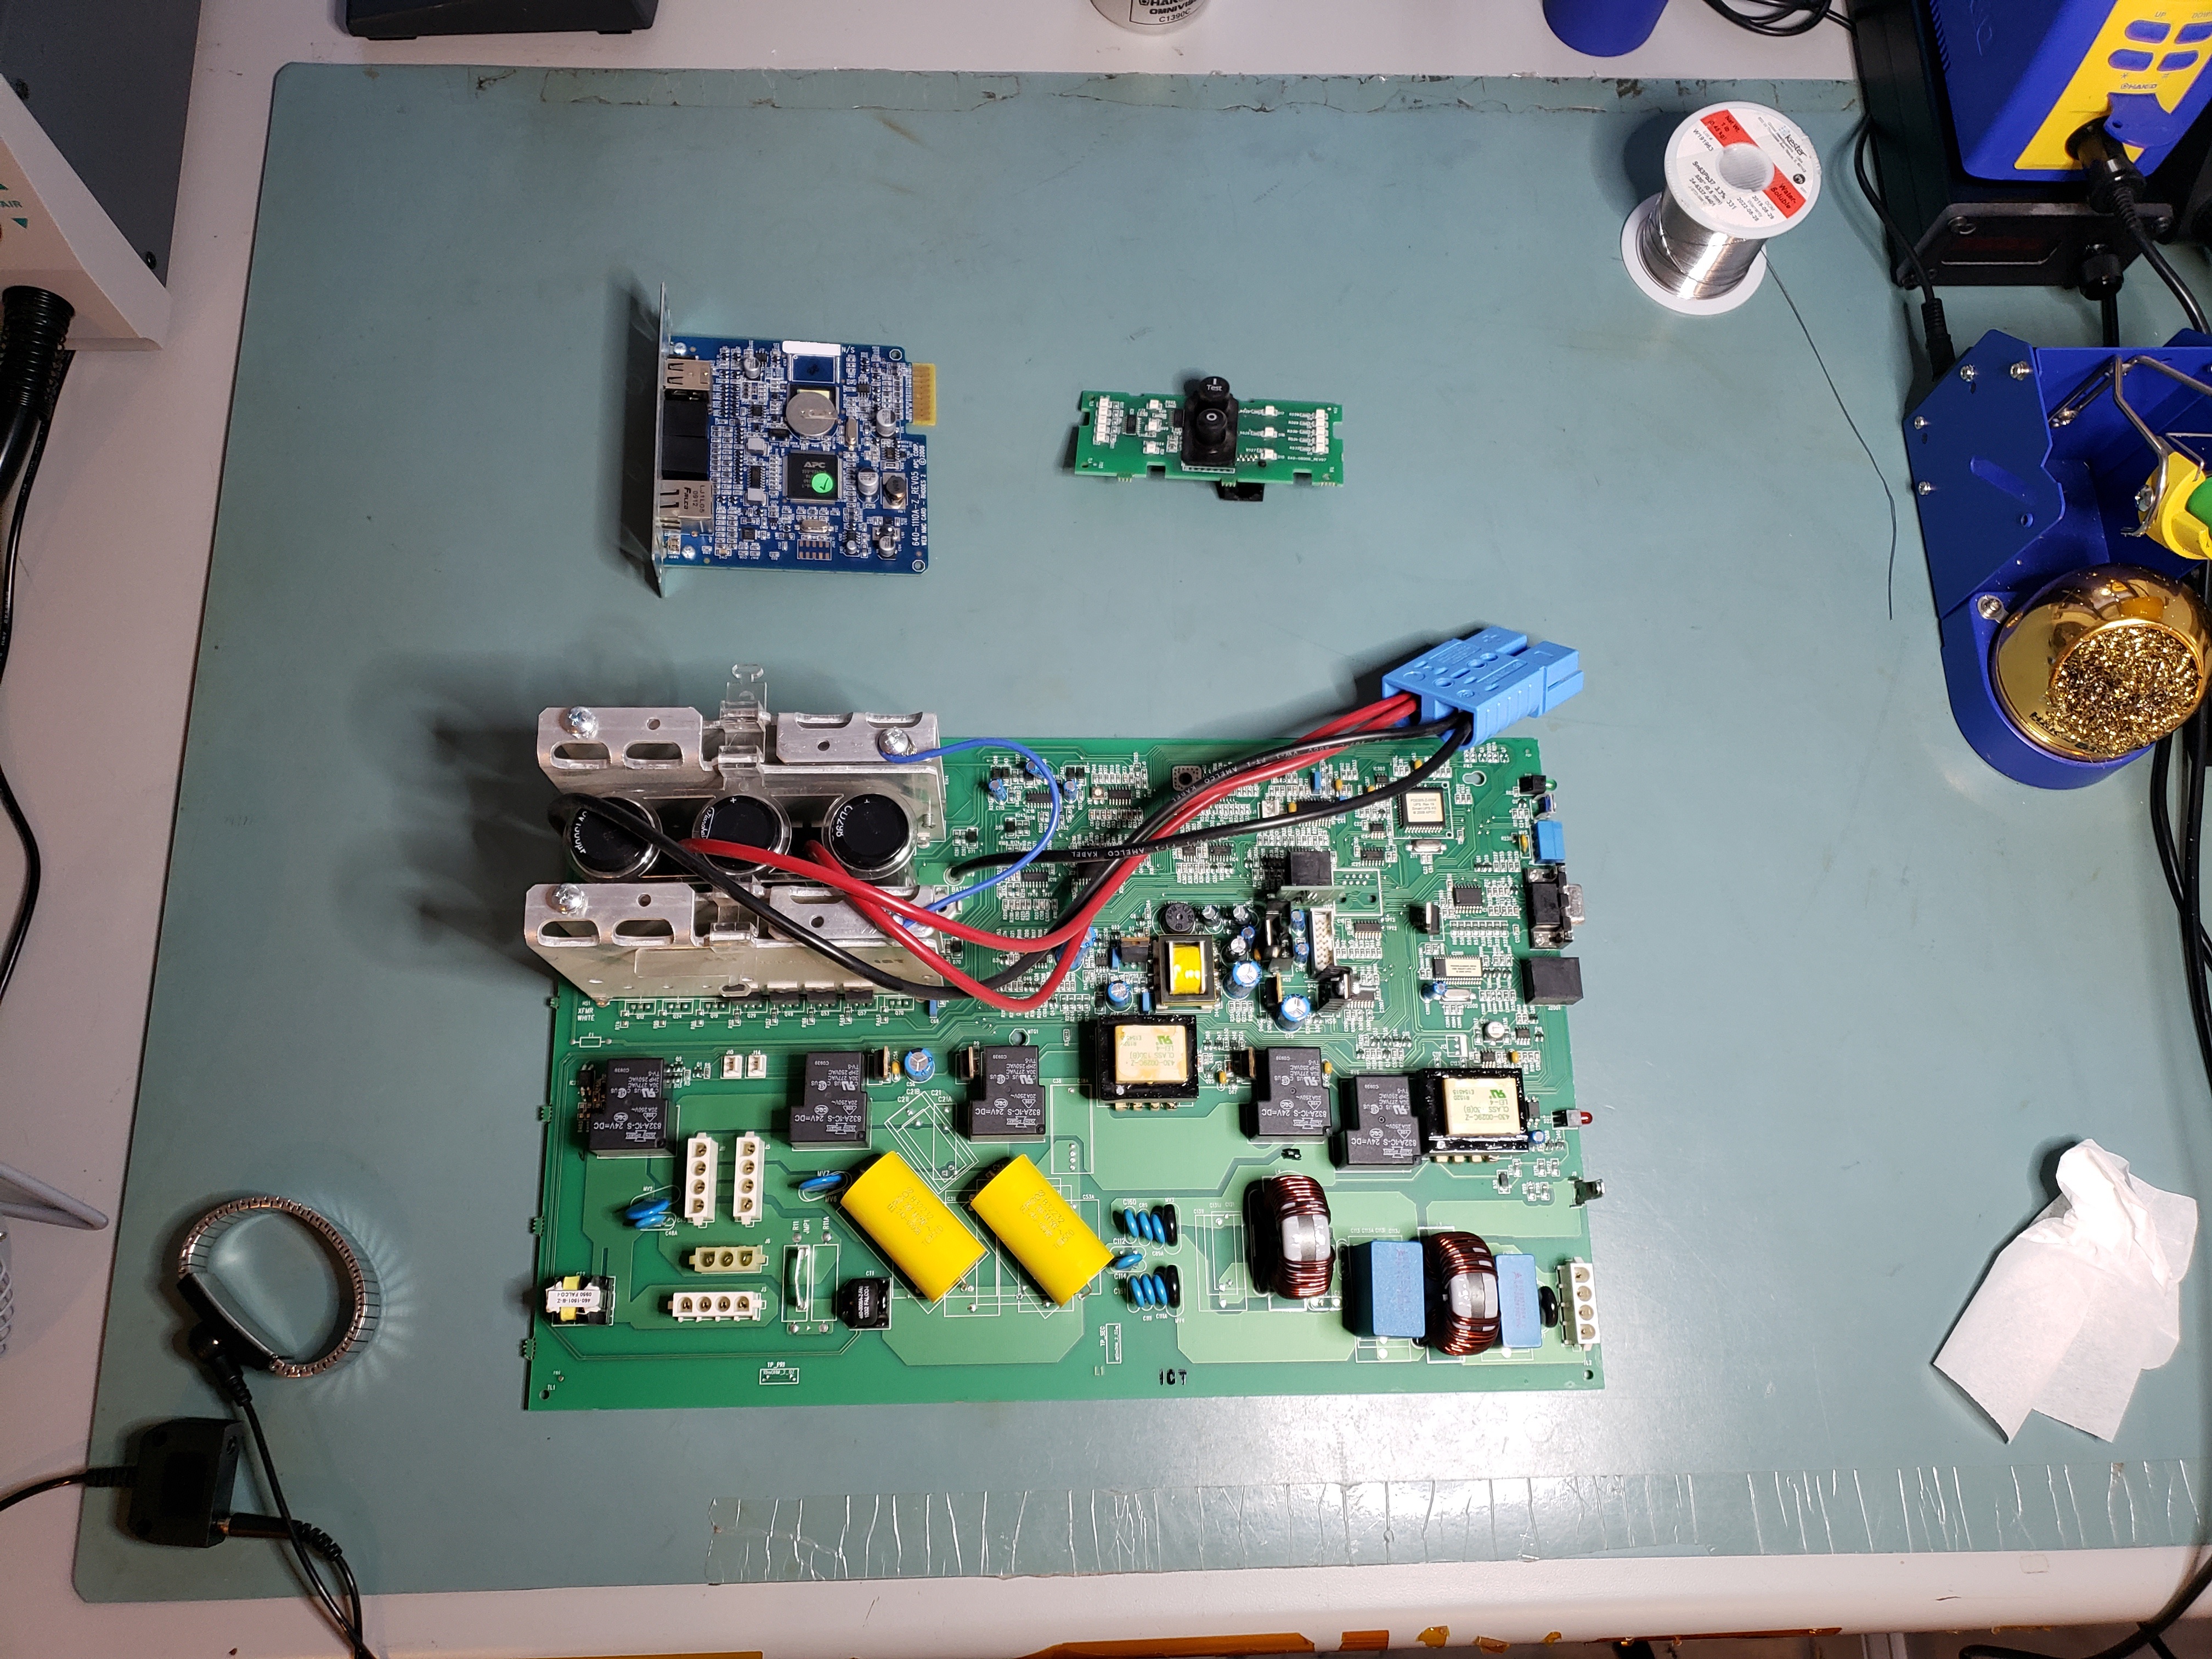
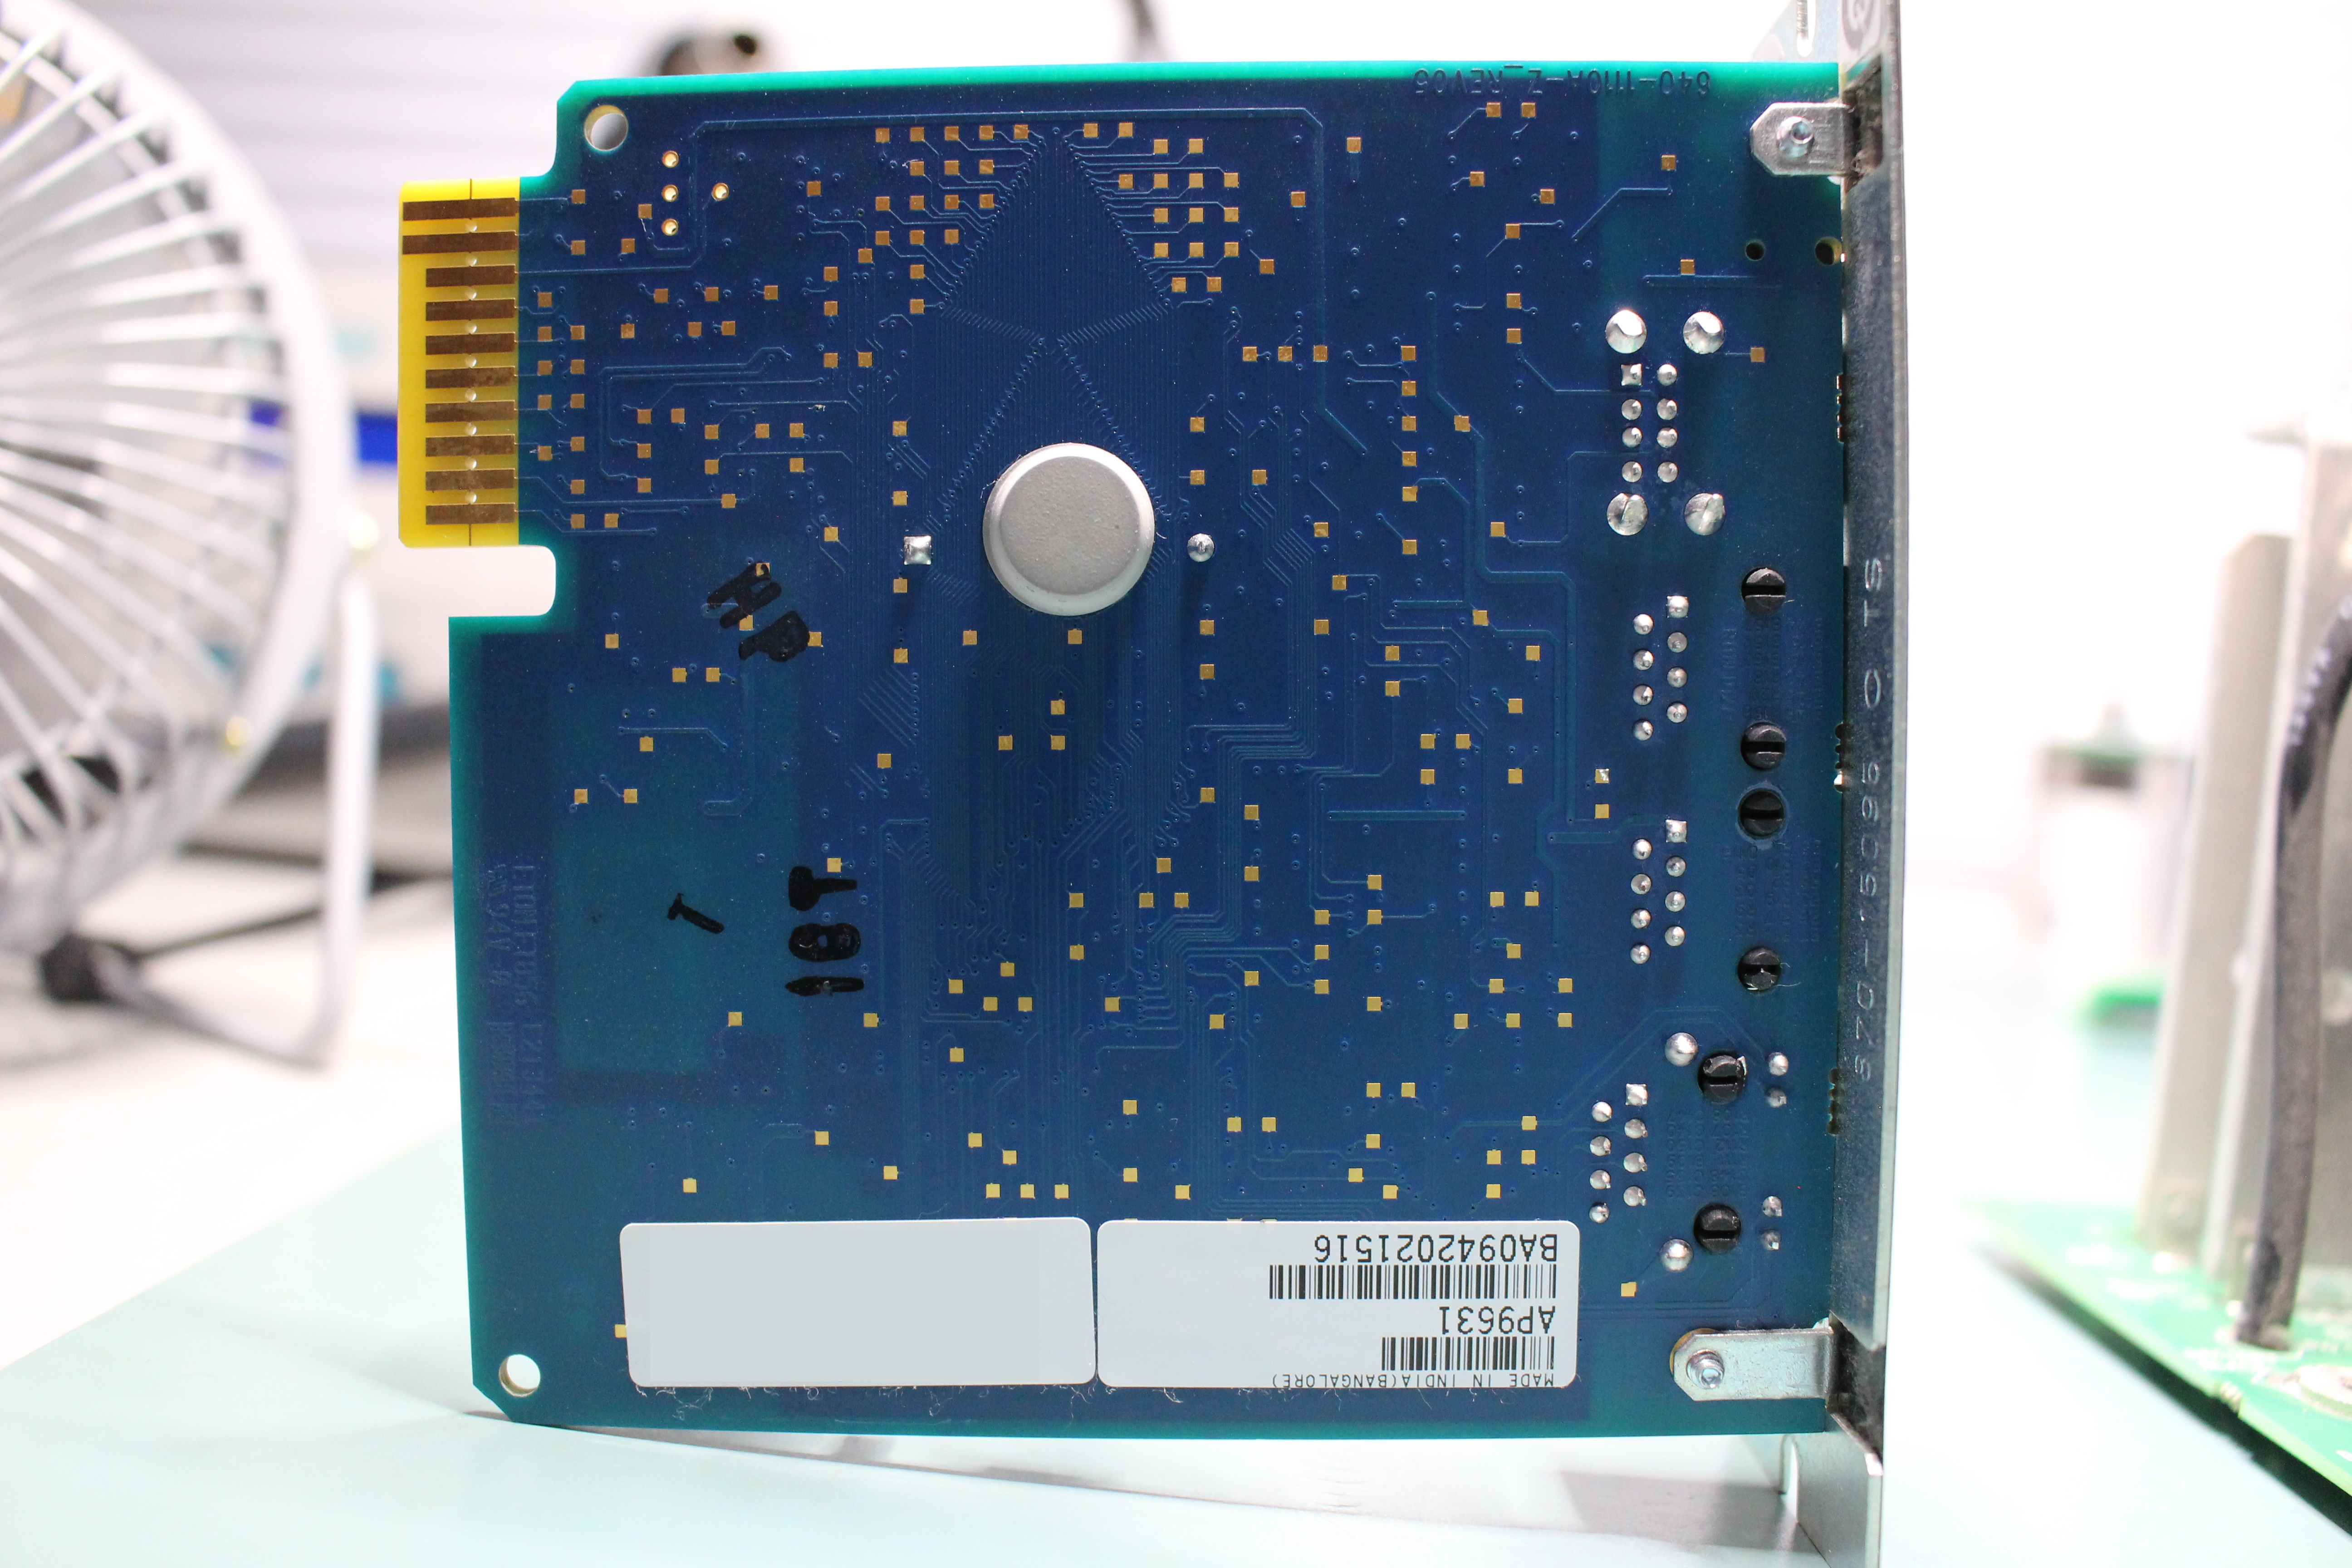
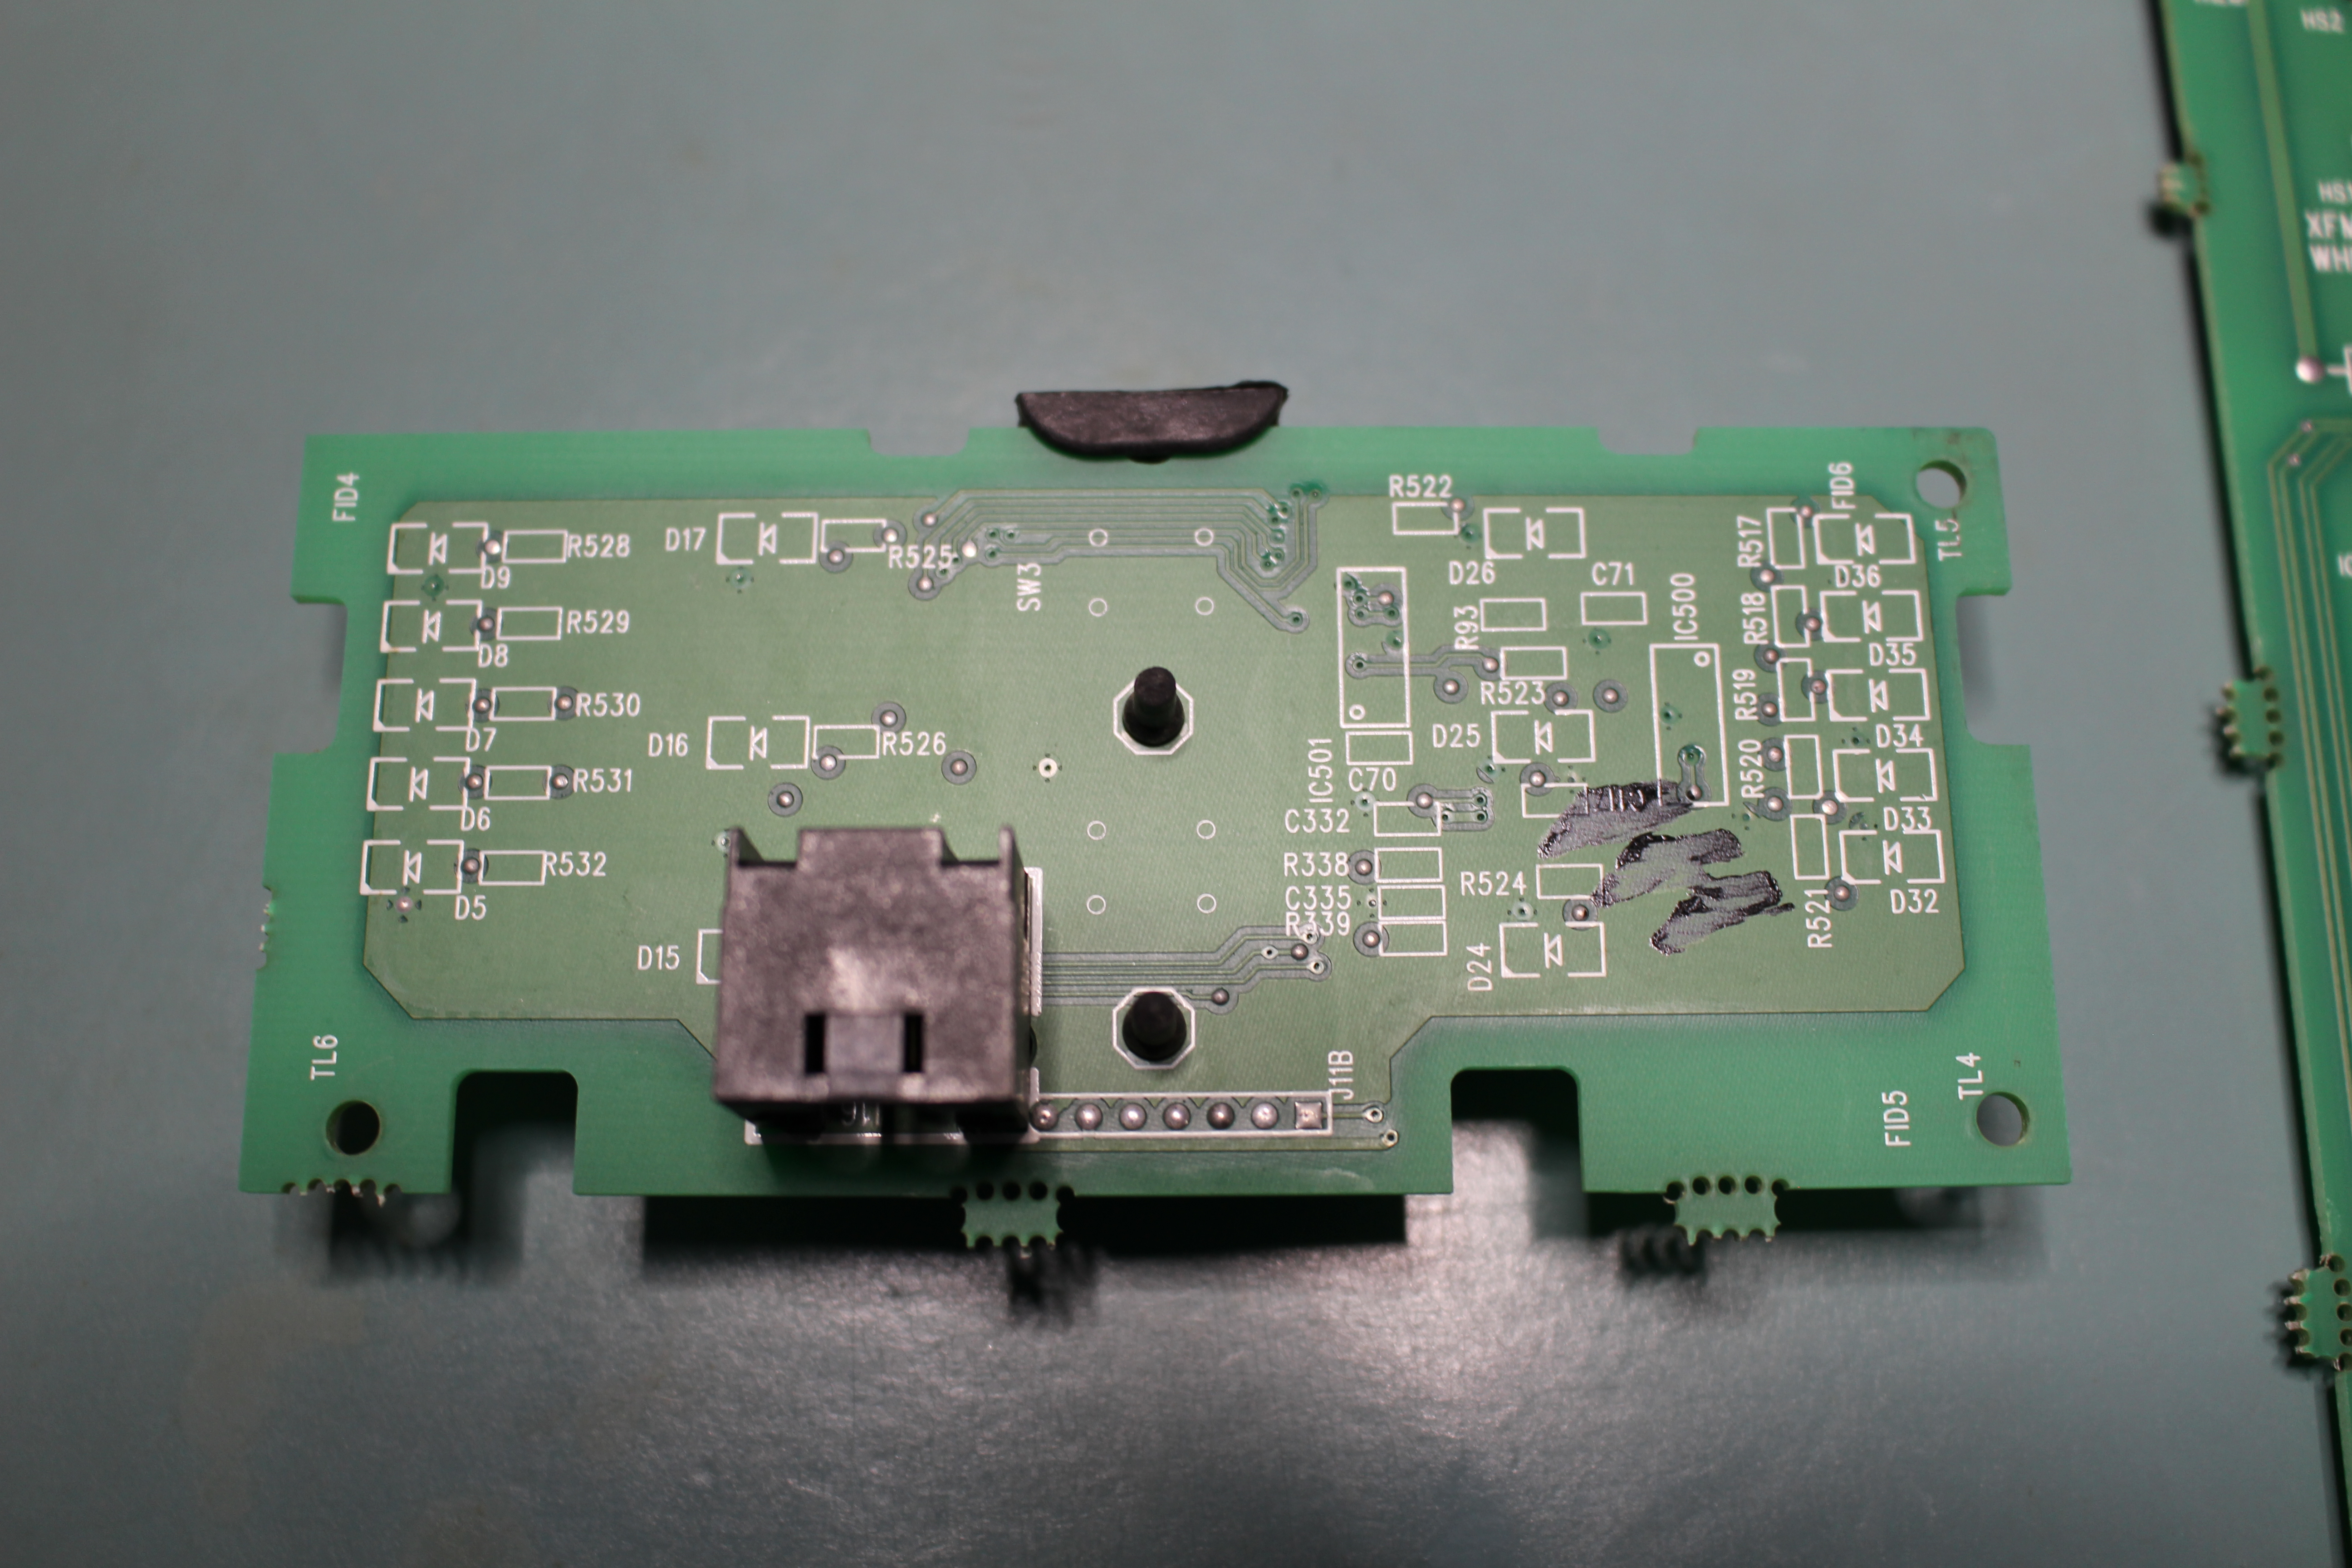
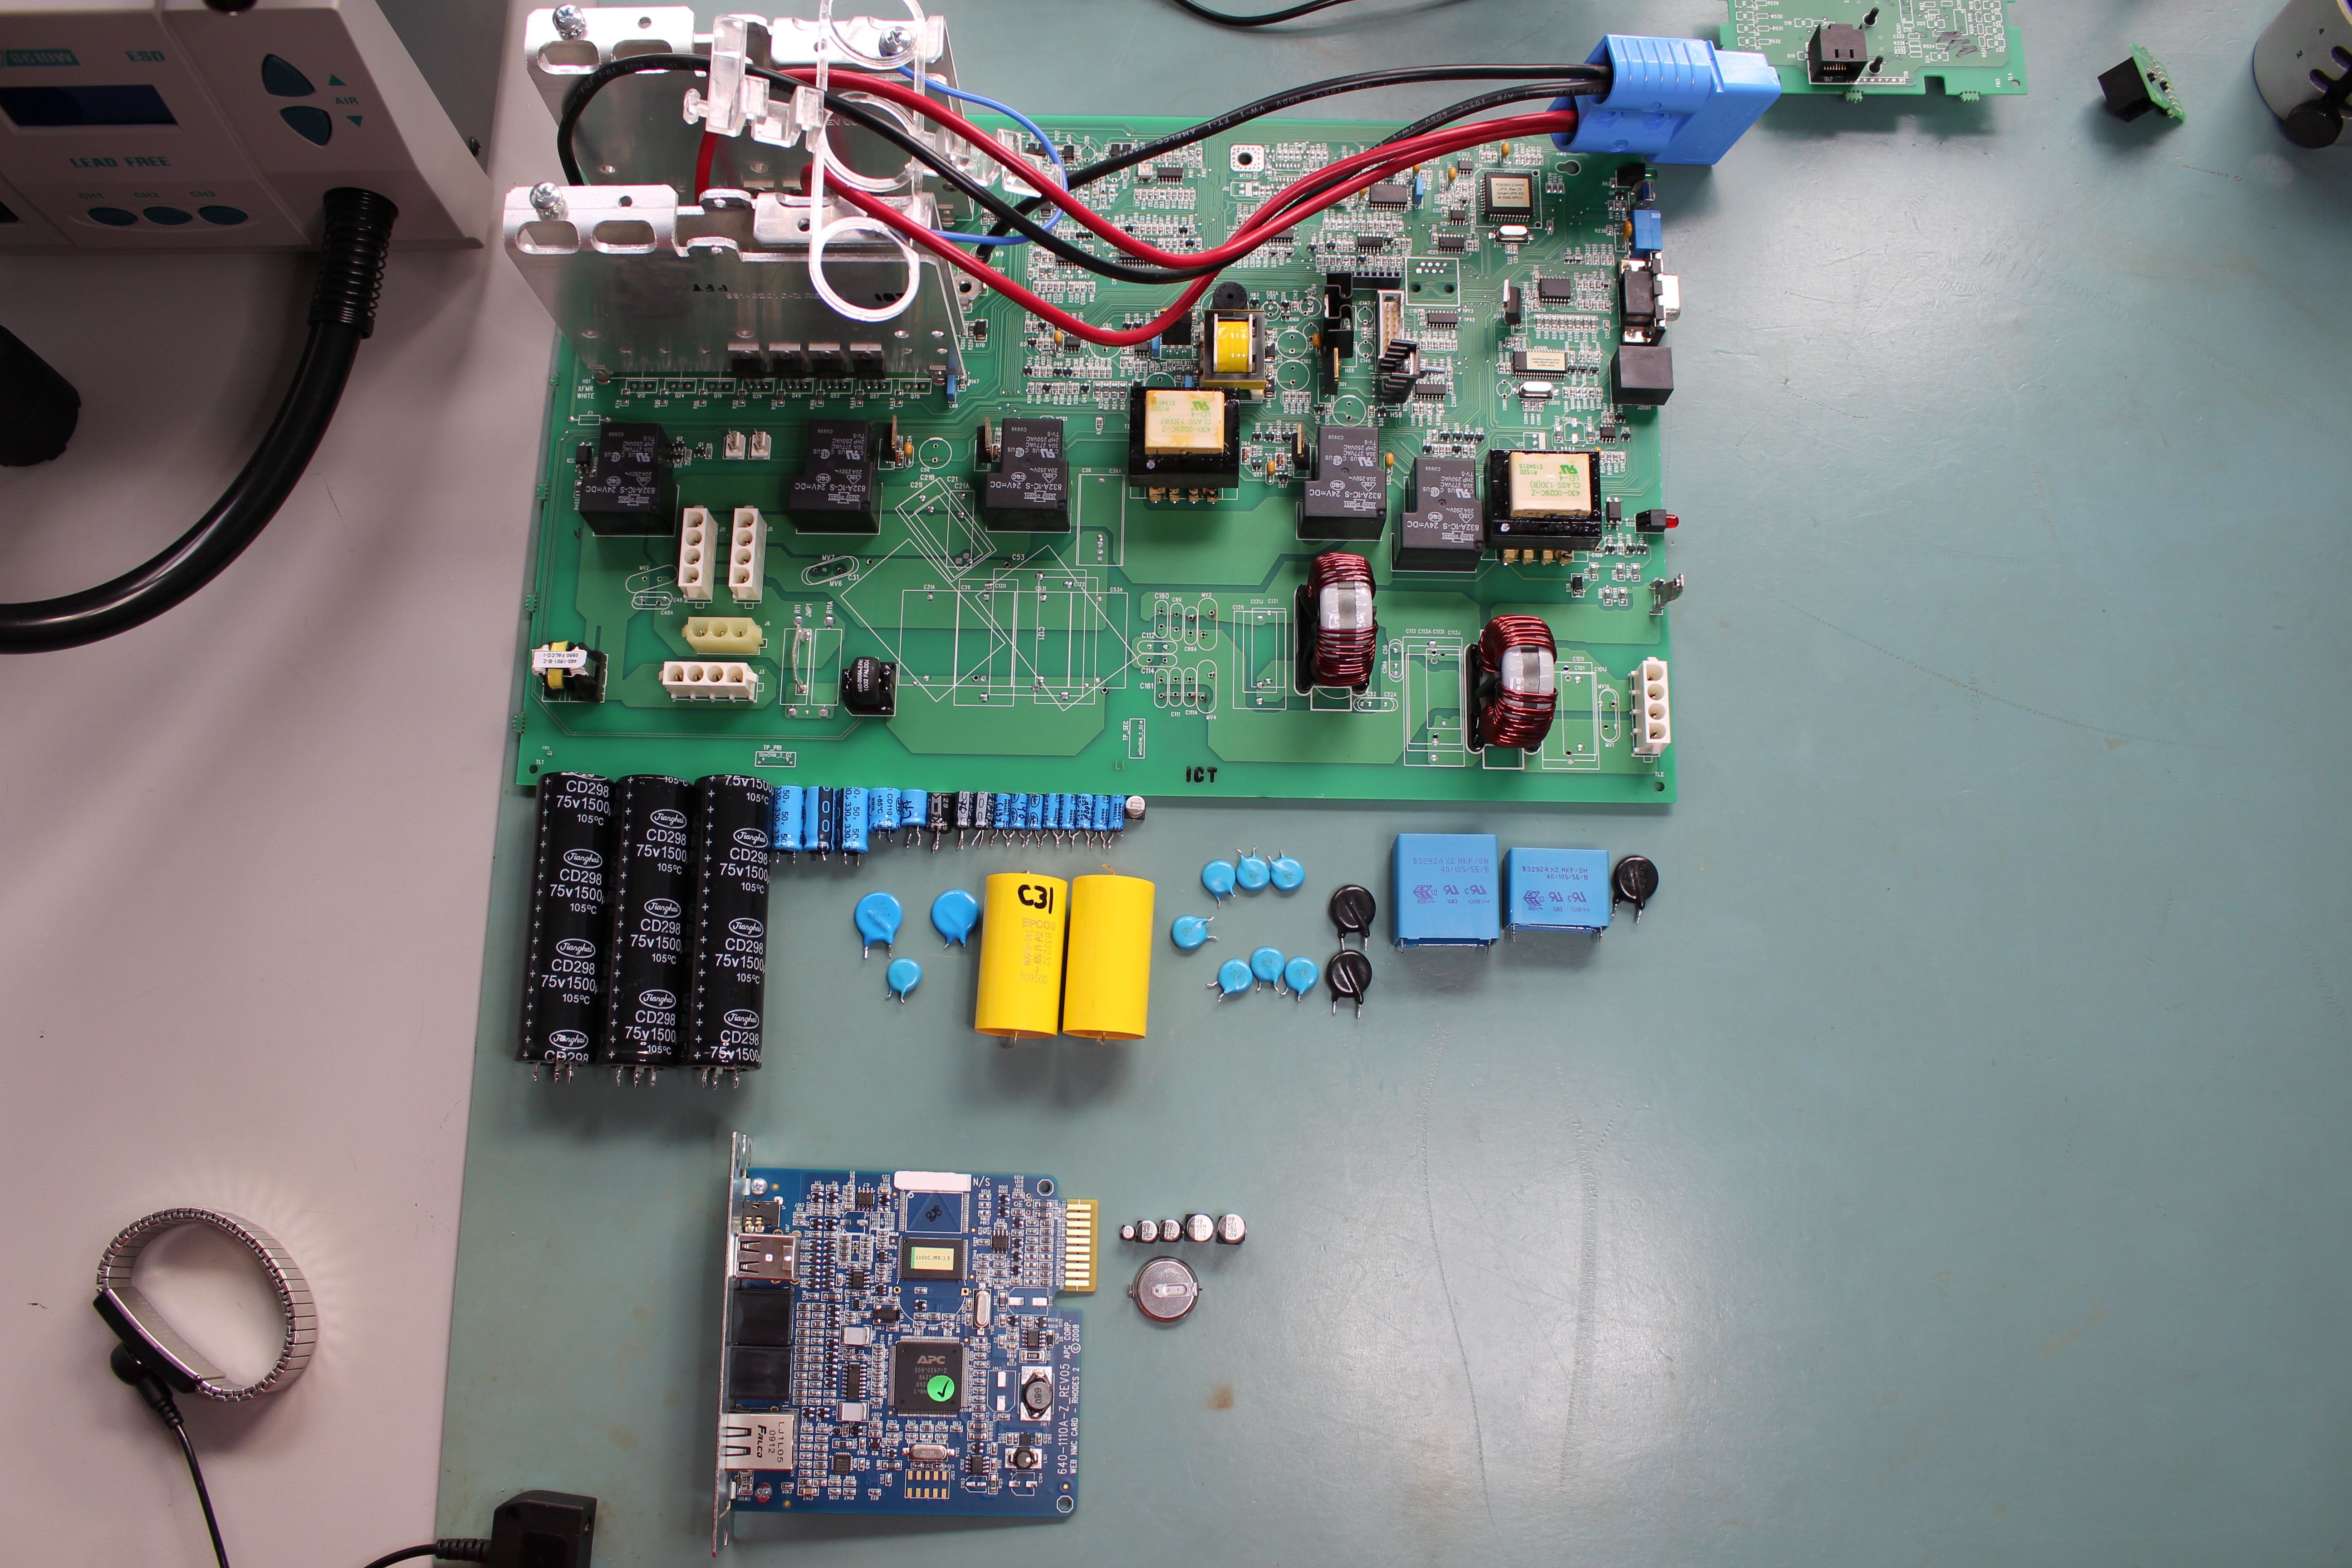
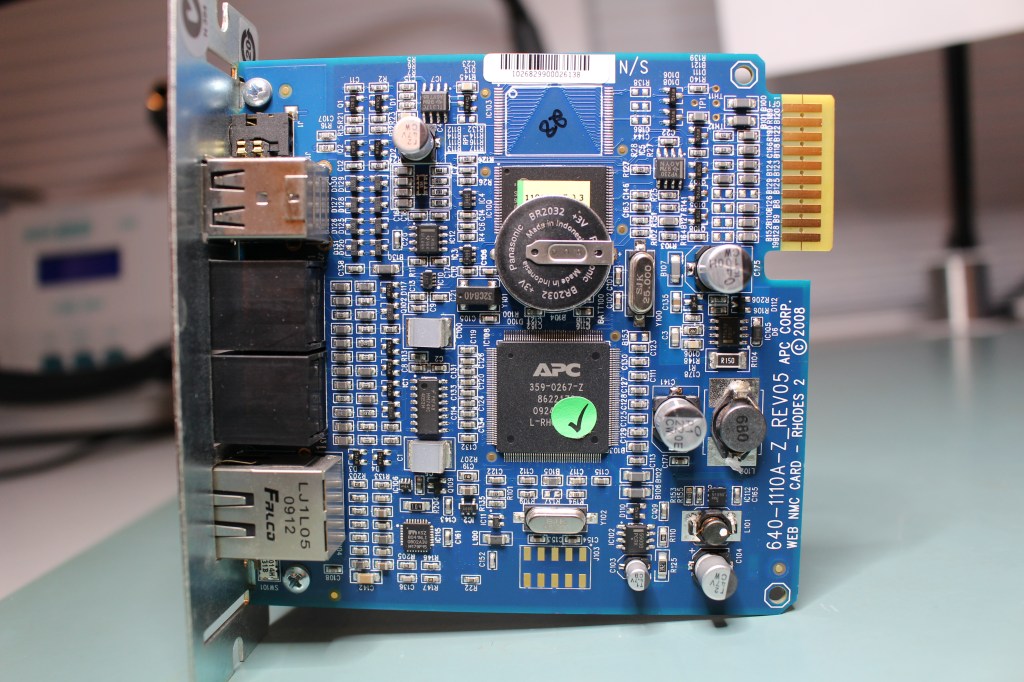
Now we’re all set to examine the board and figure out what we want to replace. While we’re at it, lets take a look at the network card and the front panel board as well.
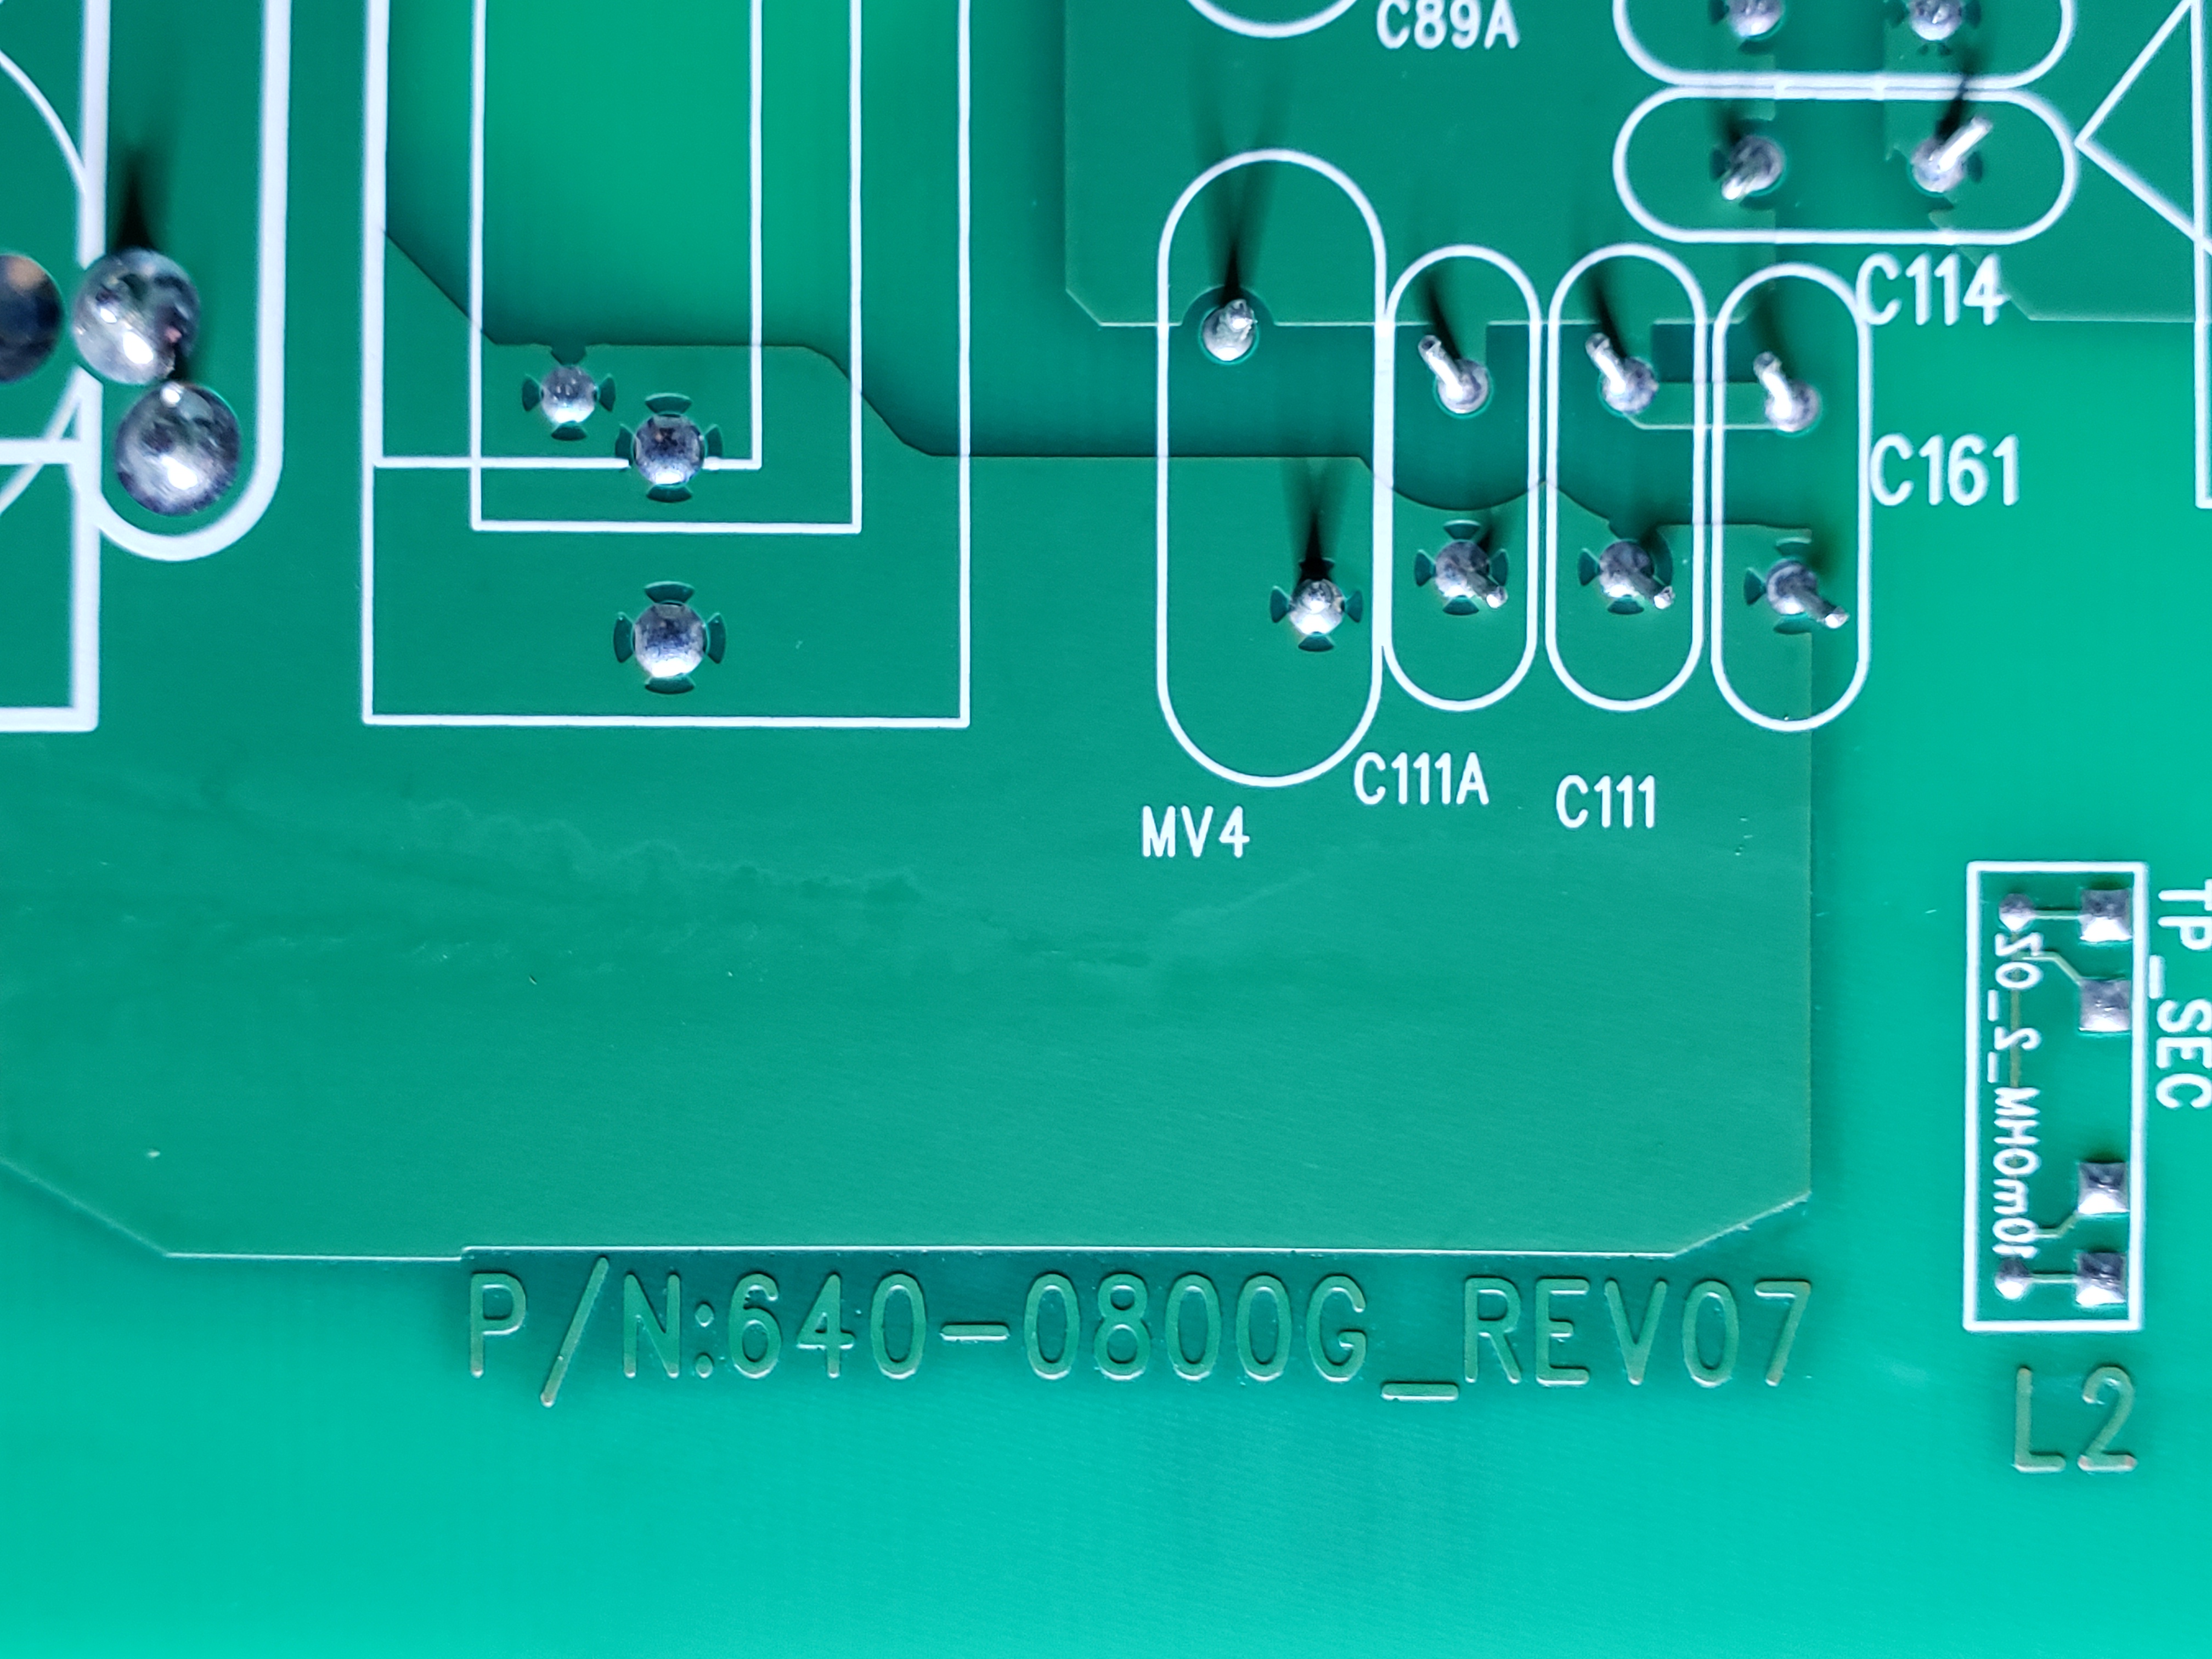
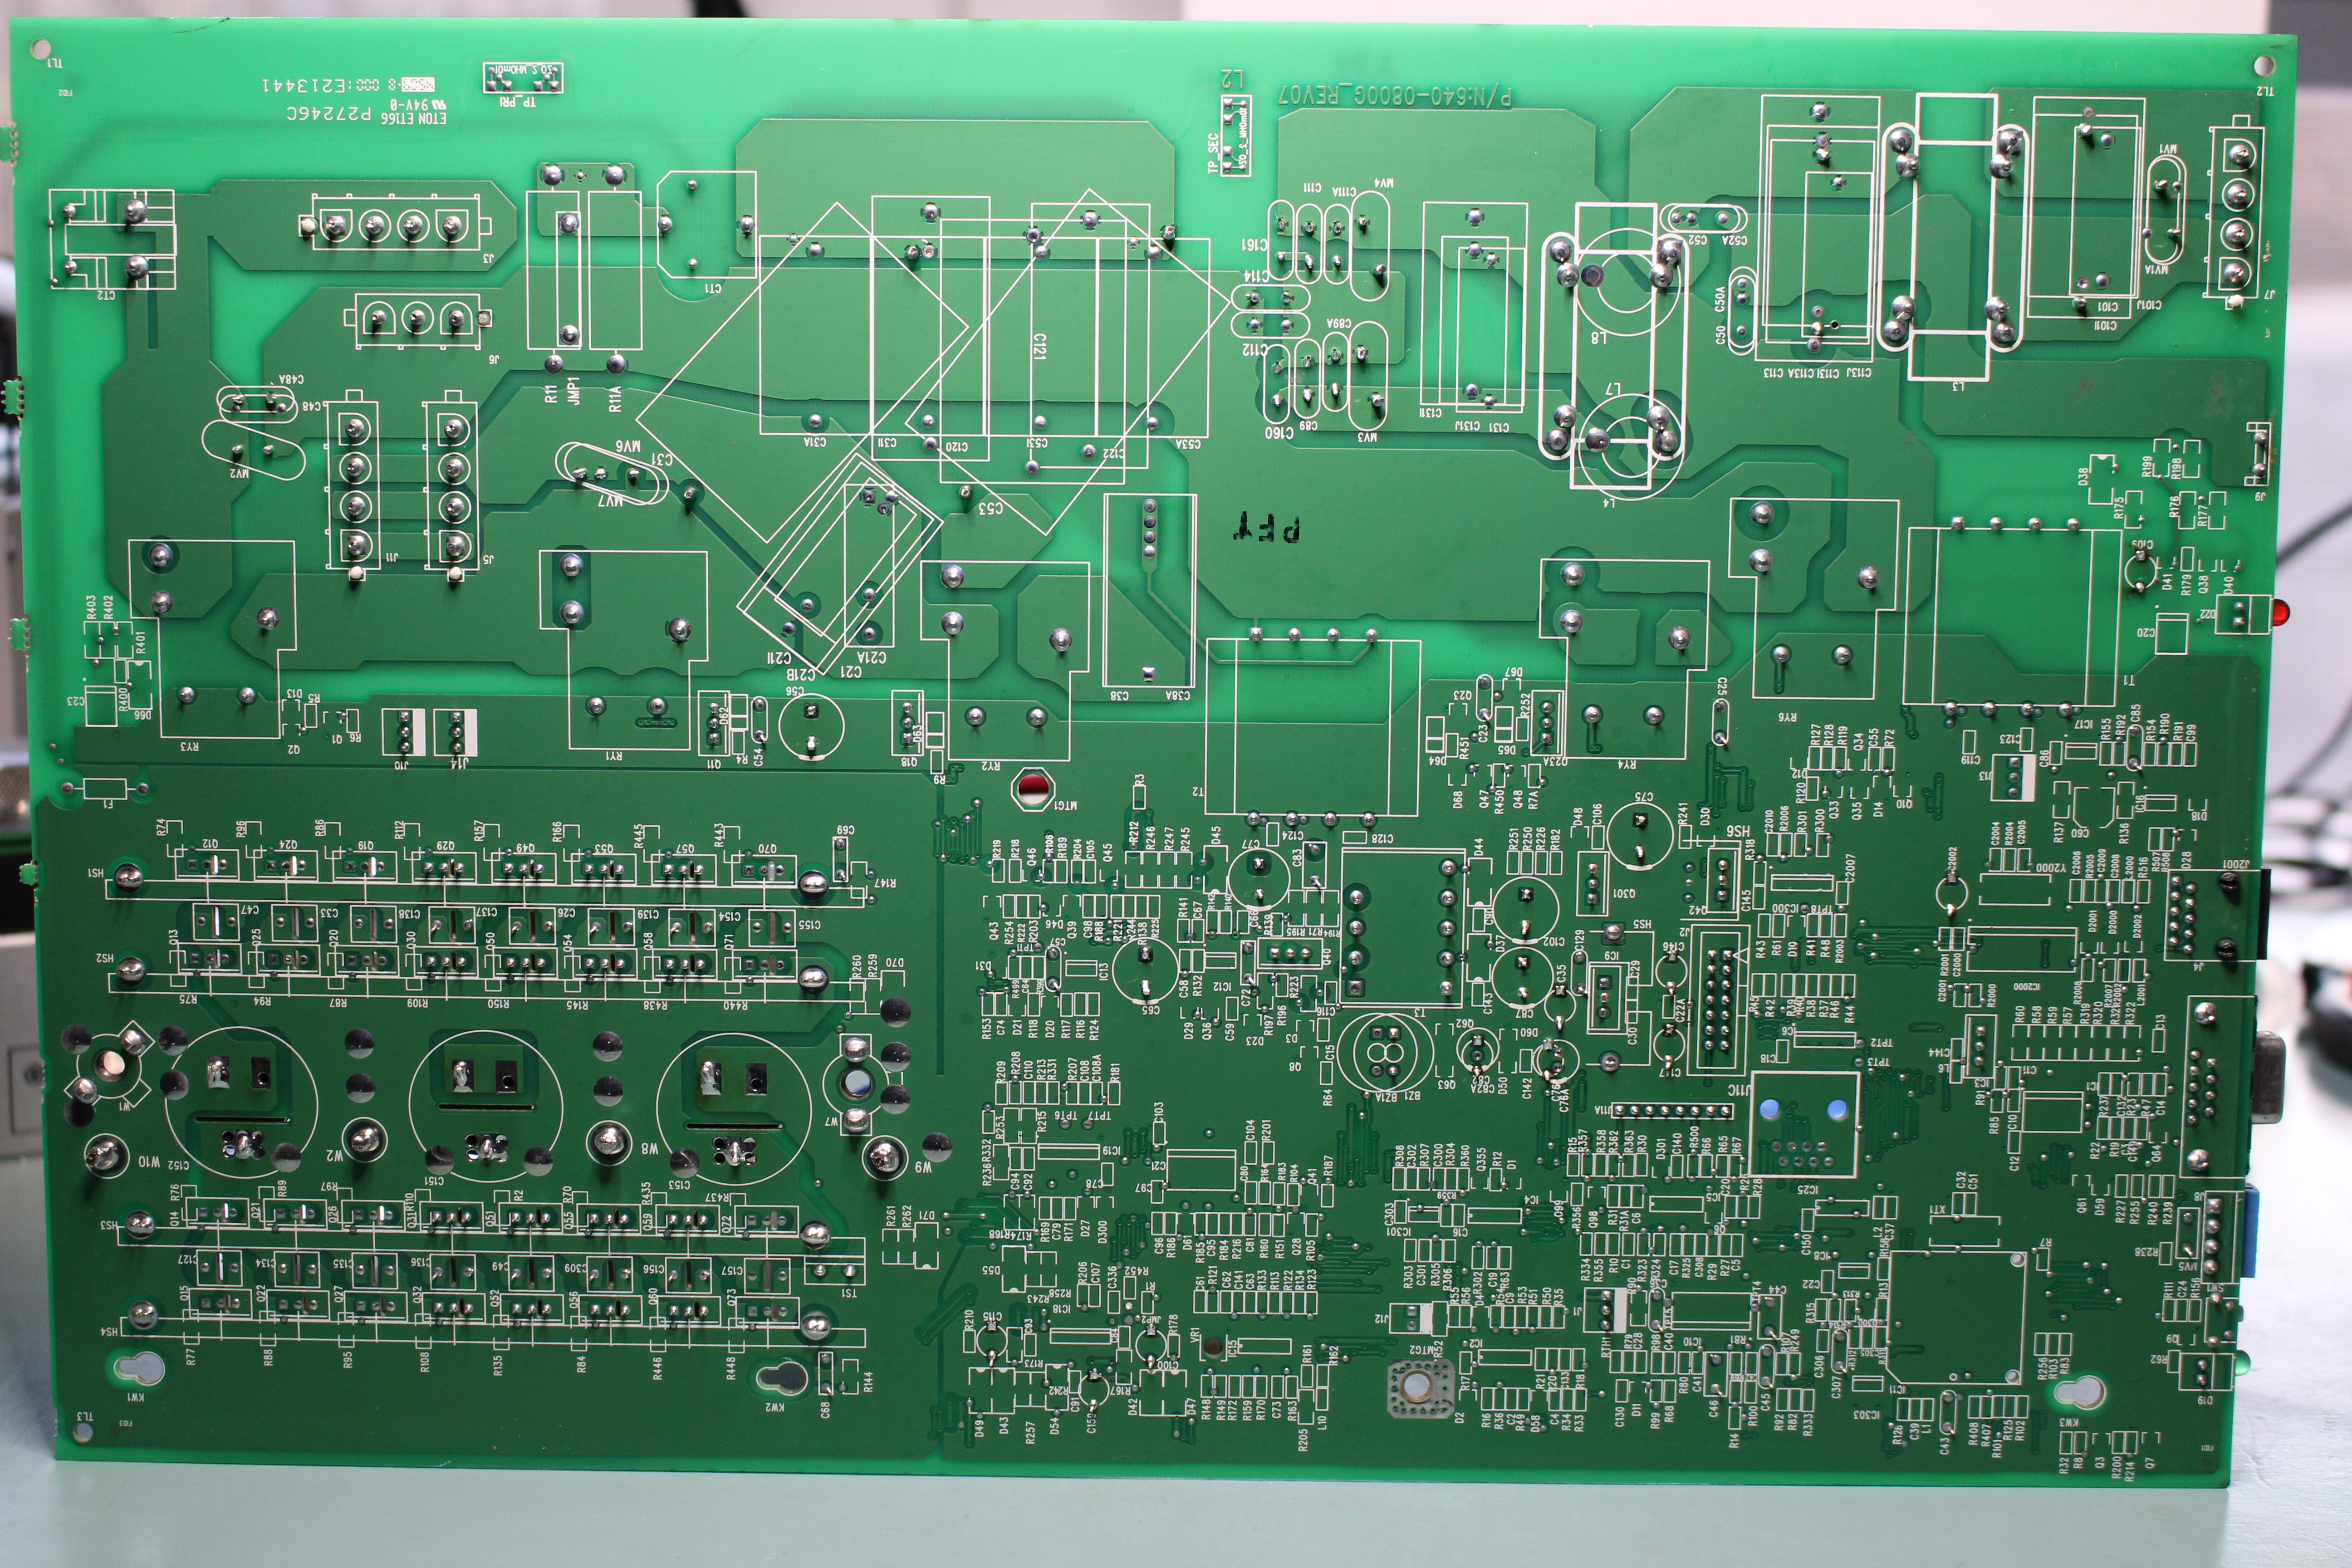
Some identification/part # markings on the main board, for those who are curious:


And some hi-res photos of all the boards with a decent DSLR camera:
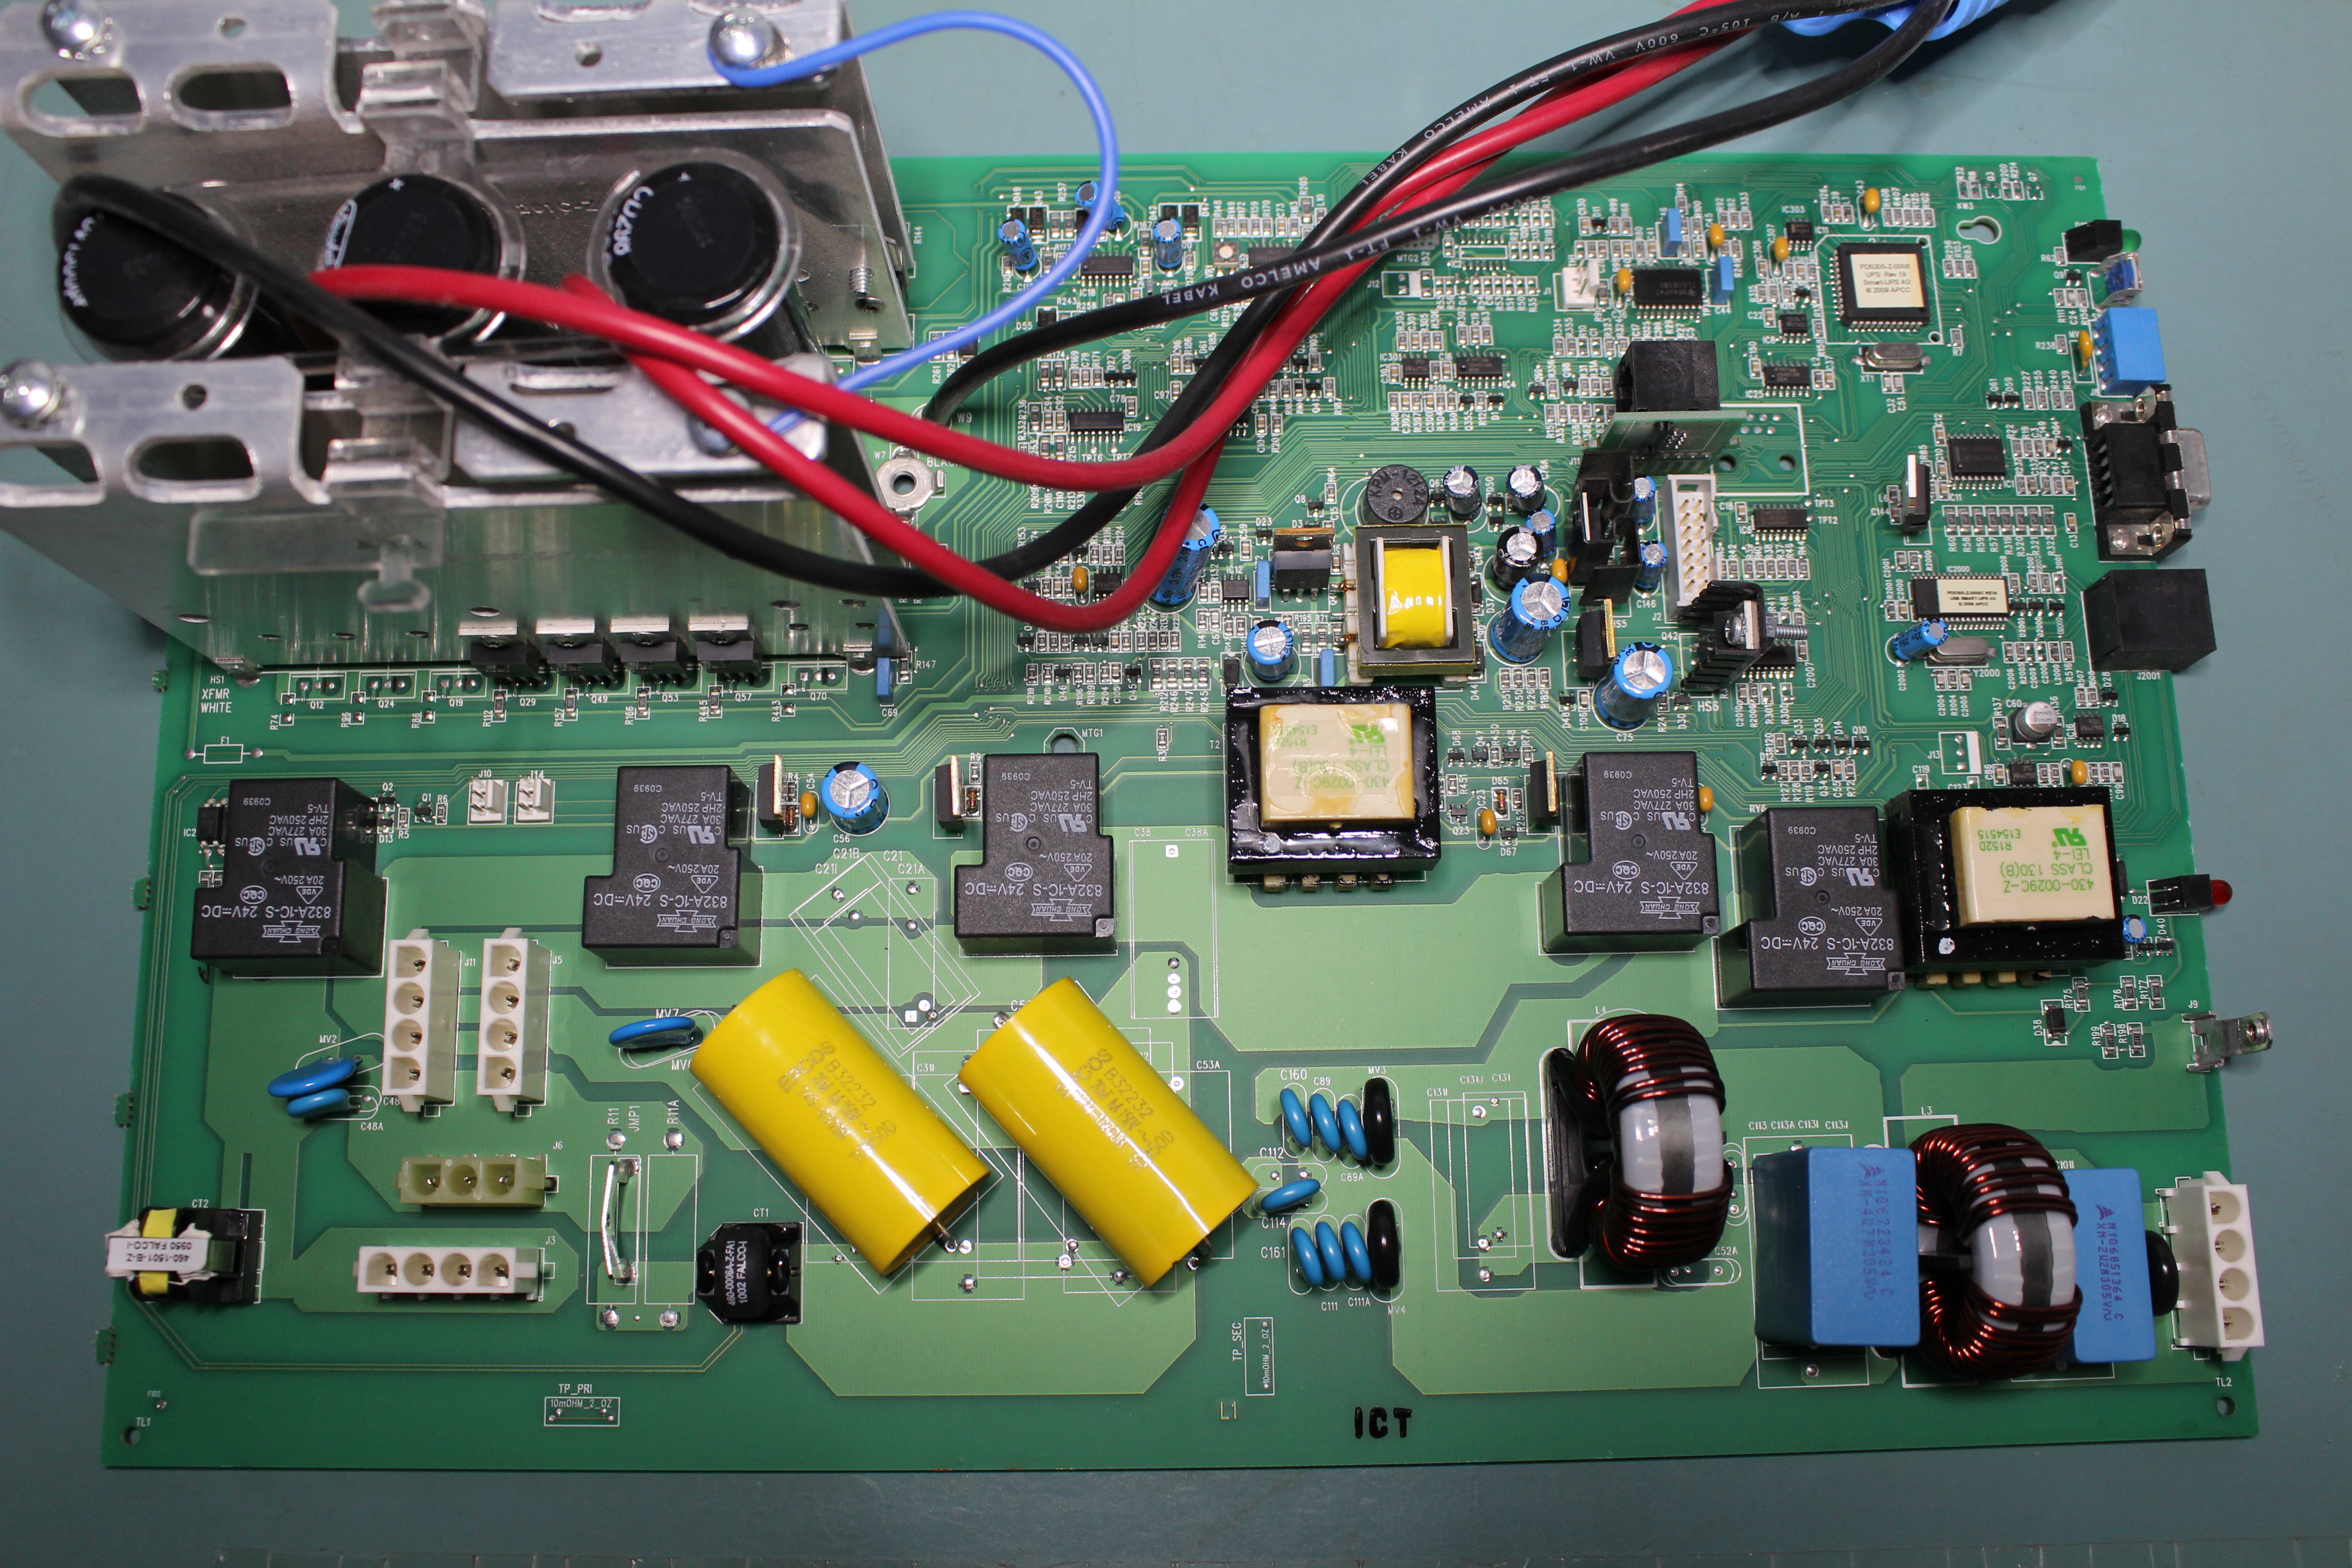
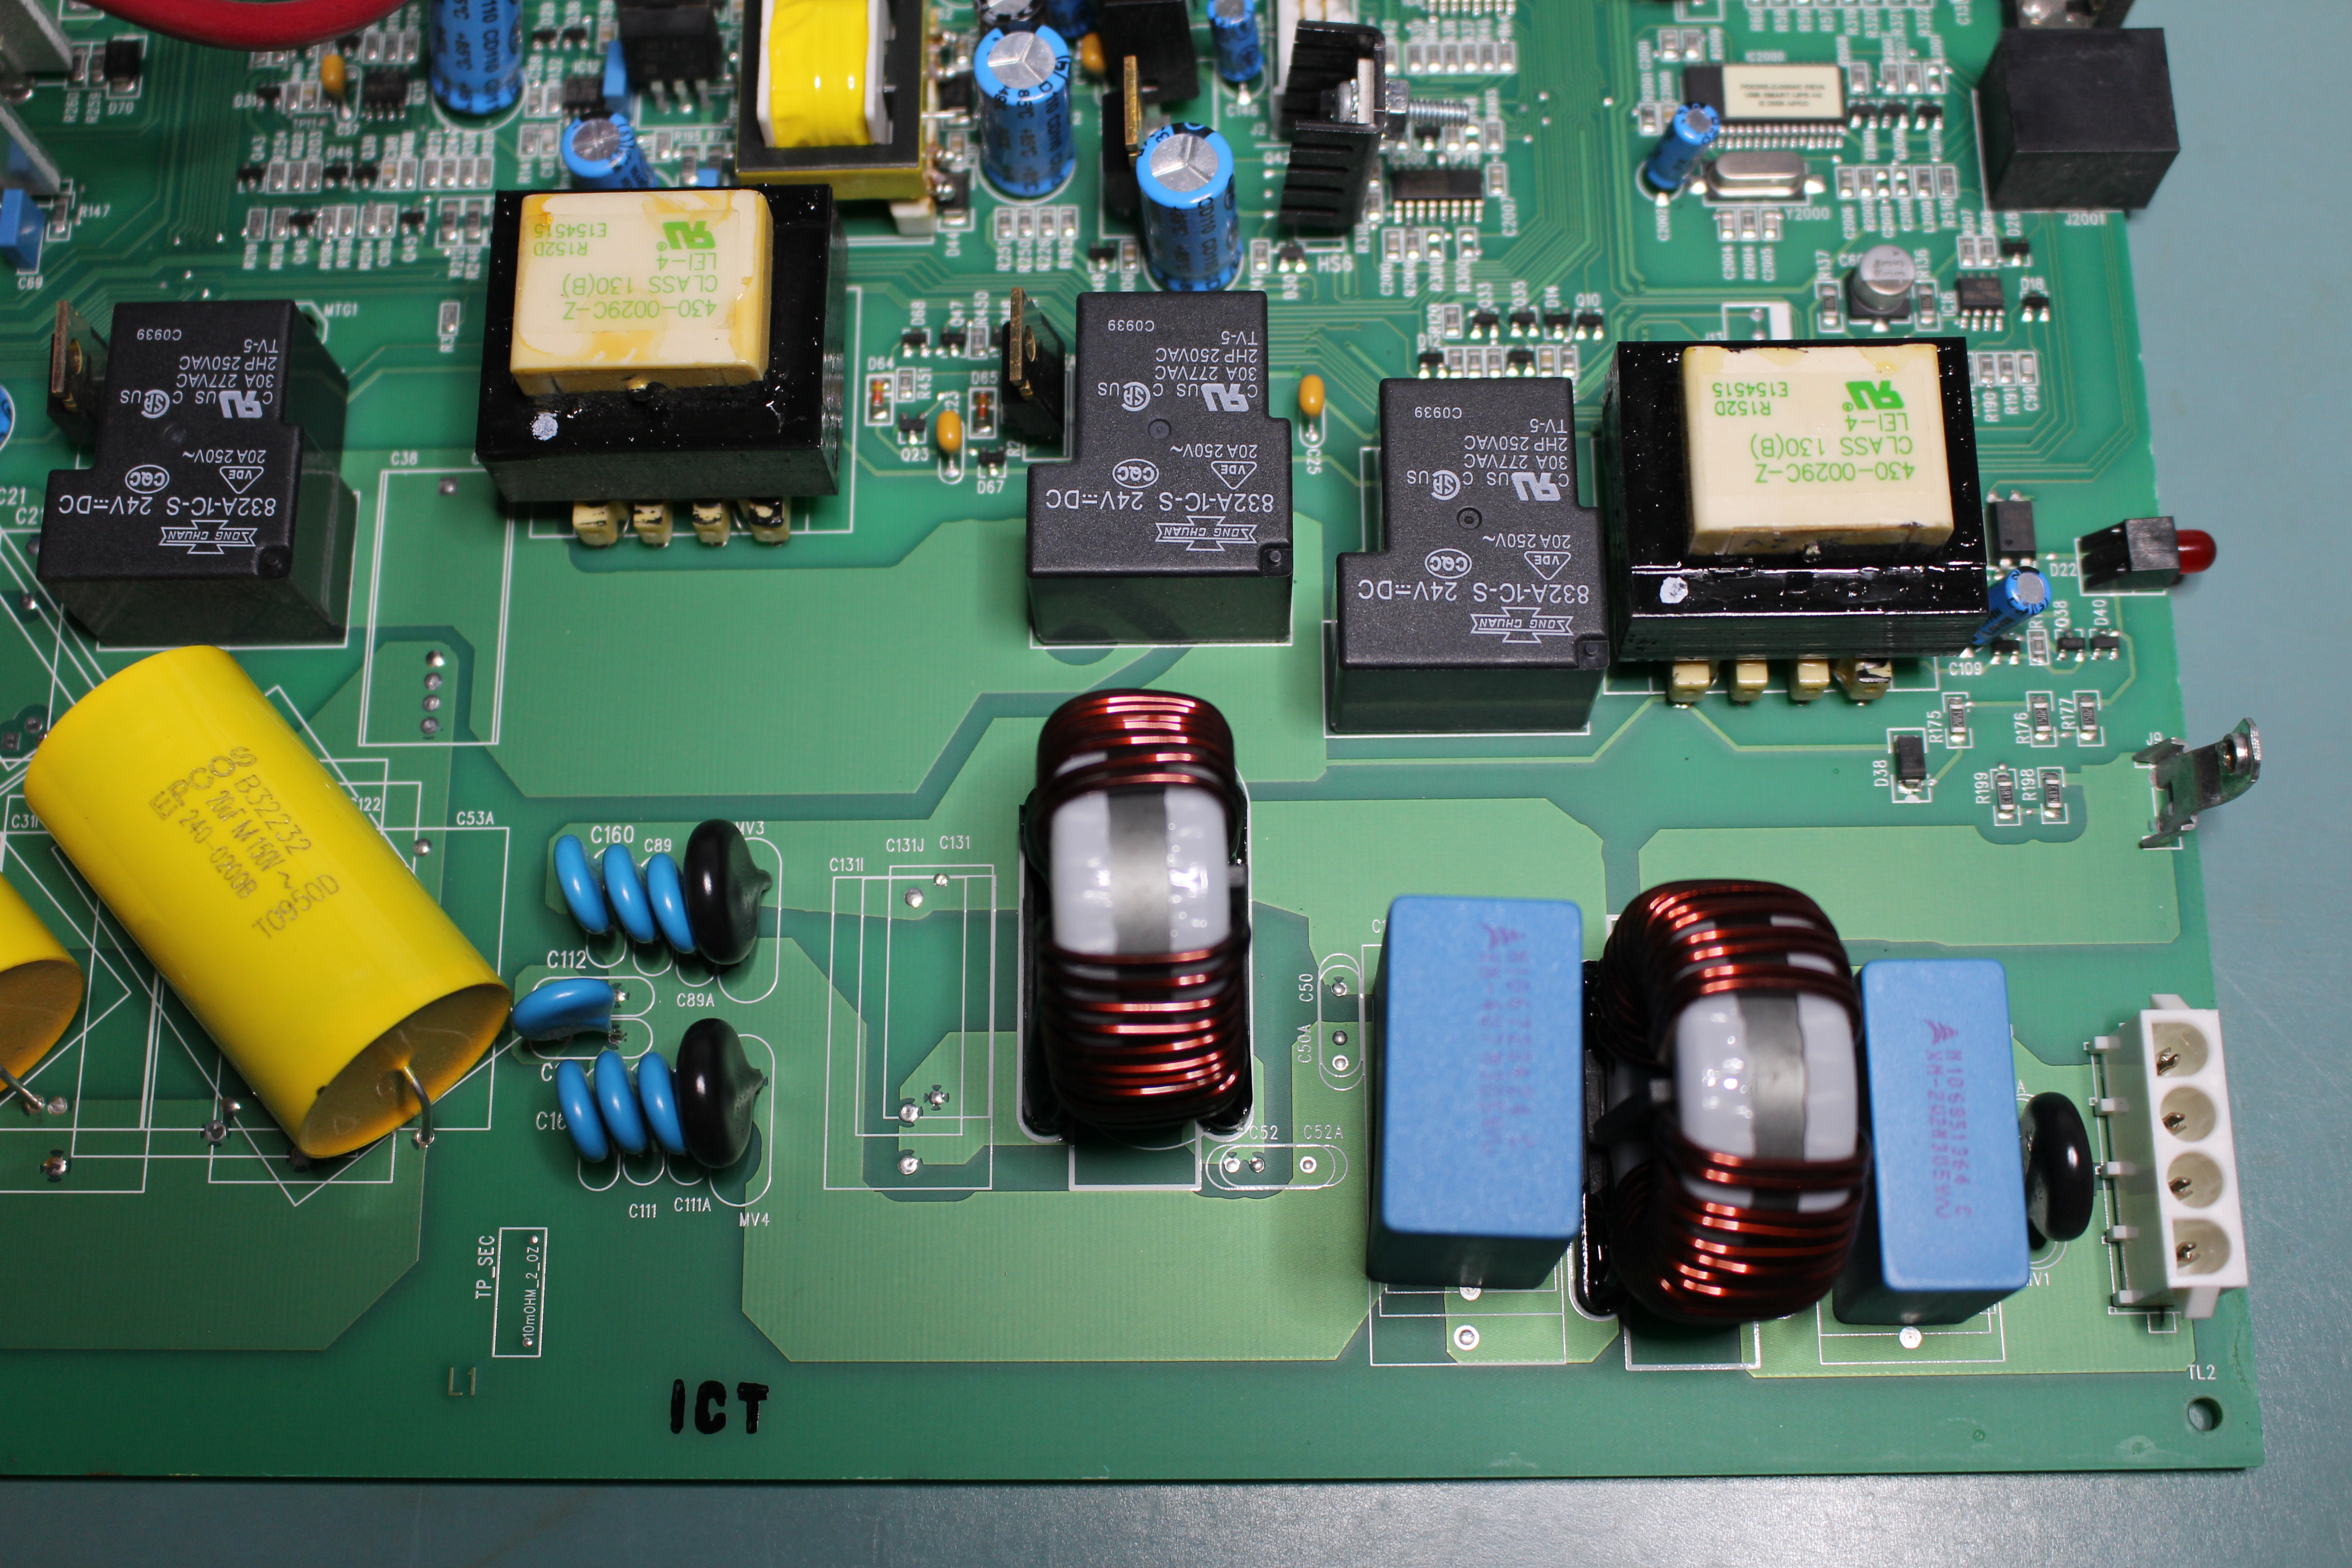
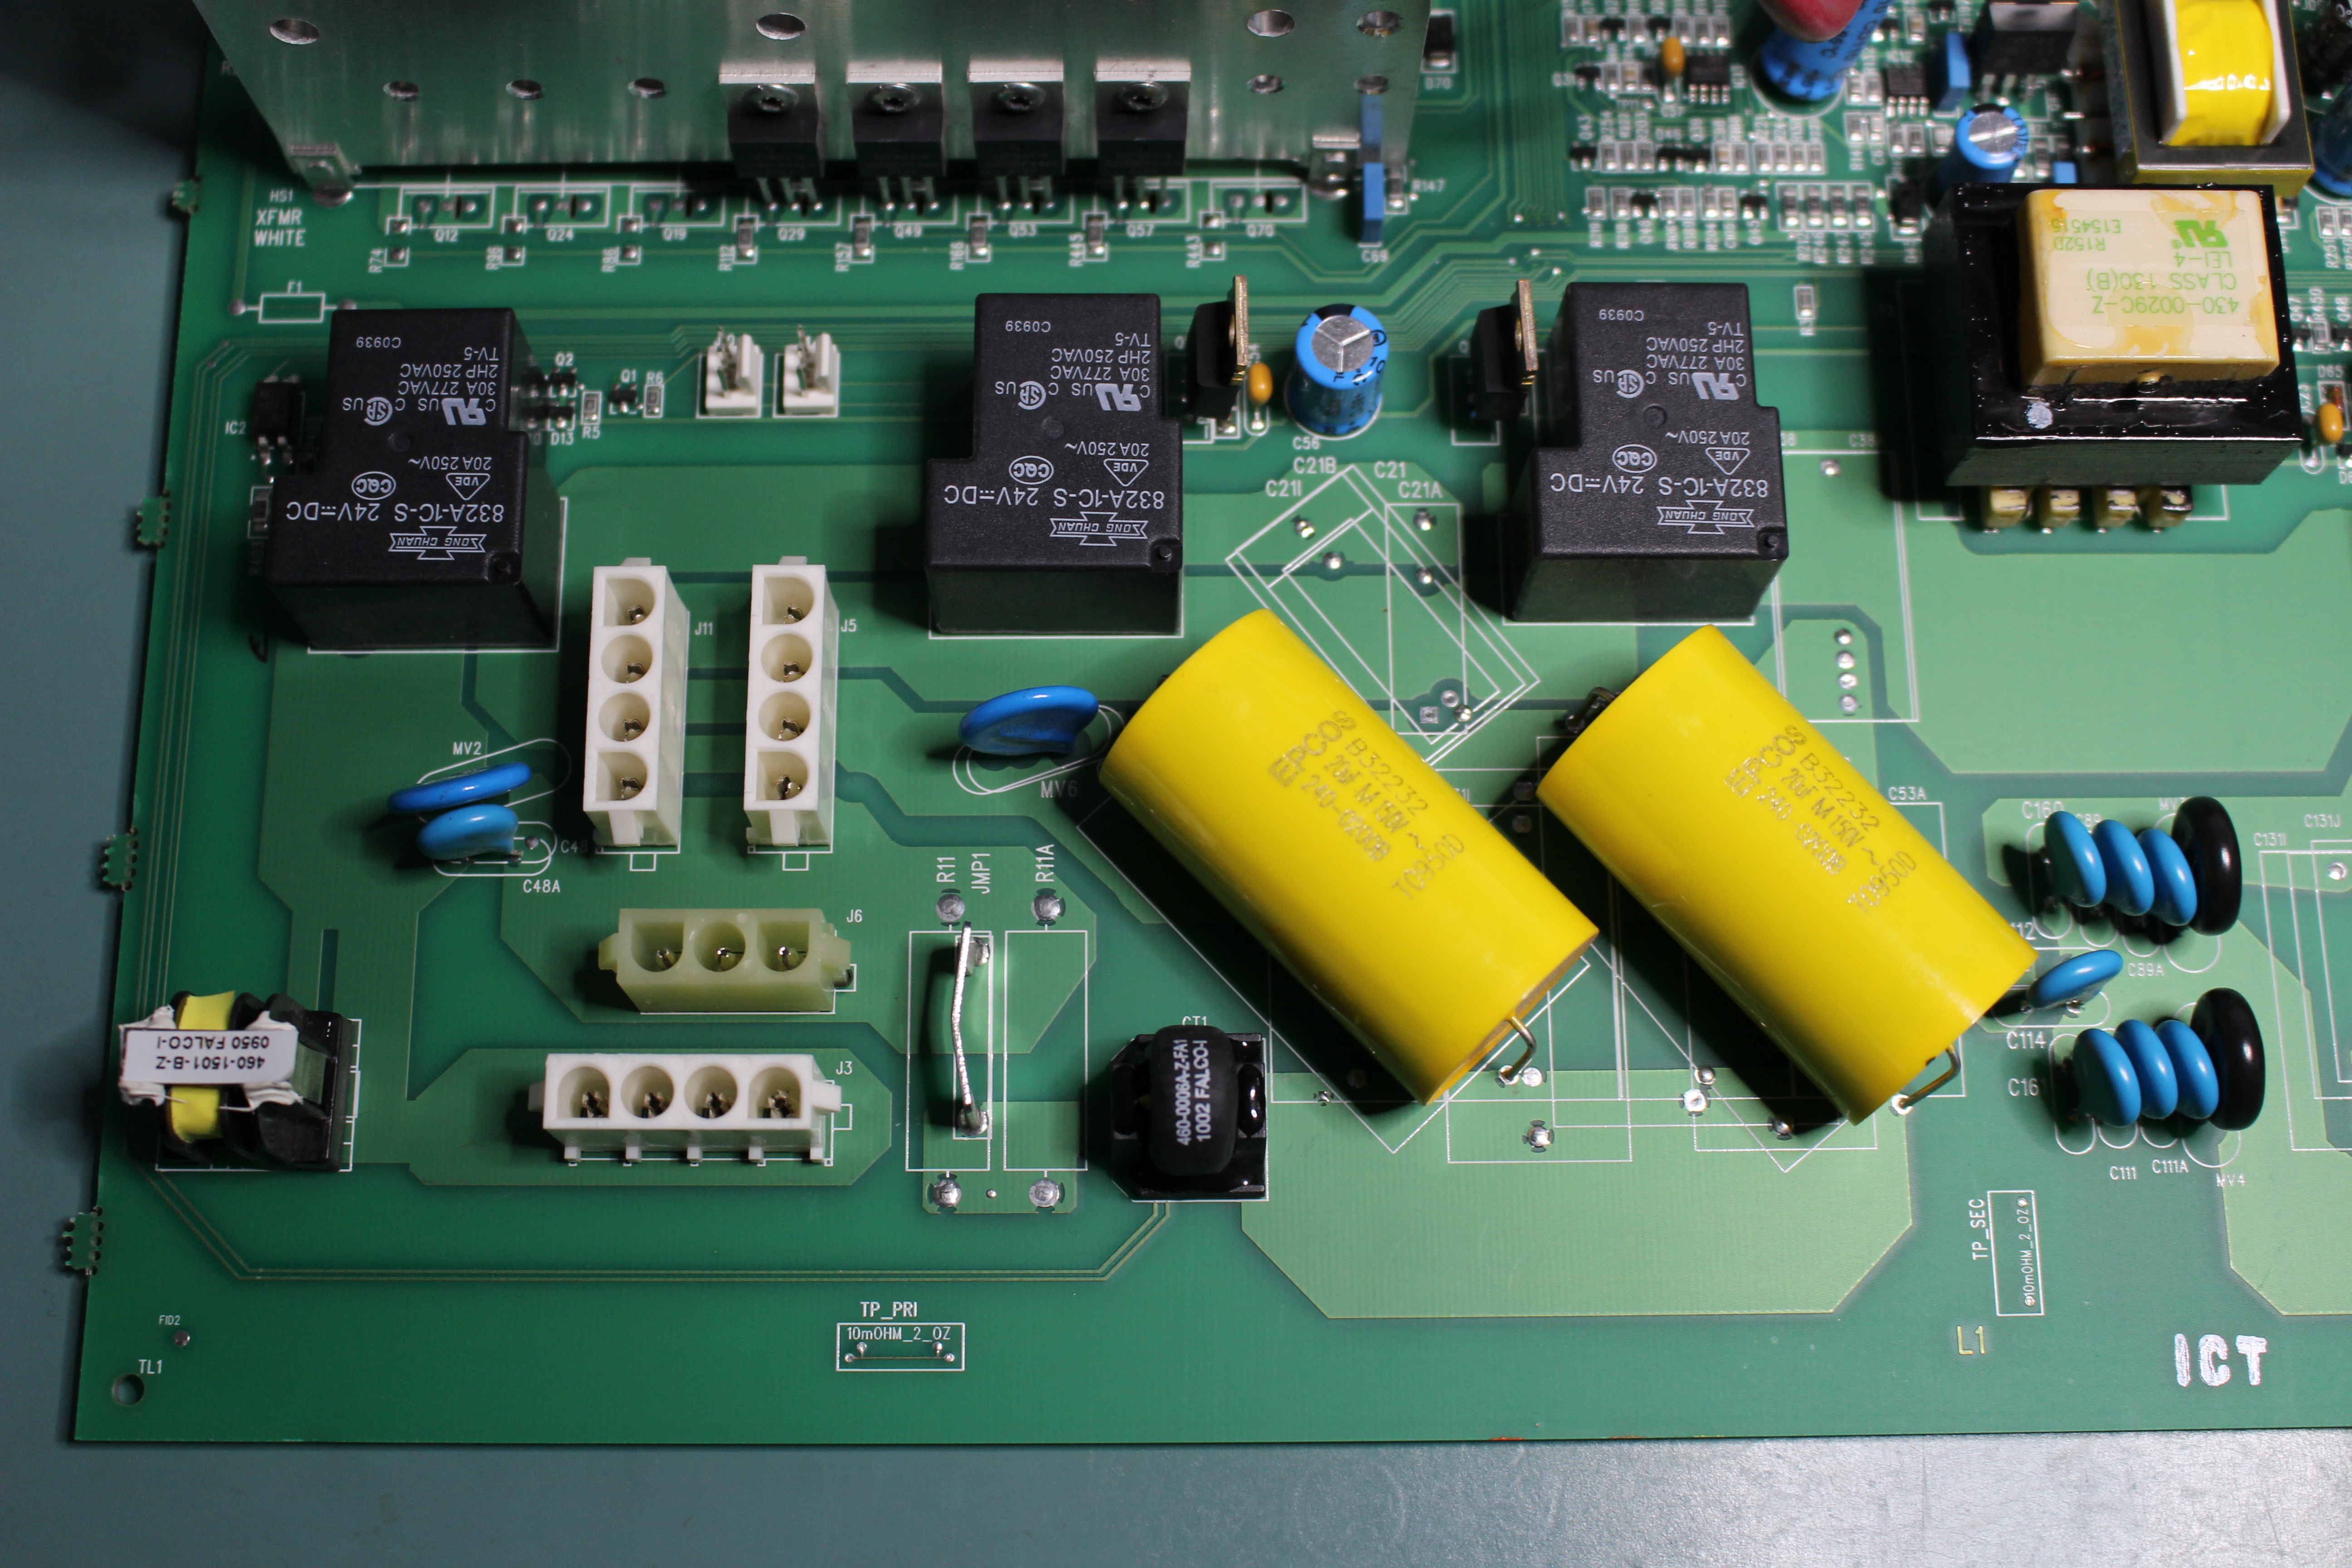


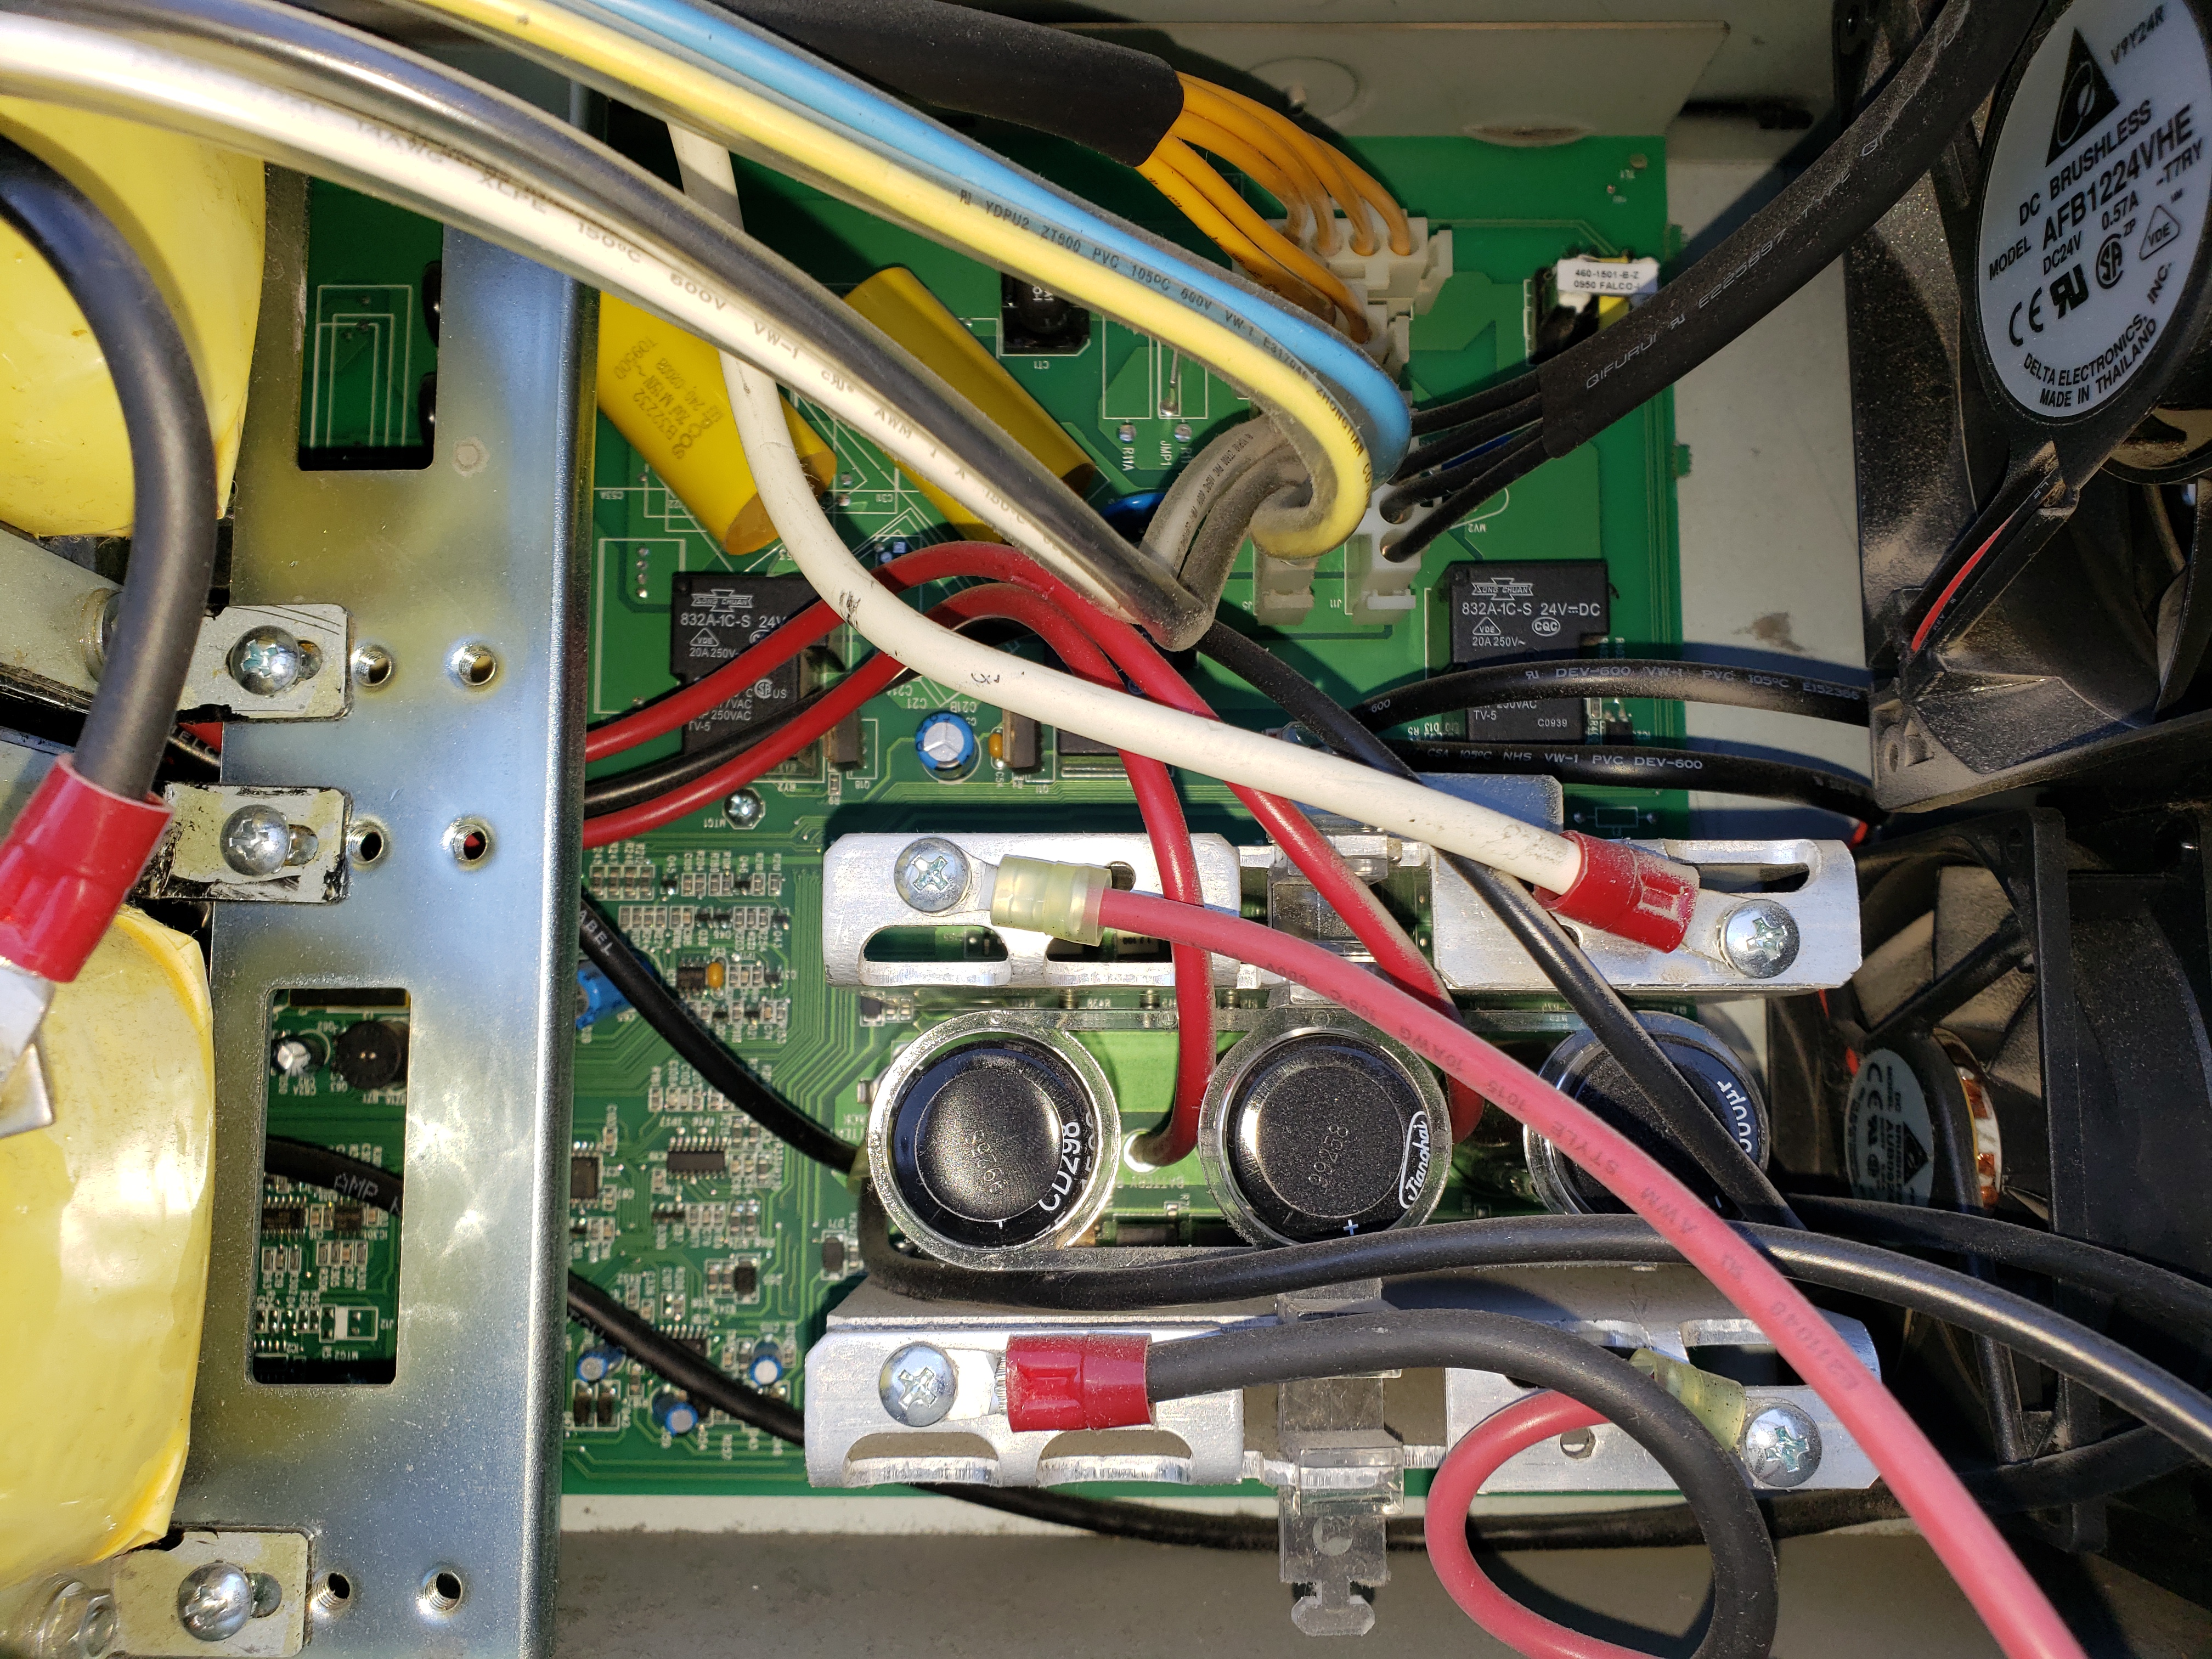
To tackle the electrical side of this refurb, I opted to place all of the capacitors (Class X and Y filter caps, both film and ceramic types) and the metal oxide varistors (MOV)s which are responsible for surge suppression and filtering. Caps and MOVs do tend to degrade over time, and I want to have the surge protection and filtering that this unit offers.
In addition to the mains conditioning components, I definitely want to replace all of the old electrolytic capacitors. Electrolytic caps are by far the lowest life/highest failure risk components in an old electronic device. To my surprise, APC used a lot of second-rate lower quality capacitors throughout this unit. All of the caps (besides the 3 large ones on the inverter) were bargain bin, standard life 85°C rated jobs which are Chinese and Taiwanese brand.
Nothing against el cheapo caps, but they are far away in both performance and longevity when compared to top-tier Japanese and North American brands such as Rubycon, Nichicon, Nippon/United Chemi-Con, and Kemet just to name a few. Additionally, being that this UPS was manufactured in 2009, it is just two years ahead of the infamous “Capacitor Plague”, which was a period of time (1999-2007) where a lot of electrolytic caps made by Chinese and Taiwanese companies were made with substandard electrolyte and failed prematurely. The chances of this board receiving caps made in that timeframe is pretty high.
After pulling all of the old components off of the boards, I put together a spreadsheet to track everything that was going to be replaced. I usually stick to Digikey, Mouser, and Newark for all of the components I buy.

As you can see, all of replacement components are of the highest quality. The electrolytic cap upgrades in particular are a quantum leap, with all being 105°C 5,000-10,000 hour high ripple current Rubycon and Nichicon brand.
In addition to the caps and MOVs, I also opted to drop a new battery on the network card in addition to replacing the old fans with quieter ones for a minor reduction in airflow and static pressure specs. One memory I have of this unit is the perpetual and annoying drone of the fans, so might as well fix that while we’re at it.
A few days later and Christmas has come early (again) thanks to Digikey!

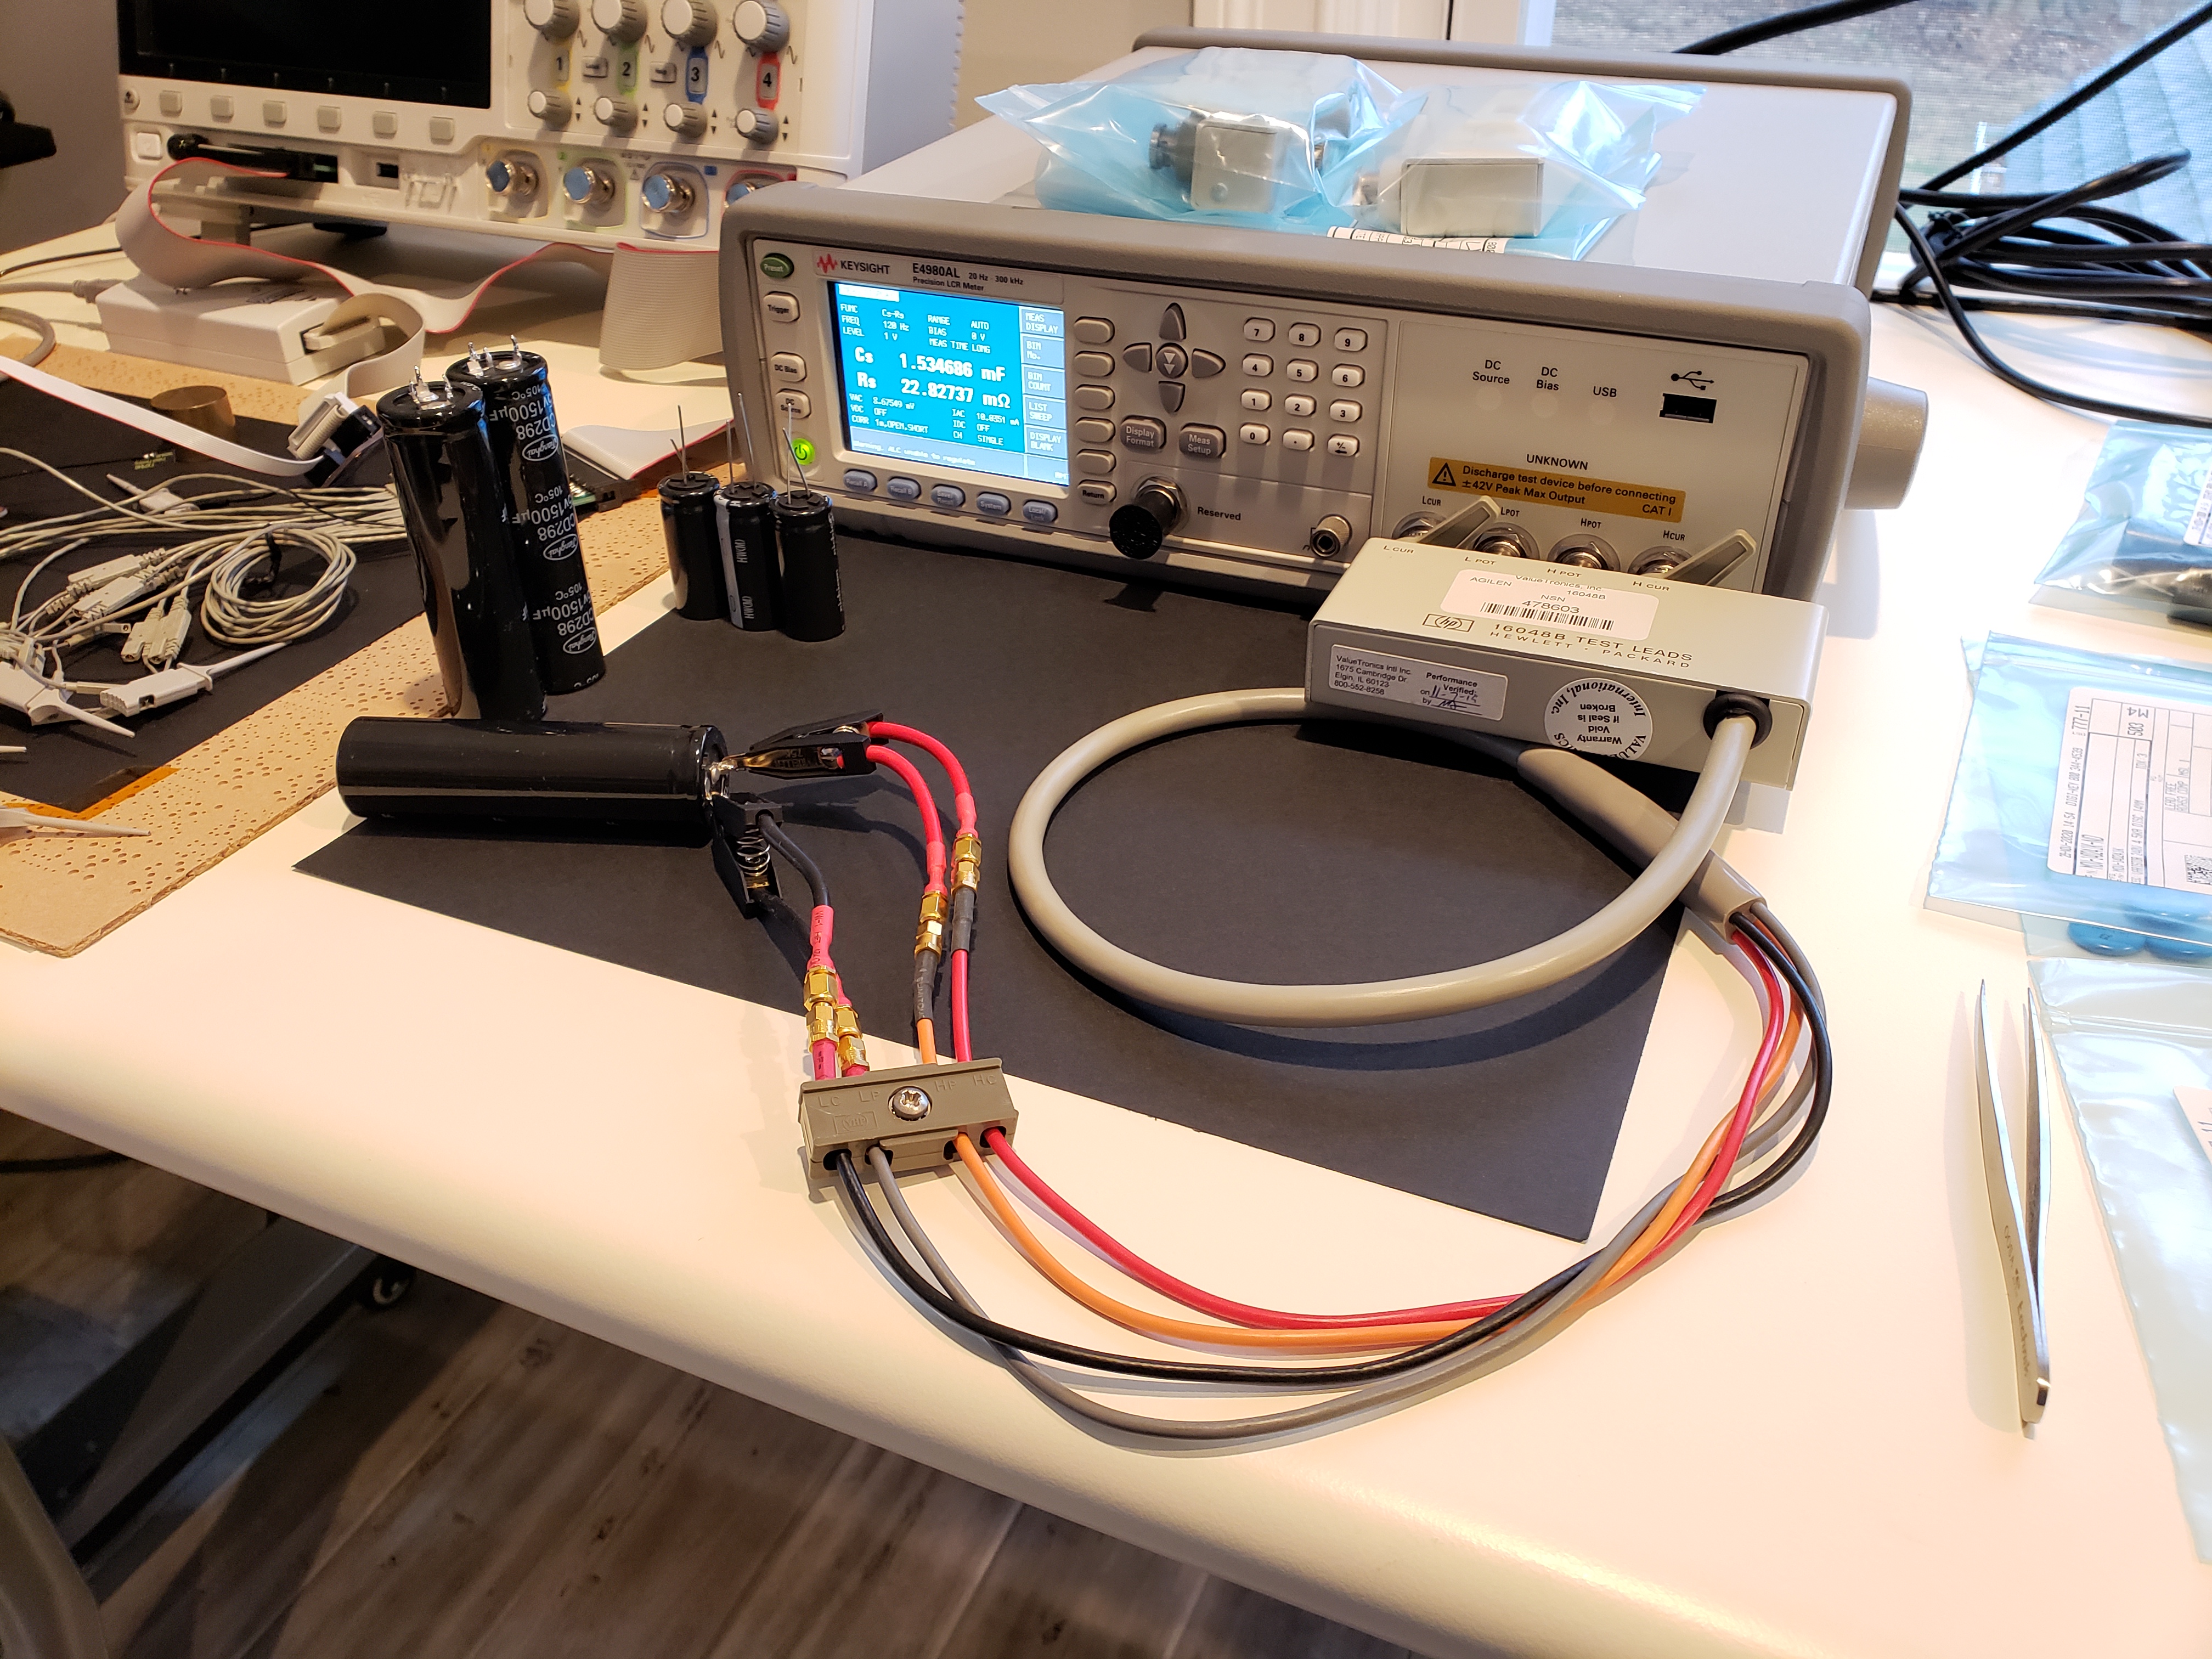
Before whacking the new components in, I wanted to make some before and after measurement on the capacitors using my new (to me) LCR meter. Since its a pretty good one, I trust it will make accurate and repeatable measurements to best represent the overall change in electrical performance from the “recapping”.


Measurements were made sequentially under the following conditions:
- 70°F (21°C), 35% relative humidity
- E4980AL warmed up for 2 hours
- Settings: ALC on, “Long” measurement, 5 averages
- Capacitance below 10uF, 1 KHz test signal at 1.0 Vpp amplitude
- Capacitance above 10uF, 120 Hz test signal at 0.5 Vpp amplitude
- HP 16048B test fixture (with custom SMC to medium Kelvin clip termination) for snap-in and cylindrical film cap measurements
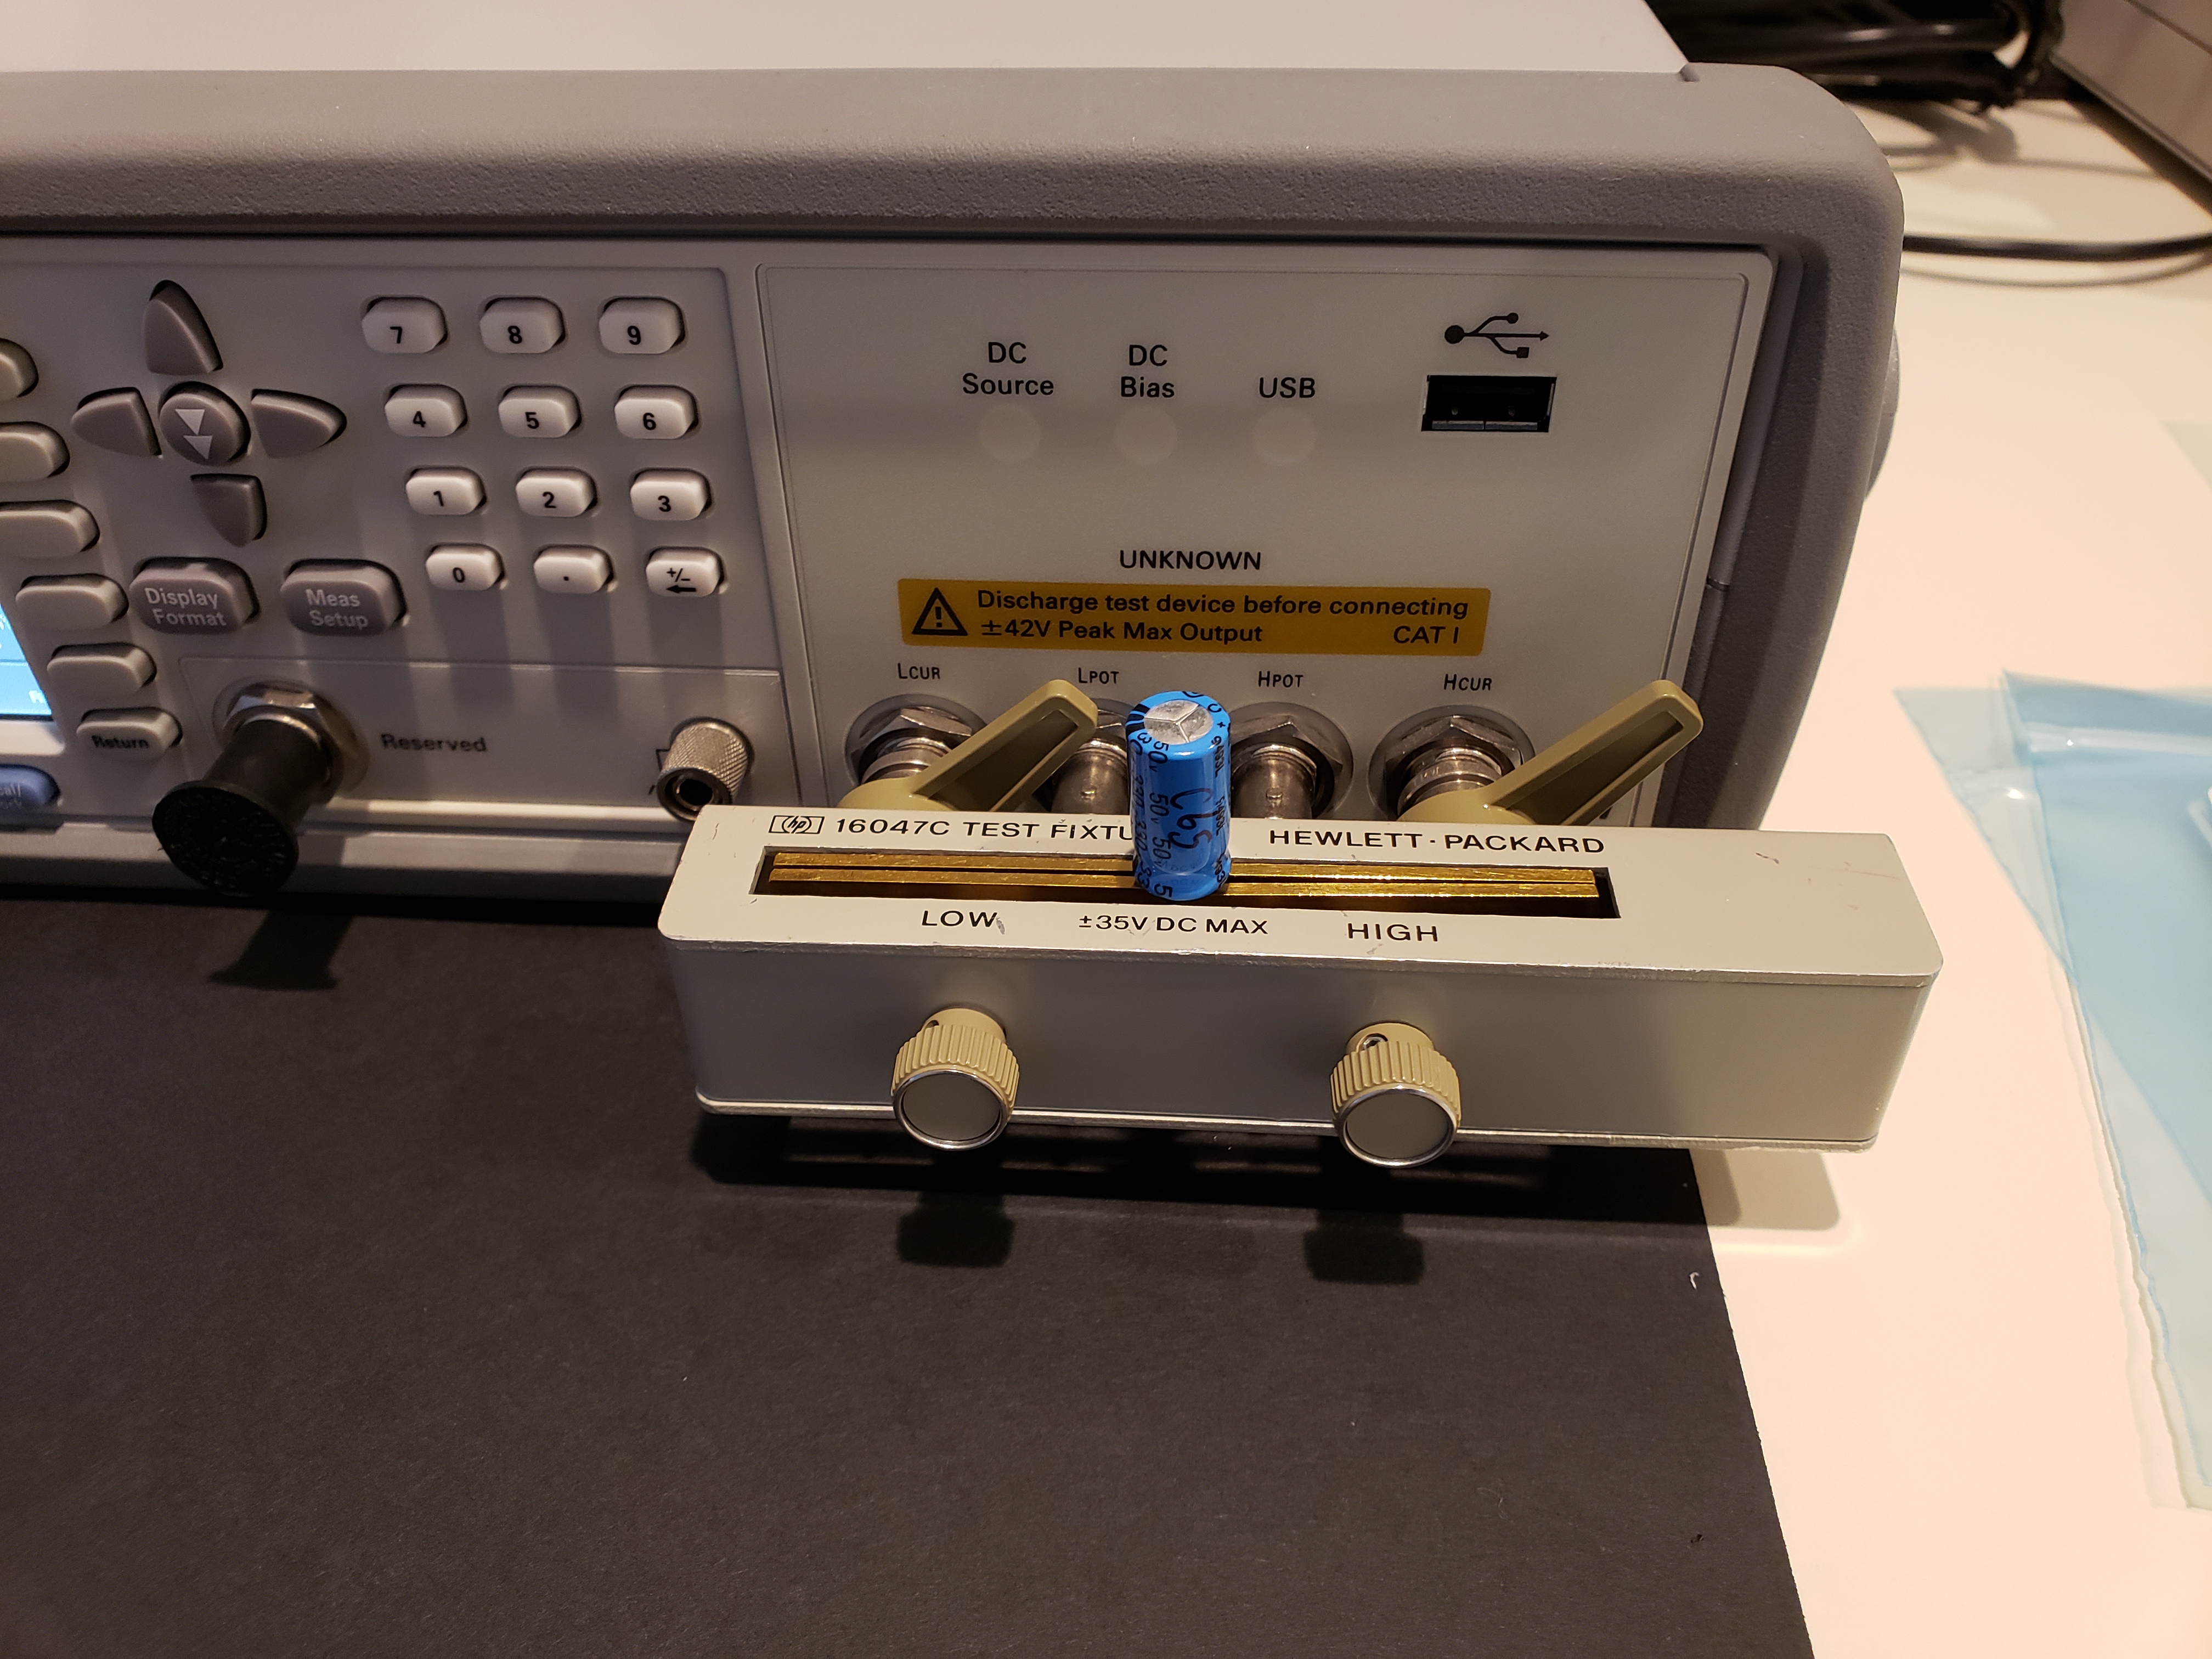
- HP 16047C test fixture for all leaded, through hole capacitors
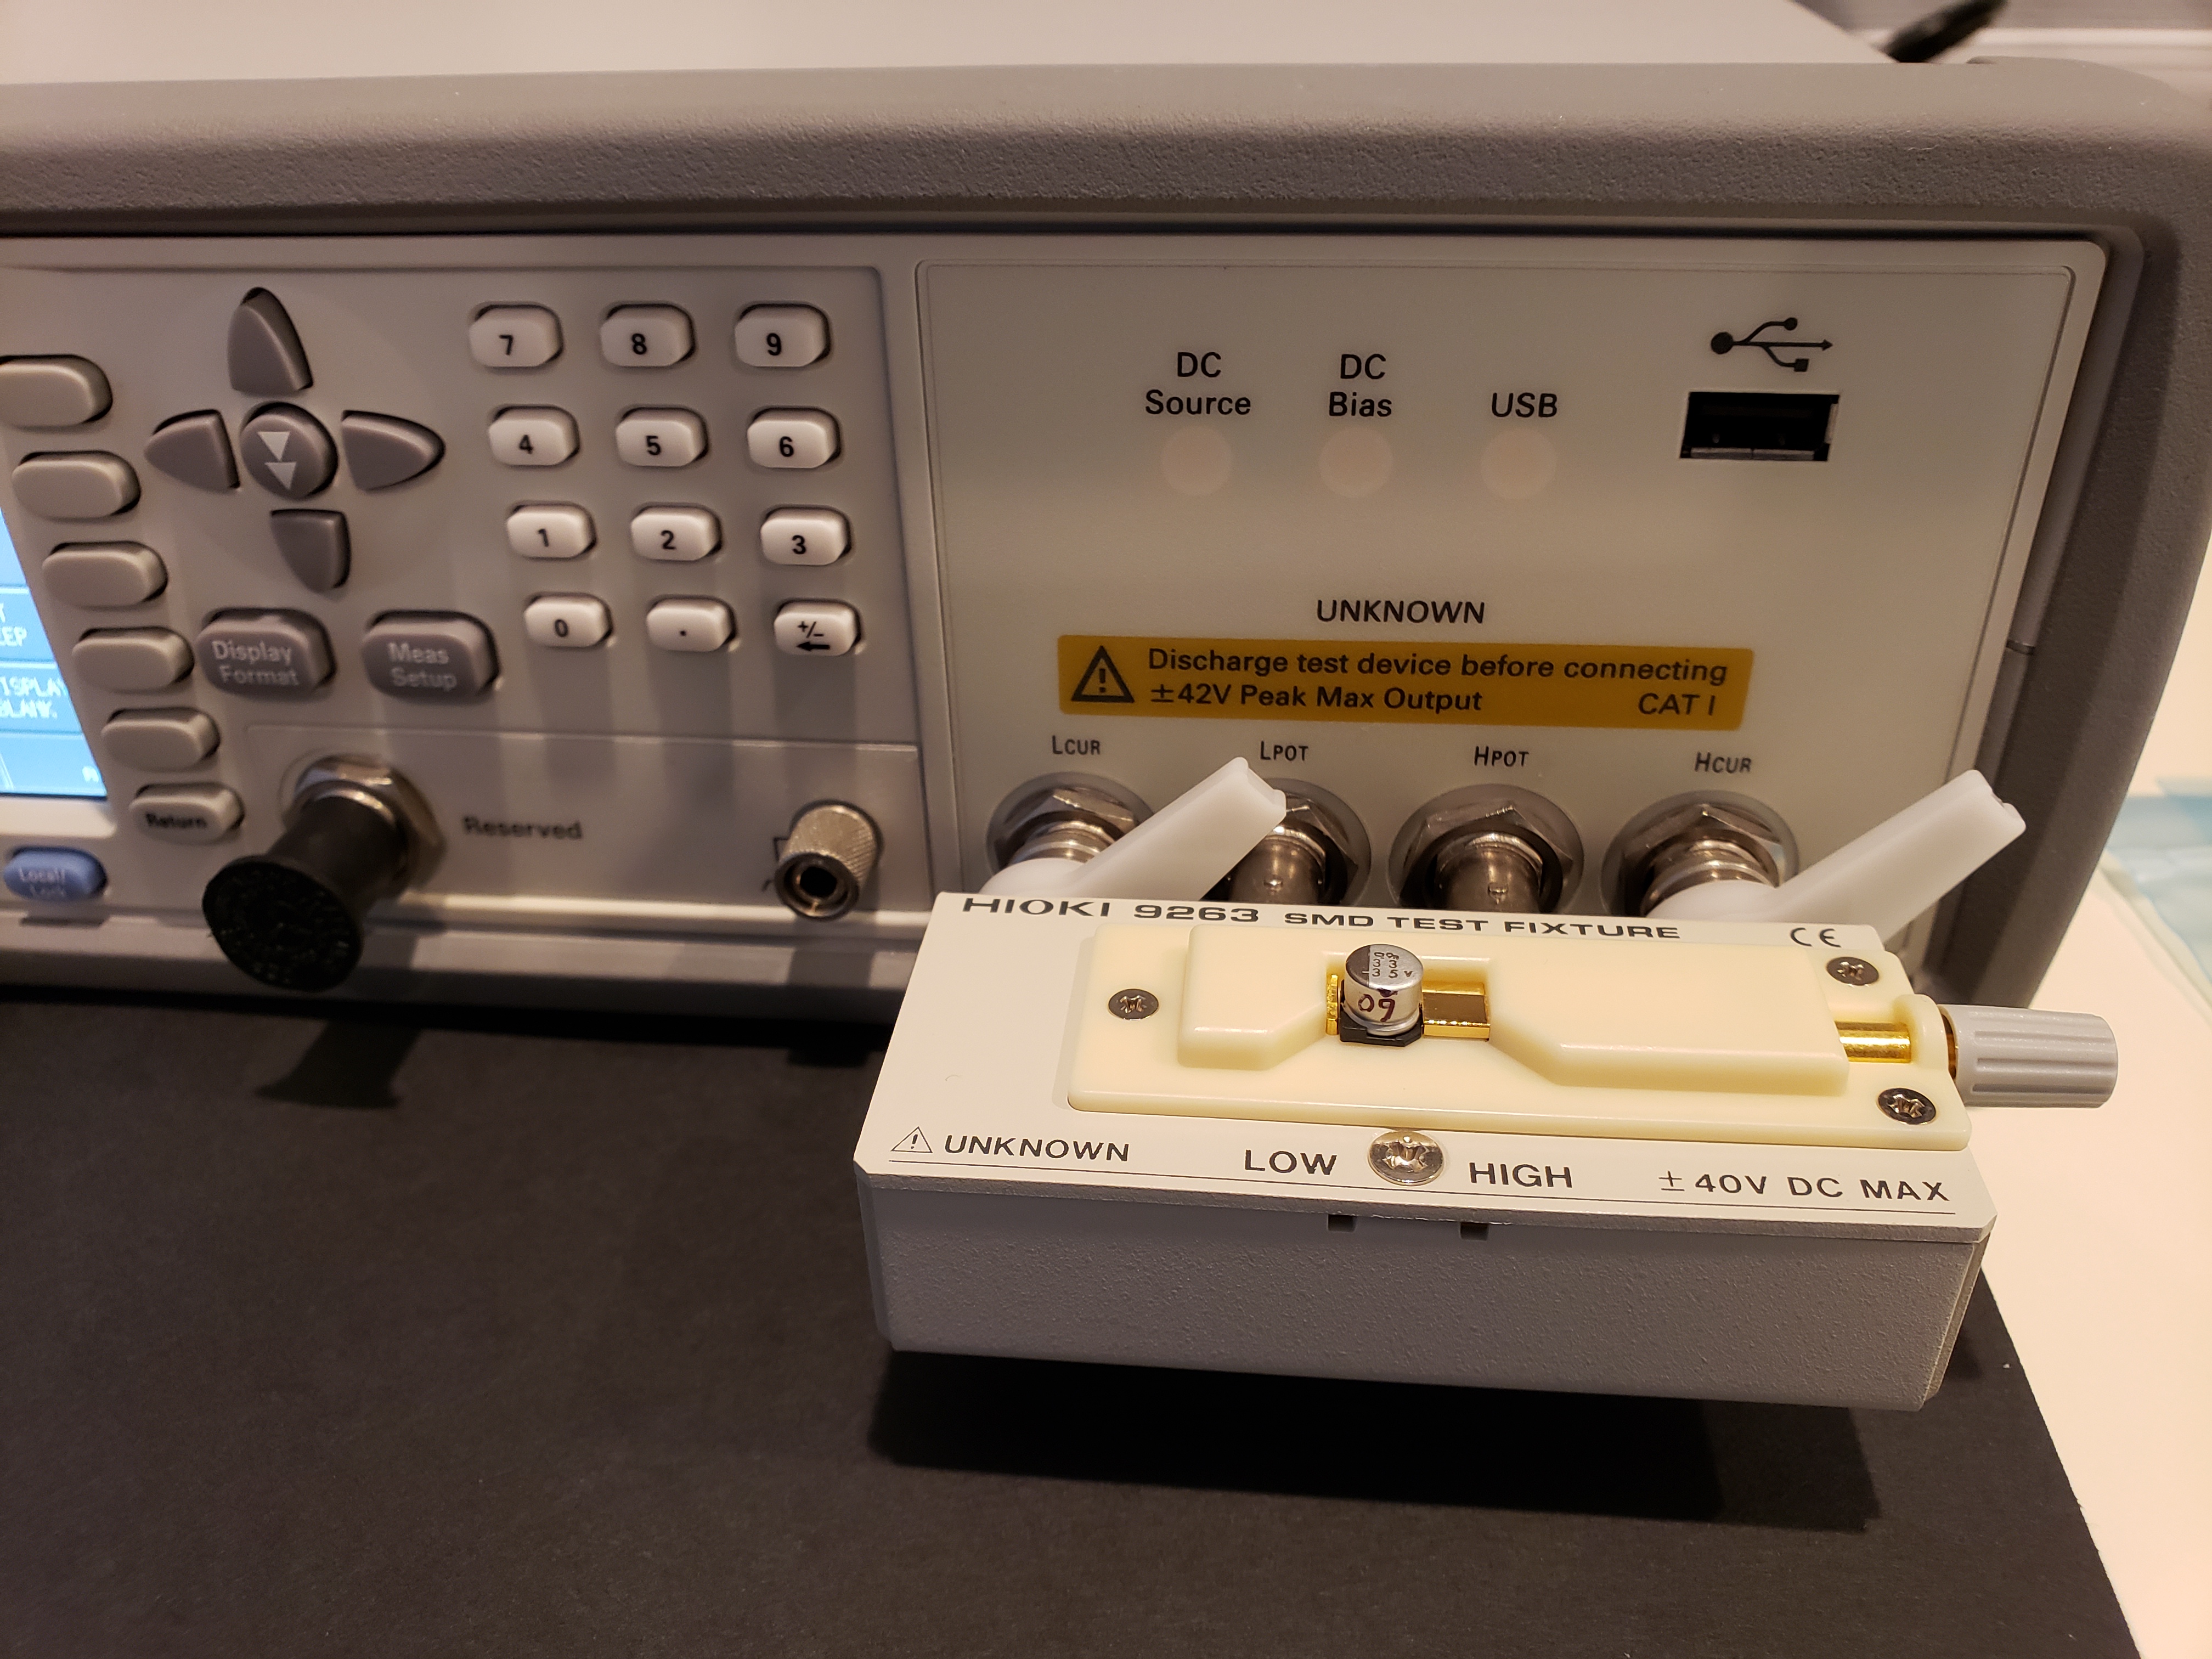
- Hioki 9263 test fixture for surface mount capacitors
- Open and short compensation performed for each fixture change
The measurements indicate that overall ESR dropped 49%, while overall dissipation factor also decreased by 45%. Although none of the old capacitors fell out of their rated tolerances, they are completely outclassed by the new replacements as expected. In addition to this immediate performance increase, I guarantee that the new components will also last much, much longer in full time service. Time to install!

Back of the reworked board to illustrate the importance of cleanliness. Throw away the rosin and use water soluble flux and solder! Distilled water, an acid brush, and lint free wipes will make your board spotless!
I also replaced the surface mount electrolytic caps and coin cell battery on the optional network card:
Time to drop the board back in and wire it all up again!

Word to the wise: reassembling this UPS is nothing short of maddening. The RJ connector that runs from the front panel to the main board is such an afterthought it makes me sick. This cable goes through the fan housing, underneath the transformer tray, and even underneath the plastic network card housing. DO NOT FORGET TO PLUG IT IN BEFORE YOU PUT THE NETWORK CARD OR TRANSFORMERS BACK. Rant over.
Apparently this UPS will not turn on without a set of batteries installed. Guess APC figured “Why do we need a 5 dollar switching power supply if we can just use the main batteries for all of the logic DC?”. Cost cutting (or maybe the 2007-2008 financial crisis?) strikes again, so I had to wait for a set of batteries to show up before I could put my work to the test.


After popping in the new batteries, the UPS powered right up hitting the “Test” button. It lives!
Pressing “Test” not only powers on the UPS, but it also immediately performs an inverter test as well. All systems seem normal, and the batteries charged up steadily. I plugged in the UPS over USB and installed APC’s powerchute management software to perform self tests, runtime calibration, and additional setup steps. This is necessary since the UPS does not have a front panel capable of changing system settings.
Again… note that in order to connect most Smart UPS models to a PC over USB, you need this RJ50 to Type A cable. Why APC couldn’t just use a type B connector is beside me. Probably Maybe some business guru could explain their profit margin increase by avoiding USB licensing fees and selling a “special” cable.

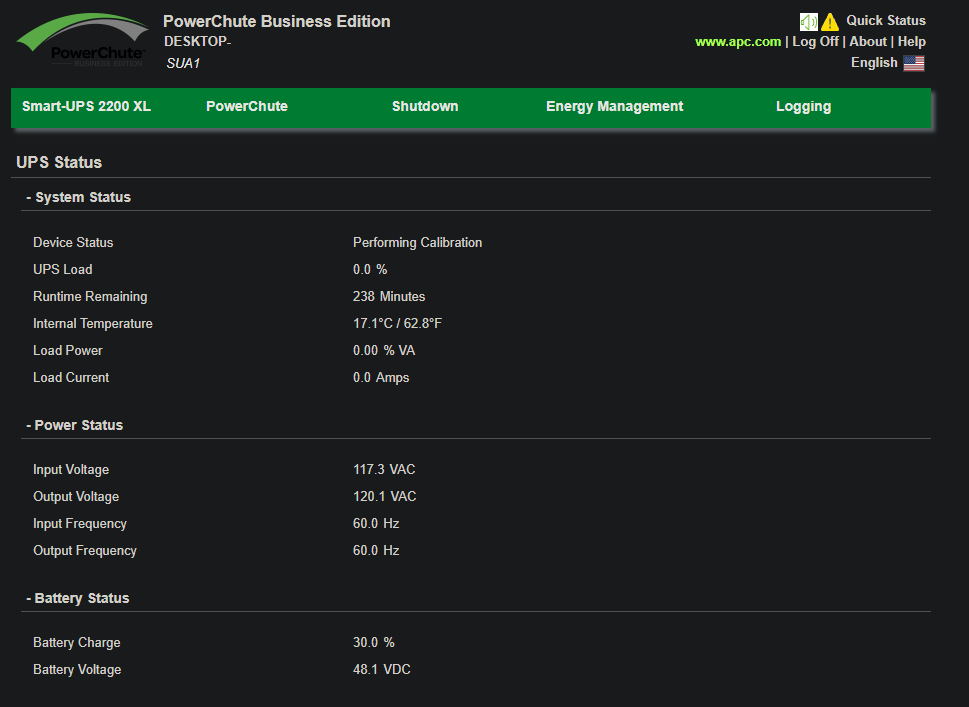
After performing a self test and extensive runtime calibration through powerchute, the job is done! This 10 year old SUA2200XL has a new lease on life, and should provide surge suppression and backup power for years to come. Plus, it is one less piece of E-waste in the landfill!

Impressive rebuild! These days it seems everything is made to have a short shelf life throw away. Good business model i guess, but so wasteful. Nice to see it has some new life.
LikeLiked by 1 person
very thoughful for you to put up all your work and share wth everyone.i have a similar APC SUA3000XL.
what i noticed it has a same main board,just bigger transformers and more mosfets on the inverter heatsink.
mine runs fine even after 10 years but recently started troubling.
it starts fine but after few hours six of the main lights on front panel starts blinking and it cuts off output on all load.
No matter i might need to recap it.
This guide will help me alot choosing components . though mine is 230VAC version.
LikeLike